Erez Marom Photography
The Good, the Bad and the Ugly of Aerial Photography - Part 5: Examples and Comparison
Posted on 16th July, 2017 - Back to Blog Listings
So far in this series I have talked about the advantages of aerial photography and about shooting from a helicopter as opposed to shooting from a light plane. I have also talked about the right equipment for this kind of shoot, and about technique and parameter selection. In this final article in the series I want to discuss my experiences from 4 aerial photography sessions, compare them and analyze what I learned from them.
I won't be presenting any new info, but I think it's important to do a comparison since I learned a lot from these short sessions, and if you can learn from my experience and mainly from my mistakes, I will have done what I set out to do with this series of articles.
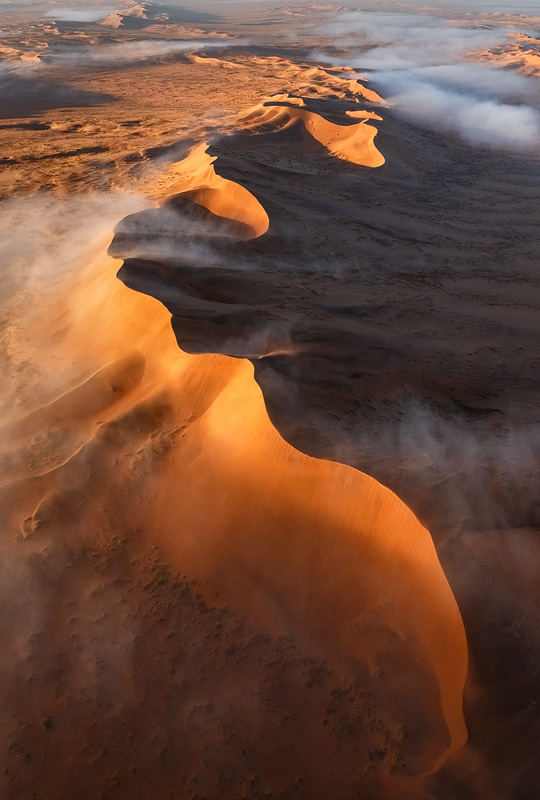
My first ‘serious’ photography flight was in Namibia, in March of 2014. I flew over Sossusvlei to capture the dunes of the Namib Desert in morning light. It was in a Robinson R44, mentioned earlier as a great helicopter for photography flights, and both doors were taken off. I flew around for 1:15 hours and the hourly rate was about $850, which is quite good. I took one Canon EOS 5D Mark III with a Tamron 24-70mm F2.8 stabilized lens on it, plus a 70-300mm which I never actually used. This was the flight on which I understood the need for 2 bodies, but I really did fine with the 24-70mm as most of the beauty was in the larger-scaled structures, mainly the shapes of the dunes.
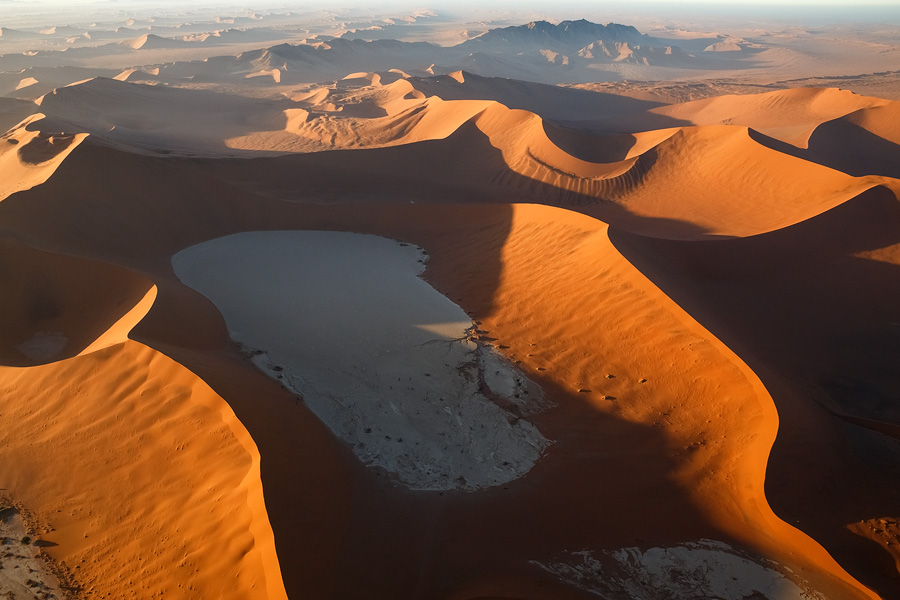
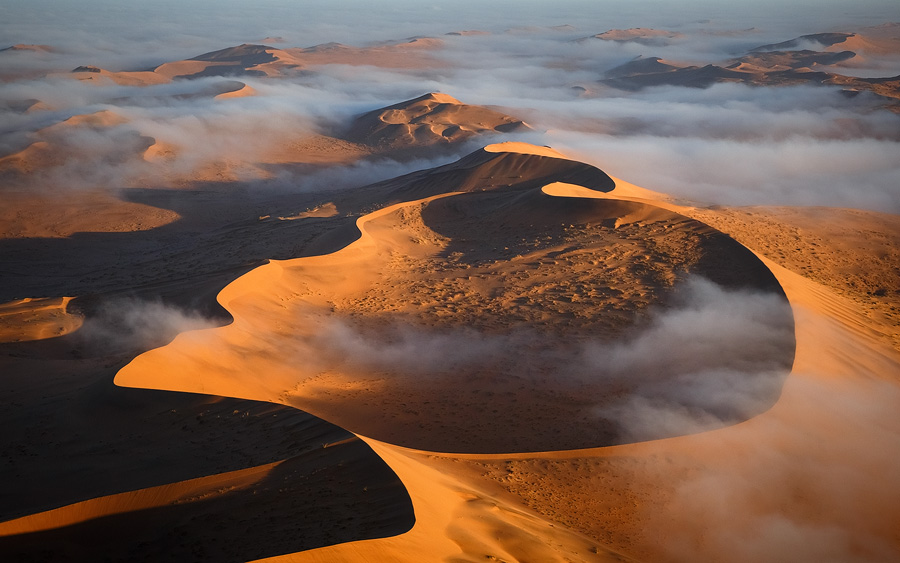
About half an hour into the flight the pilot noticed mist between the dunes ahead, and it was an easy decision to carry on flying and shoot the dunes shrouded in mist. Overall the flight was a huge success, and it triggered my love for aerial photography. I highly recommend flying in Sossusvlei. The fact that the pilot was flexible and had enough insight to suggest flying further above the dunes made a huge difference. Where possible, you should always opt for a pilot with experience of photographers, and make sure you listen to their suggestions.
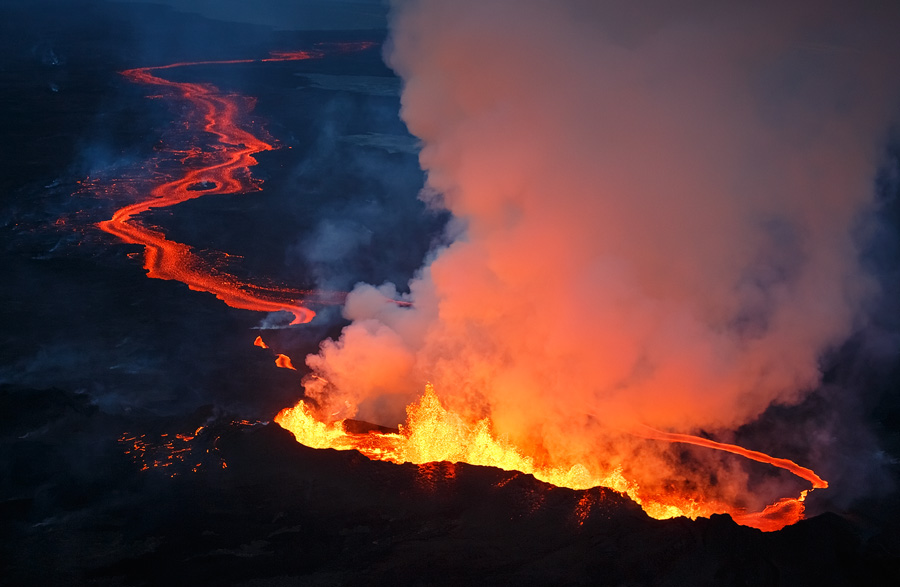
The second flight was during a very special event: the Holuhraun volcanic eruption in Iceland. I had come back to the hostel after shooting the eruption from the land three days before the flight, and I encountered several days of harsh winds and sand storms. Then finally the weather improved and I secured my spot on a sunset flight. We had an unbelievable flight over the volcano with a pink sunset in the background, and even today, that flight ranks among my favorite photography experiences
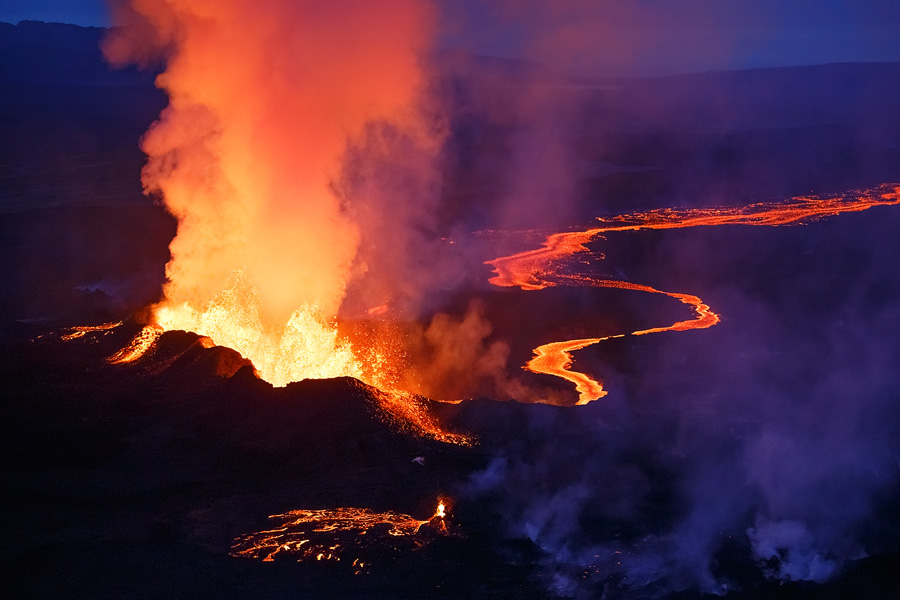
I took two bodies, a Canon EOS 5D Mark II and a 5D Mark III, with 24-70mm and 70-300mm zoom lenses. I used the telephoto lens quite a bit to shoot the details of the eruption, and in this case it was a good decision to opt for a telephoto instead of an ultra wide.
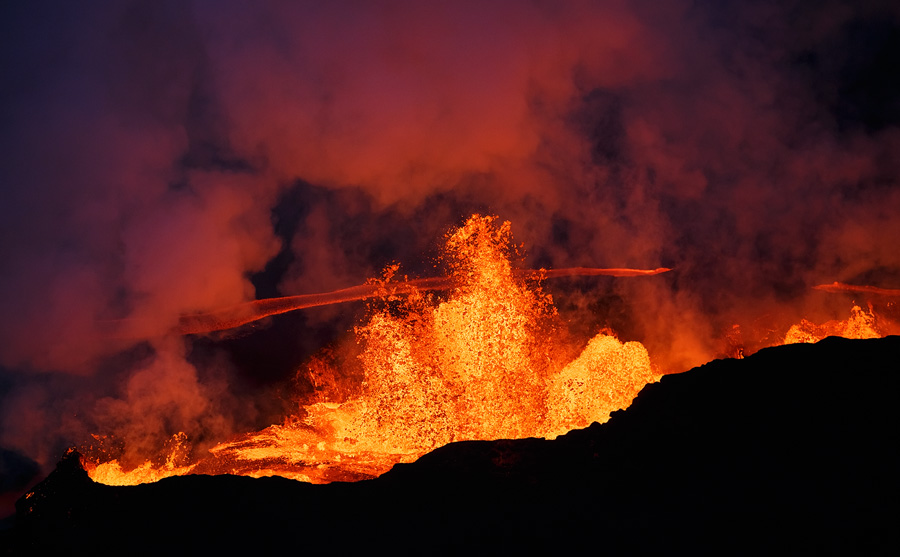
The flight was very costly. For 1:45 hours I paid 2600 Euros, at a rate of almost 1500 Euros an hour. Ouch. Helicopter flights in Iceland are more expensive than in other countries, so make sure it’s really worth it if you intend to fly there. These are some of my favorite shots from this flight. You can decide for yourself if it was worth it or not, but note that unique images such as these are the key to getting noticed: thanks to this shoot alone, I sealed an ongoing postcard deal in Iceland (which alone paid back for the trip), an interview with Iceland's largest news website, several new private clients and a share by National Geographic on Facebook, hitting over 124,000 likes.
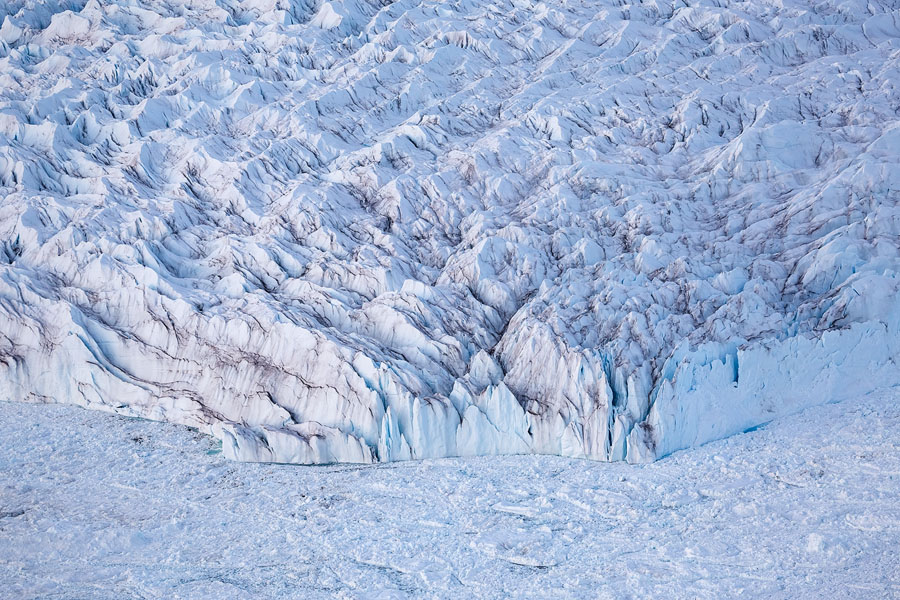
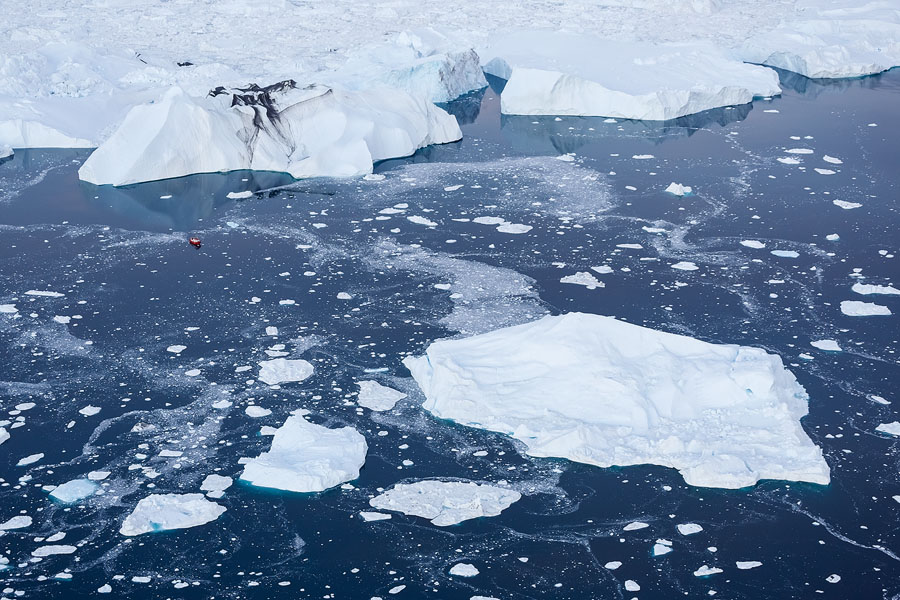
My third photography flight was in Disko Bay, Greenland. Unfortunately, this was also my most disappointing experience. I flew in a small airplane with a tiny hatch to shoot from, which both made it very hard to achieve a decent composition, and caused the lens to vibrate violently, rendering many of my shots blurry.
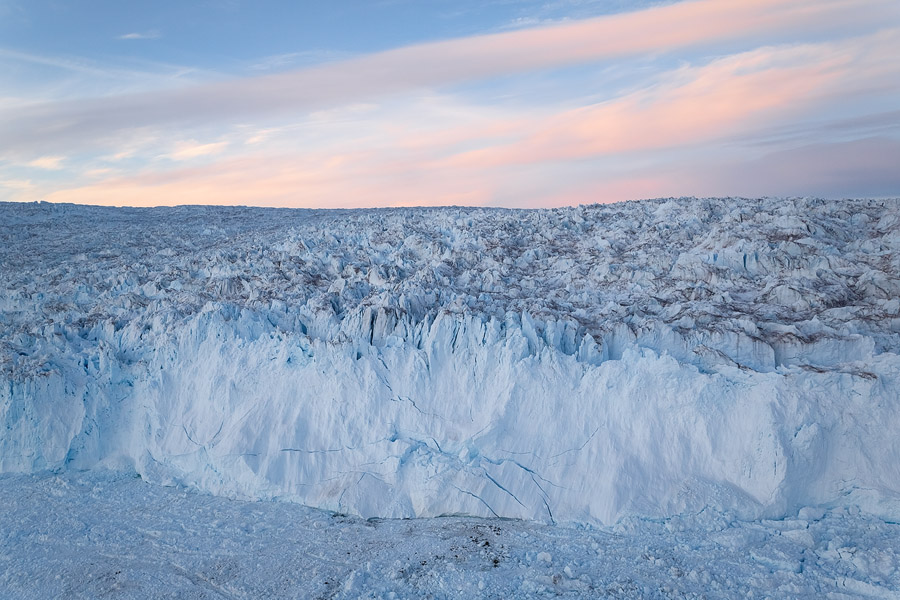
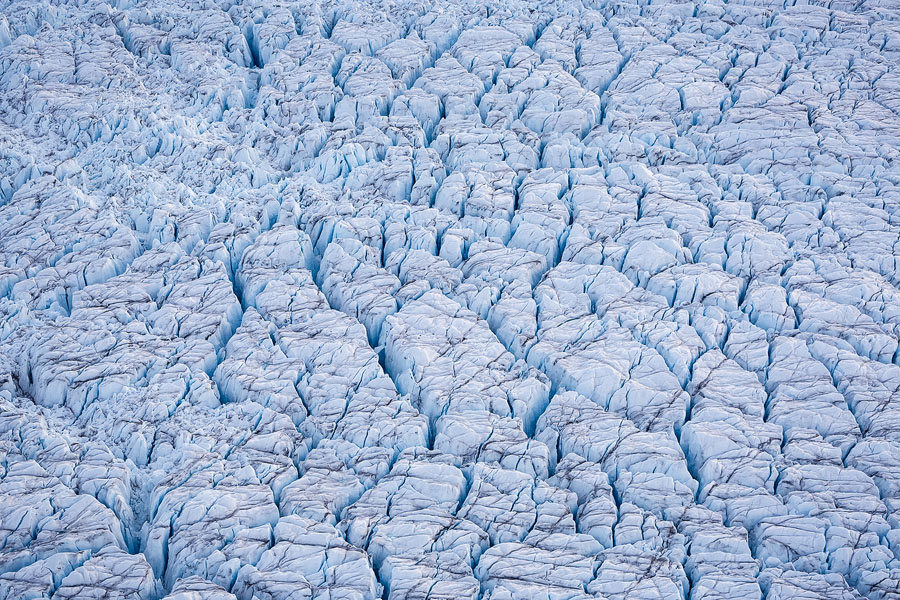
On top of that, communication with the pilot wasn’t good enough, and he didn’t understand that I needed more room on my right to shoot from. I paid way too much, over a thousand Euros for a flight I could have definitely done without. It was a bad experience, but at least I learned a great deal about what not to do.
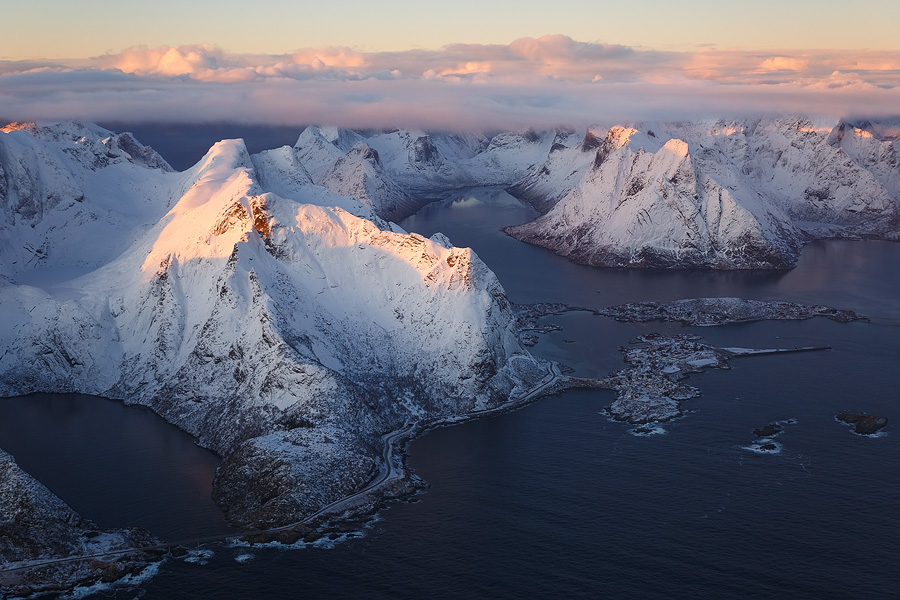
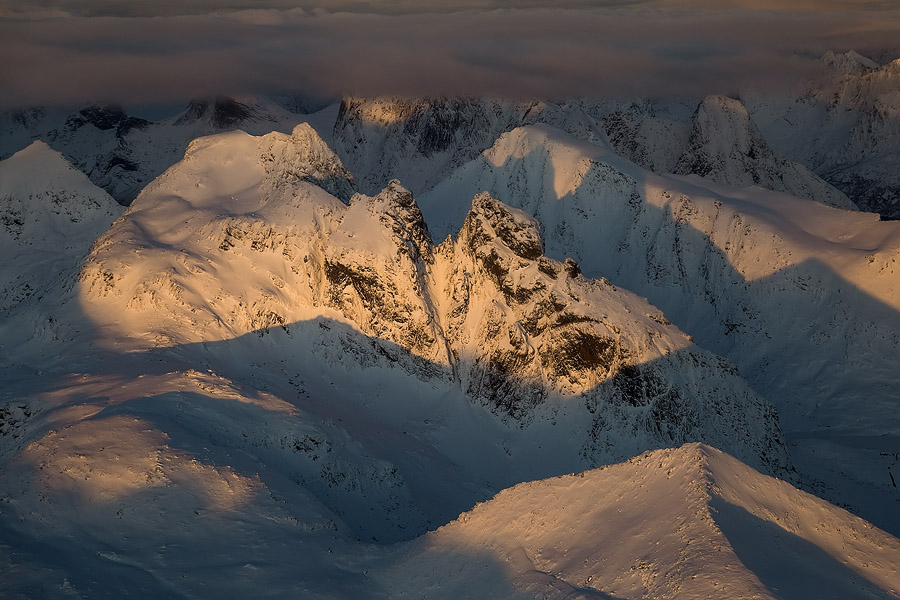
My fourth and most recent photography flight was above the Lofoten Islands in Arctic Norway. It was an amazing flight, and it reinforced my belief in light planes. The pilot was highly experienced and understood exactly what I needed, even without words. It comes to show how important a good pilot who understand photography actually is. The flight was affordable at about $300 per hour, and the conditions were excellent.
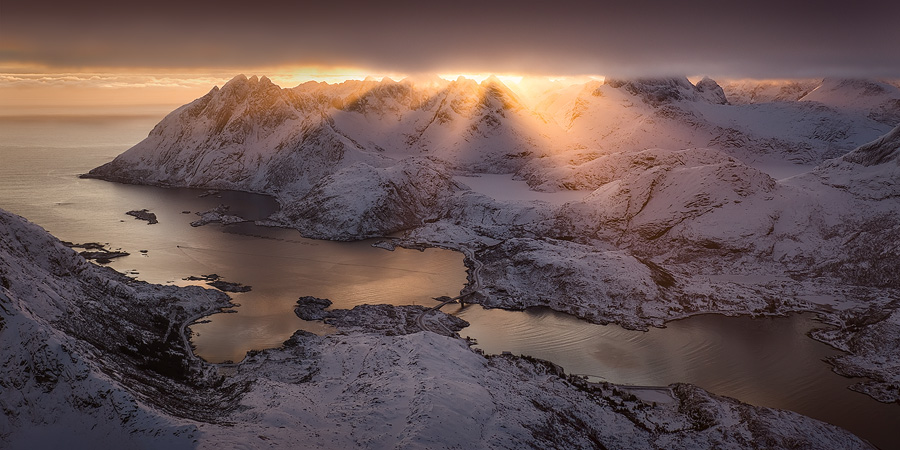
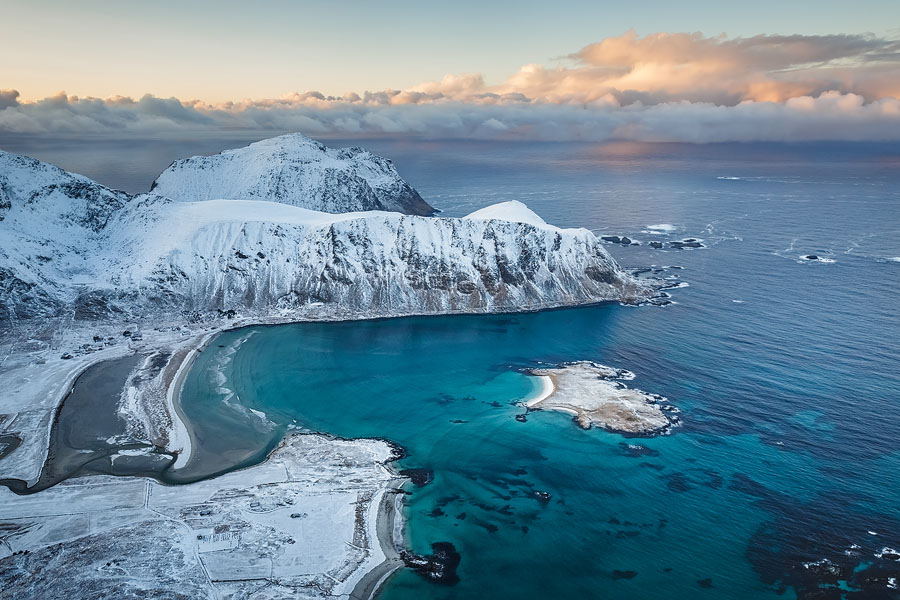
Due to their relatively small size, the Lofoten Islands are a perfect place for photography flights. You can get from place to place very quickly, and the mountainous landscape is incredible from above. The famous shooting spots are easily recognizable, too, which is a wonderful bonus.
Aerial photography is amazing. I doubt that anyone who tries it will not like it, but it comes at a cost. I hope this series has helped you understand the benefits of shooting from the air, the different options and the importance of being prepared. Enjoy your flight!