Erez Marom Photography
Article: Understanding Magnification in Macro Photography
Posted on 29th July, 2014 - Back to Blog Listings
My personal view of art in general is that one has to possess both technical and emotional capabilities to master it. The technical aspect comes first. When you start learning, you first need to take control and gather an understanding of the technical sides of your field – otherwise, you will never become a good artist. Once you master the technique - once it gets in your blood - only then can you put it aside and concentrate on the emotional side – the truly important side. Technique is to photography what the alphabet is to literature, and notes and scales to music. It is an absolute must - the artist's tool to convey his artistic vision.
It turns out that nature photography is quite deceiving in this sense. Many people think that it amounts to going out to the field, camera in hand, just clicking away. Nothing could be further from the truth. Nature, landscape and wildlife are some of the most technically challenging fields of photography, and so one just can't run from the technical aspects of macro photography.
I've mentioned before that in macro, many different issues arise from the simple fact that we shoot from very close distances. But what are those issues? And why should macro be so special and different to other photography fields? In the technical part of this series I intend to make you think more about the tech side of photography, and try to really understand what we're doing – and as far as I'm concerned – that's the only way to be a good photographer.
The first concept I wish to discuss is magnification. This elusive term makes an appearance whenever you look at a lens' specifications, but not many know what it stands for, so let's try to understand.
In a nutshell, the process of photography goes like this: every point on the subject emits (actually, returns) light rays in all directions. The rays which are emitted in a direction leading them to the front element of the lens are captured by it. The lens then focuses the rays onto the light-receiving surface (i.e., film or sensor), producing a projection or image of the subject on it.
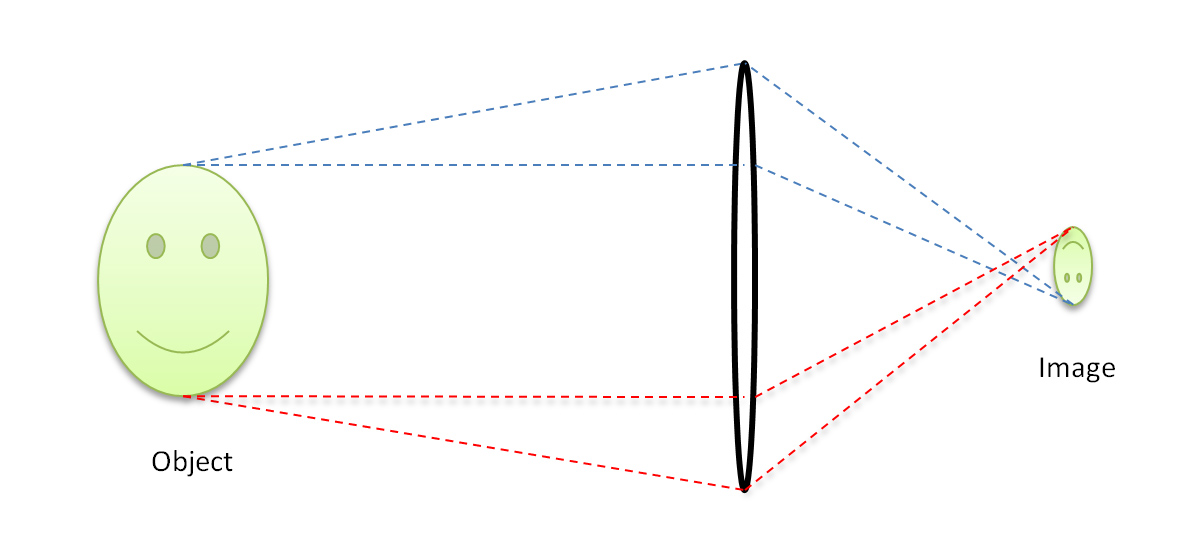
The magnification (or magnification ratio) is simply the quotient between the size of the (in-focus) subject's projection on the light-receiving surface (I’ll call it sensor from now on) and the subject's size in reality. This may seem perplexing, so here are some examples:
Say we're shooting a small child, 1 meter in height. Say also that the height of the subject's projection onto the sensor is 1cm. Then the magnification is 1cm/100cm = 1/100. Magnification is usually noted using a colon, so we write 1:100, and say "one to one hundred". Another example: If the subject is a 10cm long lizard, and its projection is 2cm long, the magnification ratio is 2cm/10cm or 1:5 (say: one to five).
What happens if the subject is the same size as its projection? If we shoot a 1cm fly and its projection on the sensor measures 1cm as well, by definition the magnification is 1:1 (one to one). This specific magnification ratio has an important meaning in macro: in technical terms, "true" macro photography means shooting at a magnification ratio of at least 1:1. Moreover, a "true" macro lens is a lens which can reach a magnification ratio of at least 1:1.
But wait – one can rightfully claim that you can take a 50mm f/1.8 and just get closer and closer until you reach 1:1 magnification. What's the catch? The problem is that a regular lens will not be able to focus from such close distances. Hence a more accurate definition for a macro lens is required.
A true macro lens is a lens whose minimal focus distance is short enough to allow photography of a focused subject in 1:1 magnification.
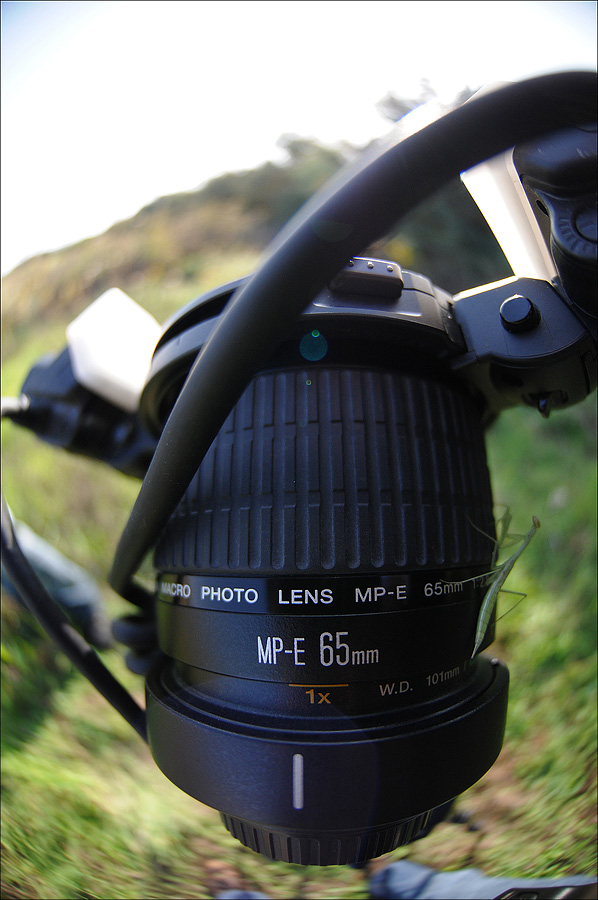
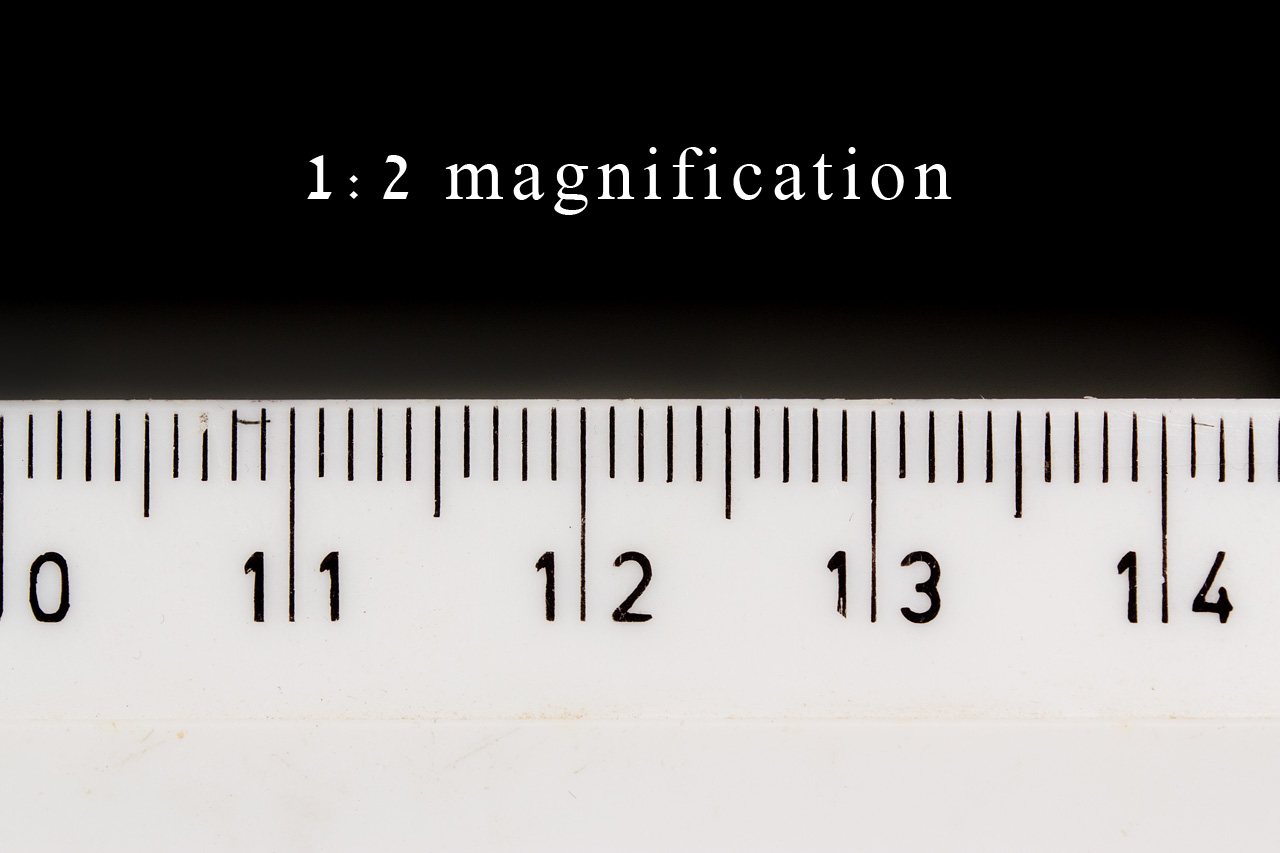
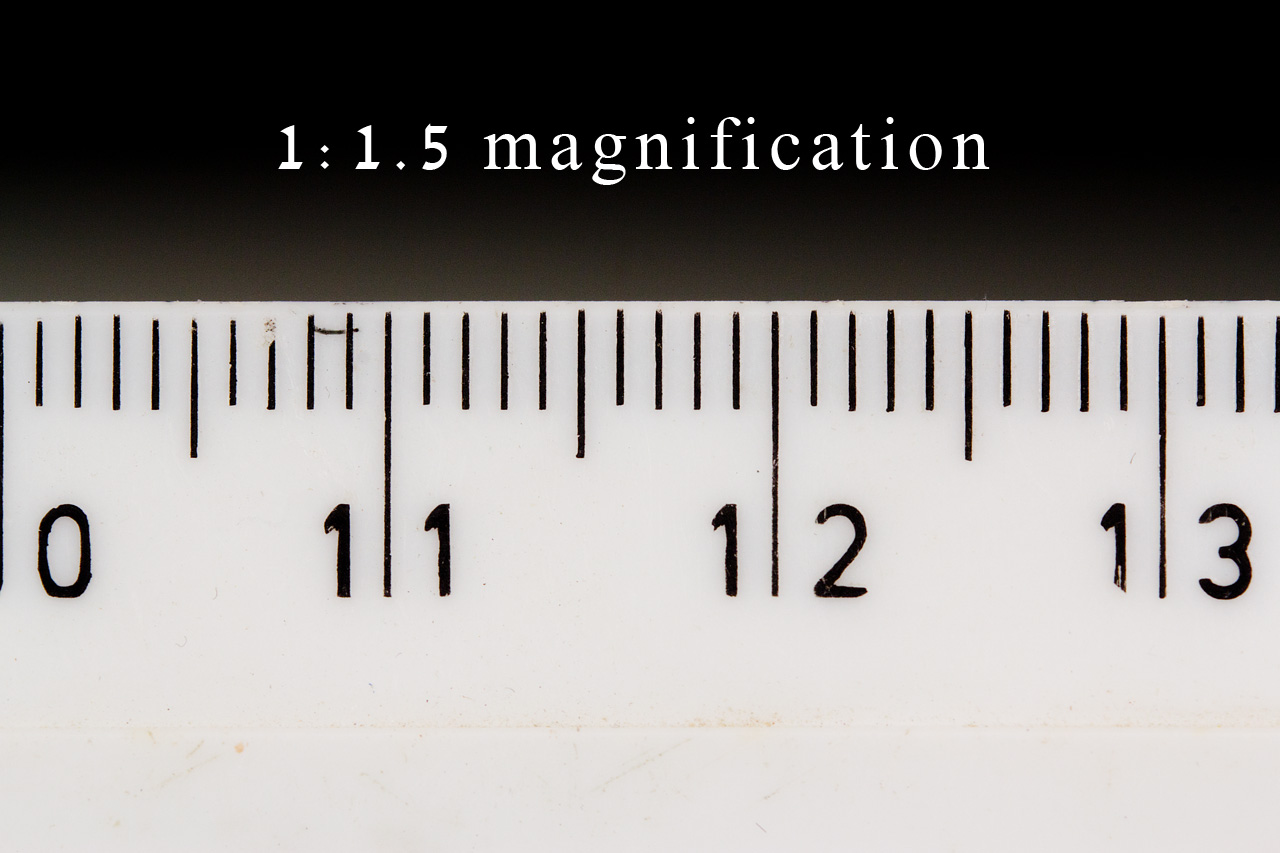
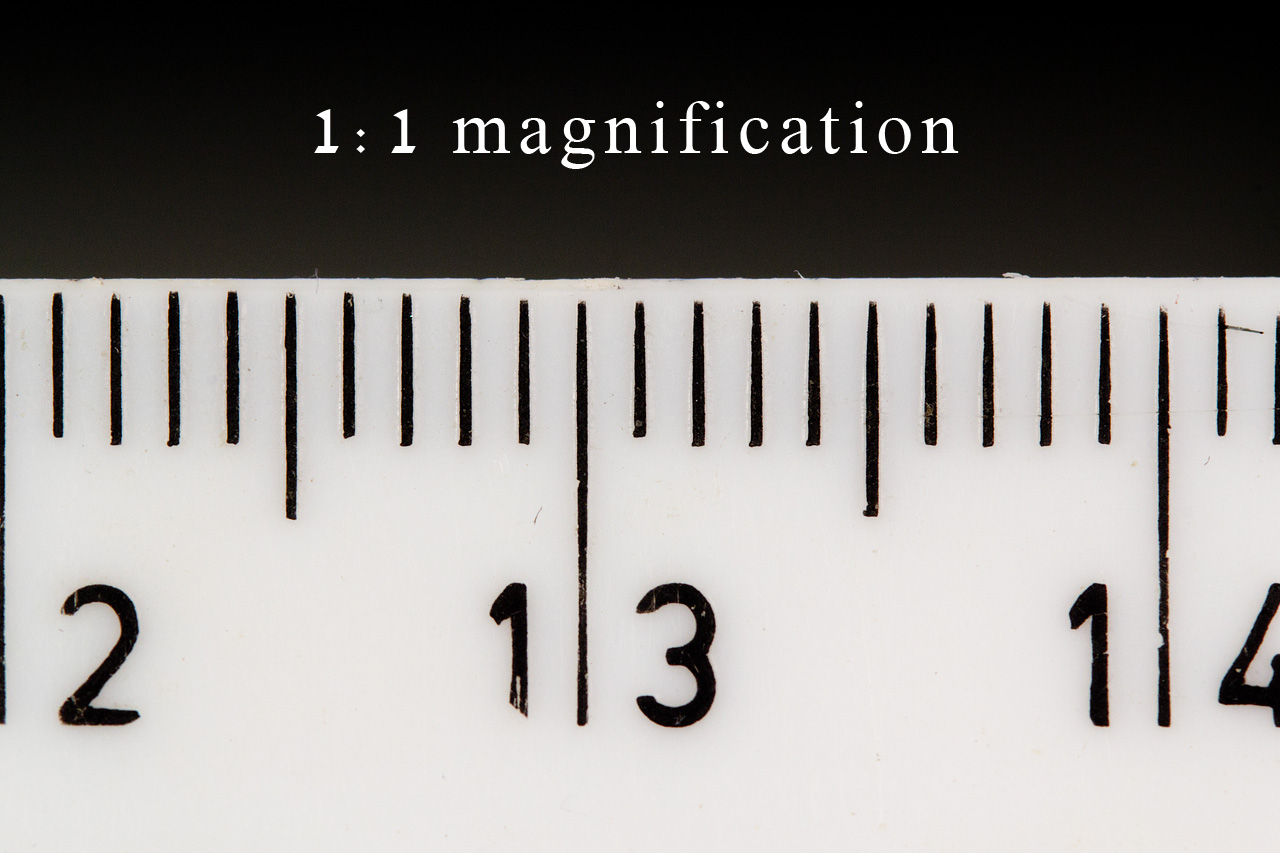
That's much clearer (hopefully), but how can we accurately calculate the magnification at an arbitrary focus distance? The easiest way is to use a ruler. In the first image below, I shot from a distance of about 65cm (subject to sensor). Forty-four 1mm notches fill the entire width of the frame, and thus the subject's 'size' is 44mm. From my camera's specifications I know that the width of its sensor is 22mm. Thus for this lens, the magnification ratio achieved with this focal distance is 22mm/44mm, or simply 1:2. The second and third images show 33 and 22 notches, corresponding to 1:1.5 and 1:1 magnification ratios, respectively. With a regular macro lens, 1:1 magnification is achievable only at the very closest focus distance. Using a longer focus distance necessarily means the magnification will be lower.
From the last statement we can also draw a connection between magnification and proximity: For a fixed focal length, magnification is inversely related to subject distance. Note that this relation isn't linear, i.e. if I get a 1:4 magnification from a shooting distance of 40 cm, I won't necessarily get a magnification of 1:2 (twice that) from 20cm. But getting closer will always result in a larger magnification and vice versa, meaning that the terms 'magnification' and 'proximity' are loosely interchangeable, and so I'll take the liberty to use one or the other as best fitting.
A few more points about macro lenses and magnification:
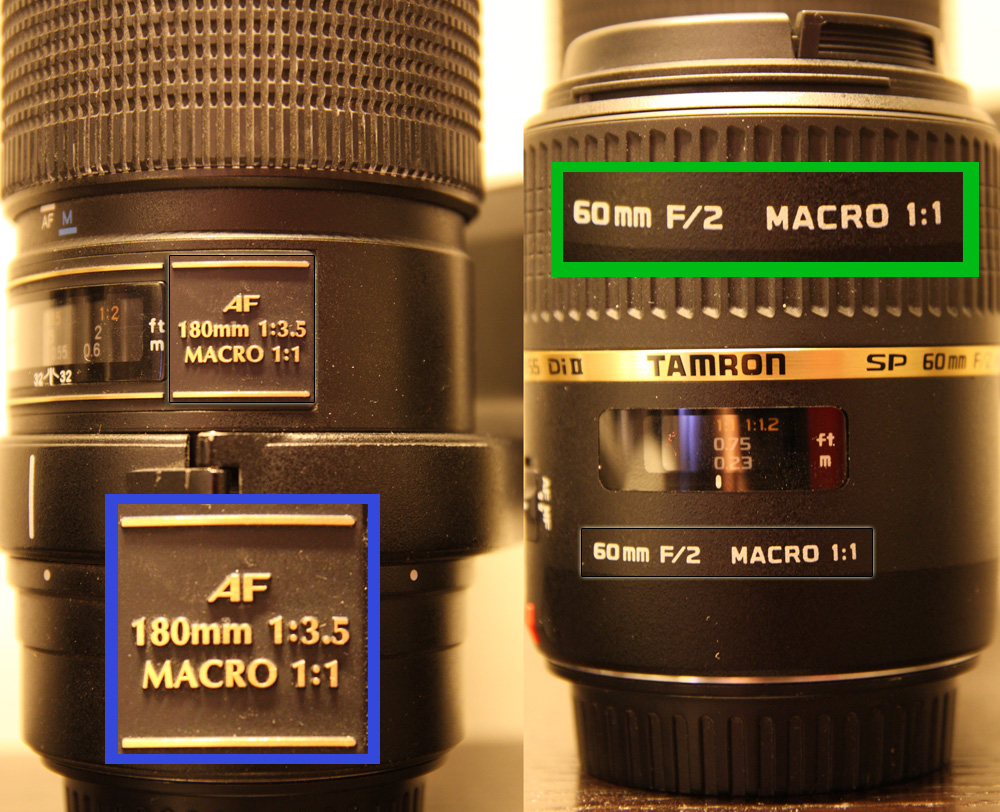
Firstly, you have probably noticed that many producers take a much greater terminological liberty as to what "macro" means, and happily write "macro" on a variety of zoom and prime lenses having nothing to do with 1:1 magnifications. This is a commercial tactic, and you should know that most of these lenses settle for just 1:4 or 1:3 ratios. That said, one can produce great results with such lenses, and achieve higher magnification with the use of additional accessories.
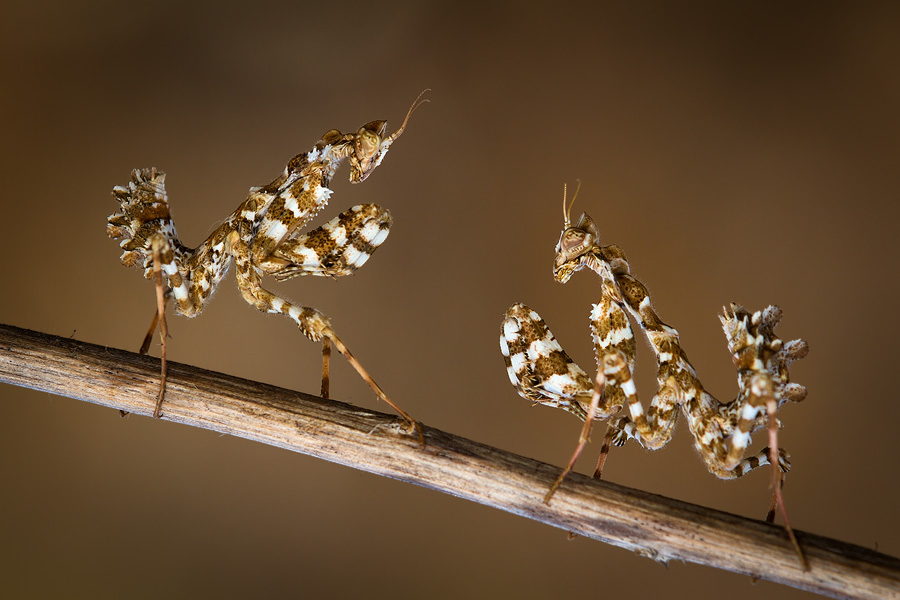
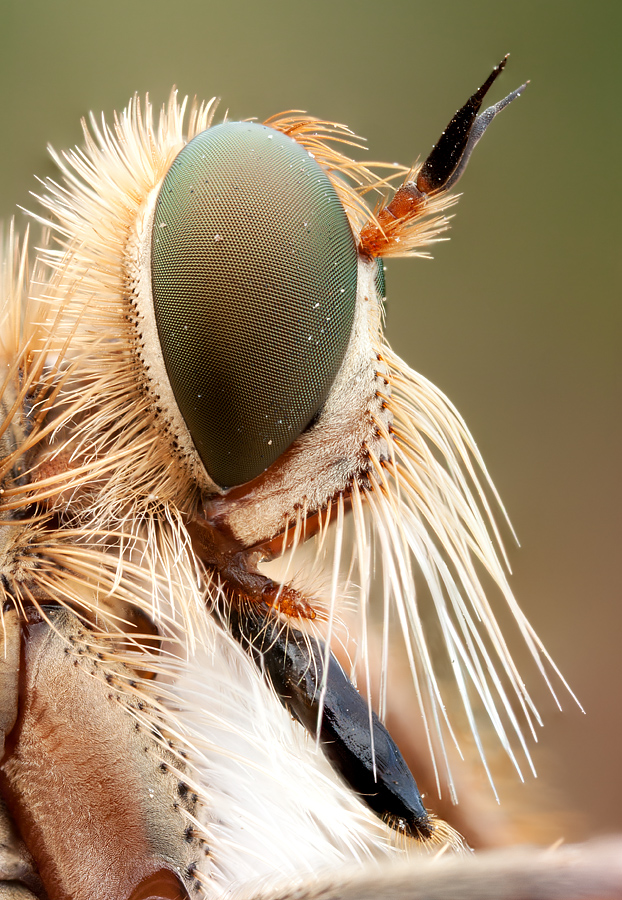
Secondly, there are cases (like the robber fly portrait above) where we wish to shoot at larger magnifications than only 1:1. These so-called "extreme-macro" magnifications are possible using special lenses or other equipment, and I'll discuss how it's done in the future.
Thirdly, from the definition of magnification it follows that it has absolutely nothing to do with sensor size. Nevertheless, sensor size does have an effect on the image's appearance, and I'll get back to that when talking about equipment.