Erez Marom Photography
Article: Depth of Field in Macro Photography
Posted on 1st August, 2014 - Back to Blog Listings
As I’ve mentioned before, macro photography has many qualities that stem from the fact that we shoot from close distances. Some of these features are positive, such as the ability to control background. But mostly they are problematic, causing a variety of difficulties and challenges to deal with in the field, in addition to artistic decisions.
I wish to dedicate much attention and discussion to what I view as the main technical problem of macro photography – Depth of Field (DOF). In this article and the next, I will talk about its causes, implications and solutions. In my view, no problem is unsolvable, but persistent problems demand stronger, repeatable solutions, ones that can be consistently utilized in the field, otherwise they mean nothing for a wildlife photographer.
Ok, let’s view the problem in all its glory. The cute creature in the image below is the nymph of a cicada (a nymph is the larval or sub-adult stage of insects with partial metamorphosis). For me, this image is a failure. But why? In a previous article I stated that the foremost technical requirement in macro is detail. And this image seriously lacks the detail I want. Almost all the interesting parts and features of the nymph are blurred – its abdomen, its wing buds, its legs, even the front of its head. That is the reason I consider this image a failure, and that is what needs to be corrected.
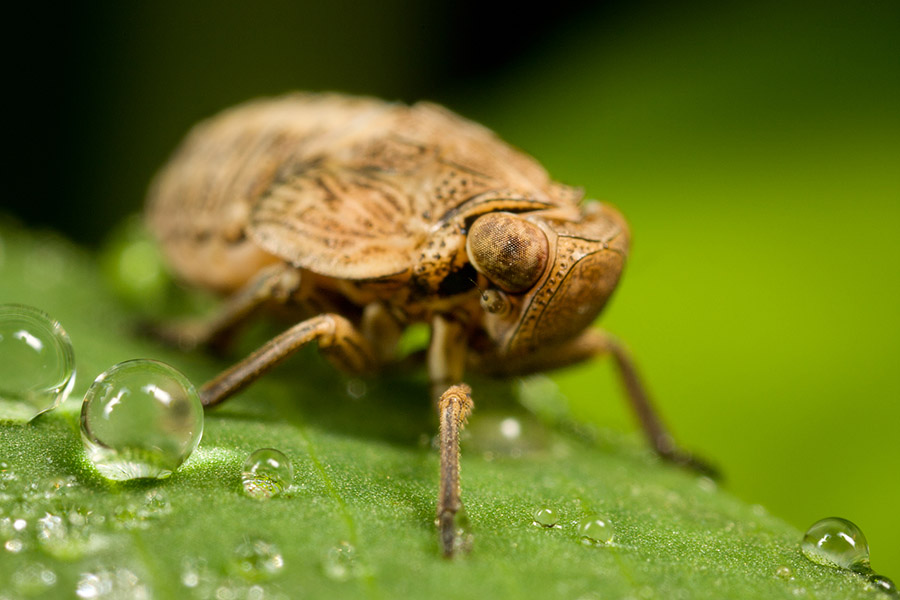
So why is everything blurred? Is it due to incorrect focusing? No. If you look carefully, you’ll see that the image is perfectly focused. In most images of animals (and humans), focus needs to be on the eyes, otherwise our brain feels that something is wrong. And indeed this is the case here- the eye closest to the viewer is in focus, so that can’t be the problem. In fact, the lack of detail results from insufficient DOF. When looking carefully, we can see that only a tiny amount of the image is in sharp focus – all the rest falls out of the focus plain and therefore loses its detail.
This obviously needs to be solved if we want detailed shots. But before we can solve a problem, we must locate its causes. So we need to understand why depth of field is so shallow when shooting macro, and to do that we first have to learn what parameters control depth of field.
When reading about it, one can easily find out that DOF is dependent upon three factors: aperture value, focal length and subject distance. If all other factors are fixed, then a smaller aperture value (the larger the f number) means a larger DOF, a higher focal length means a smaller DOF, and a closer subject distance means a smaller DOF.
This is absolutely true. However, there is an equivalent formula, stating that by a very good approximation, DOF depends on just two factors: aperture value (as before), and magnification. I’ve written about magnification in the previous article, and now we see some of its technical significance. It turns out that the higher the magnification ratio, the smaller the DOF. And this is the main reason for shallow DOF in macro – the magnifications are simply much larger than in any other type of photography.
Ok, back to the cicada image. We want to understand why the DOF is so shallow, and so we need to look at the two factors that determine it. First comes the aperture value. When photographers see such a shallow DOF, they immediately think the aperture is very wide. But this shot was made with f/9.0 – not a wide aperture at all – how strange. We can only conclude that the other possible factor - magnification – has had a critical influence here. And indeed it has. What I haven’t revealed yet is that this nymph is only 2mm in length! This means that since I wanted to photograph it filling a large portion of the frame, I had to use an extreme magnification ratio – in this case, 5:1 magnification. To those of you who don’t remember, this means that the projection of the subject on the sensor was 5 times its size in reality. Extreme indeed, and so DOF is especially shallow – only a fraction of a millimeter.
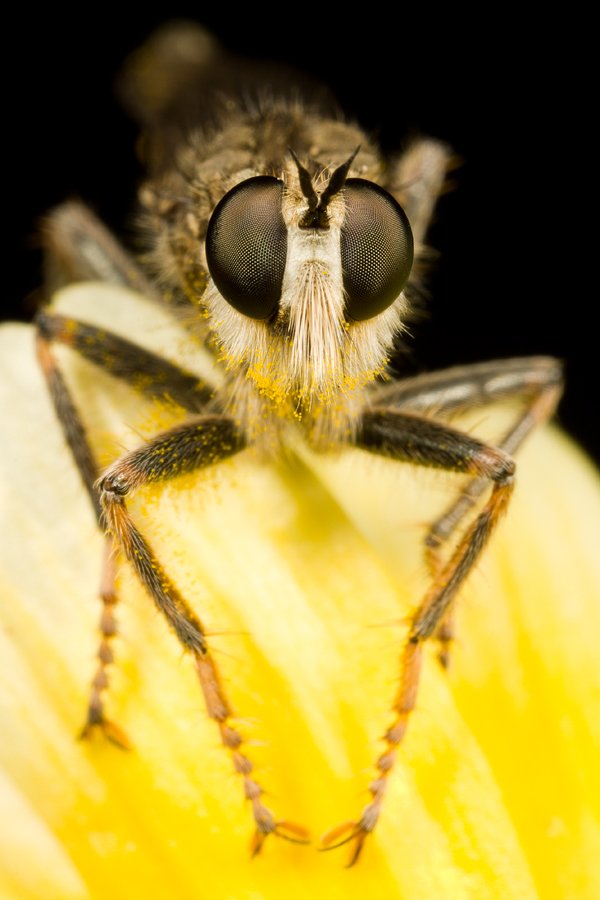
OK. Now we know the cause of the problem. But still, we need to fix it in order to produce good shots. Since DOF depends only on aperture and magnification, let’s consider the change if we alter one or both. First – aperture value. The robber fly below was shot using a much smaller aperture: f/16. In fact, this aperture is so small that is causes a significant loss of sharpness due to diffraction. Still, could be worth it if it produces sufficient DOF. However, even this tiny aperture couldn’t help this image and even though magnification isn’t extreme, DOF is too shallow and most parts of the subject are out of focus.
The second thing that can be done is to lessen the magnification – or, in other words, step back from the subject and make it smaller in the frame. I have a major problem with this “solution”, in two aspects: technical and ideological. Technically, stepping back results in the subject filling a smaller part of the frame then intended, forcing the photographer to crop the image in post processing. This naturally amounts to less resolution and reduced detail. The ideological problem is a more fundamental one: as a wildlife photographer I always wish to have the originals image as close as possible to the final outcome. Using a small magnification and cropping collides with this ideal and best not be done unless there is no other choice.
It seems that we have a serious problem on our hands. Out of the two factors affecting DOF, none can be changed without seriously compromising the image. So what can be done?
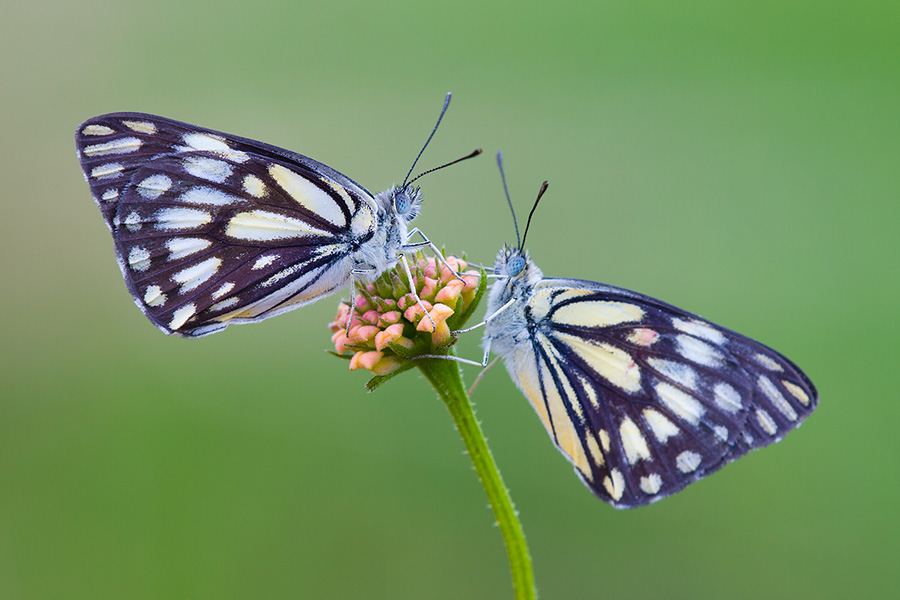
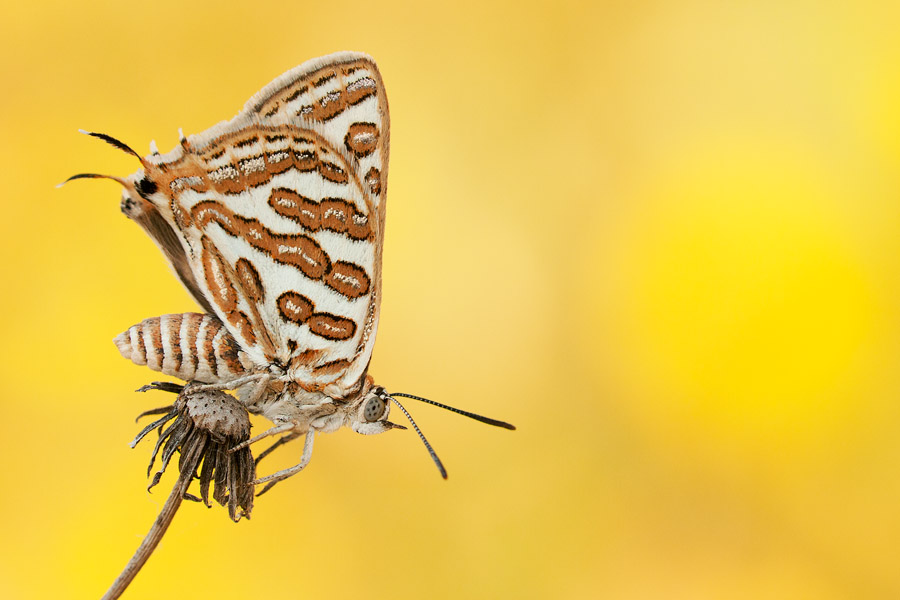
Understanding the nature and the causes of our problem brings us to the realization that our methods of dealing with it need to be a bit more sophisticated than a simple change of parameters. However, these methods exist and are quite powerful in enabling us to get our desired shot. Let’s look at the image below. This fly was shot using a wider aperture compared to the robber fly image above, and with a larger magnification ratio. This means beyond doubt that DOF is smaller. But still, the image doesn’t lack DOF! It seems that the entire fly is in focus. The truth is that DOF is indeed much smaller than in the robber fly image. But here, the subject was shot from a direction which enabled me to fit most of its interesting parts in the focus plane. The fly’s side is relatively flat, so by shooting it in a parallel angle and focusing carefully, I managed to get focus on the part which stands out most – the part most critical to the image’s appearance.
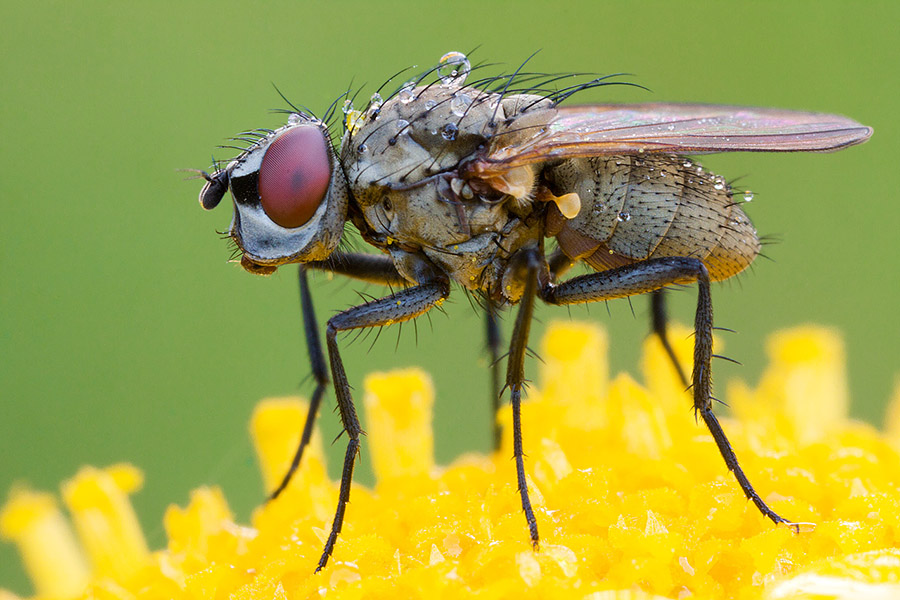
It’s important to realize that DOF is indeed extremely shallow. Look at the fly’s front right leg- it’s only a millimeter behind its front left leg, but still completely out of focus. The lack of DOF is also visible in the wings: The part of the wings closest to the viewer is focused, the part farther away out of focus. This all shows us that although DOF is so shallow, if the subject is flat enough (or at least is flat in its most characteristic – or important – parts), by carefully shooting at an angle parallel to the flat areas it’s possible to produce an image which seems fully focused.
This method might seem very naive, but it’s by far the easiest and most common method of dealing with the DOF problem in macro, and is definitely the first method I teach all students. It’s easy to use – just remember to be parallel to the subject’s body. Since arthropods usually have at least one flat side, this method is very effective.
This almost seems too good to be true, but this method is by no means perfect. It has two main problems. Firstly, what happens if we don’t want to shoot parallel to the subject? It’s extremely limiting to constrain our shooting angle this way. Sometimes we want to view the subject at a frontal angle or even a diagonal. Moreover, some subjects have such irregular shapes that they have no flat side! Arthropods sometimes have protruding body parts such as antennae, a proboscis and wings.
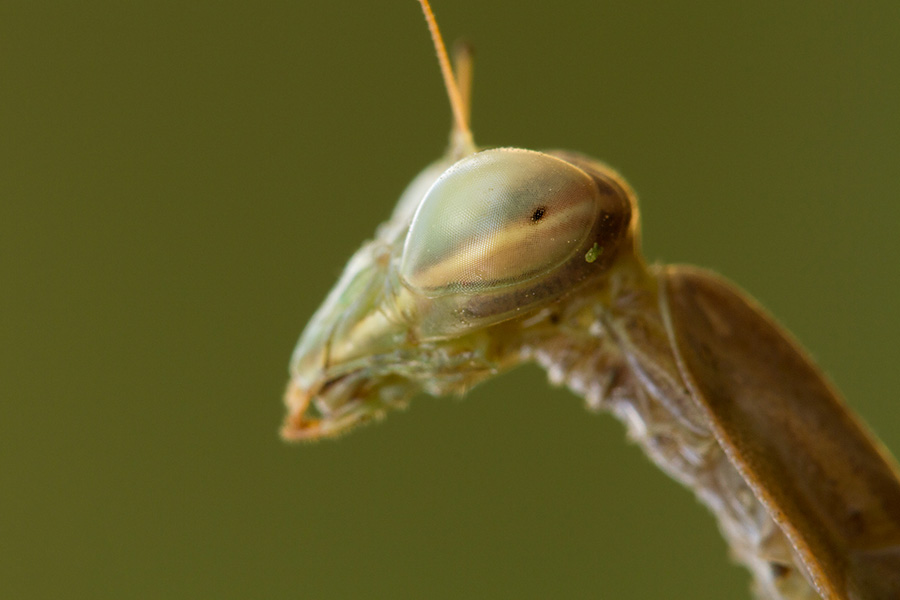
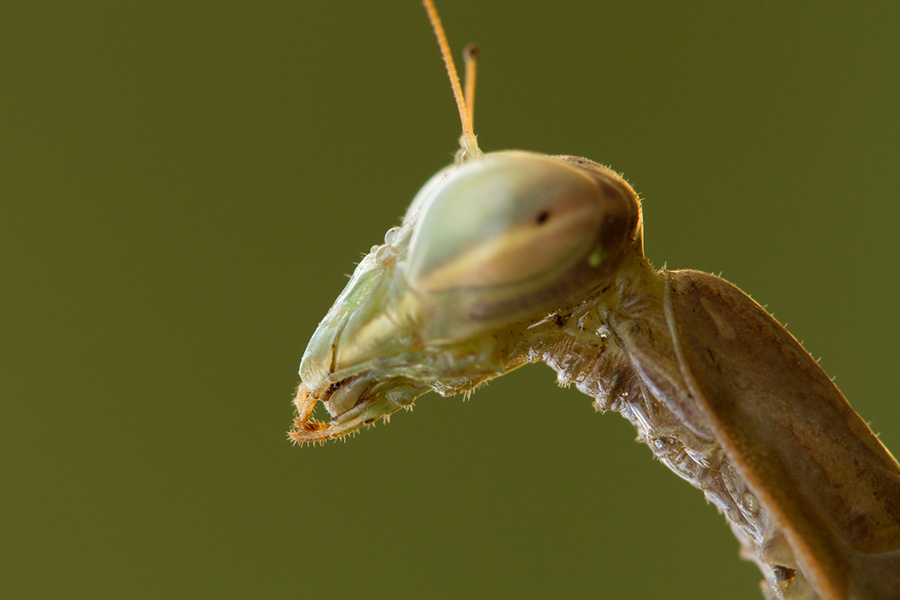
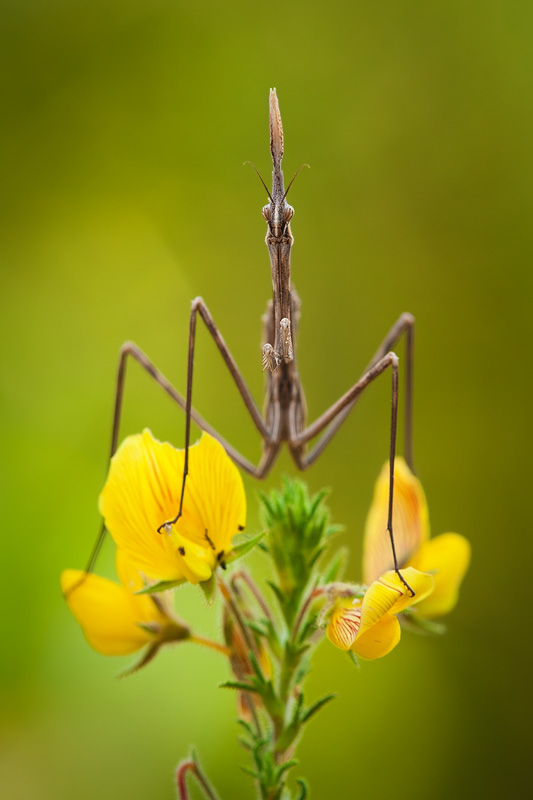
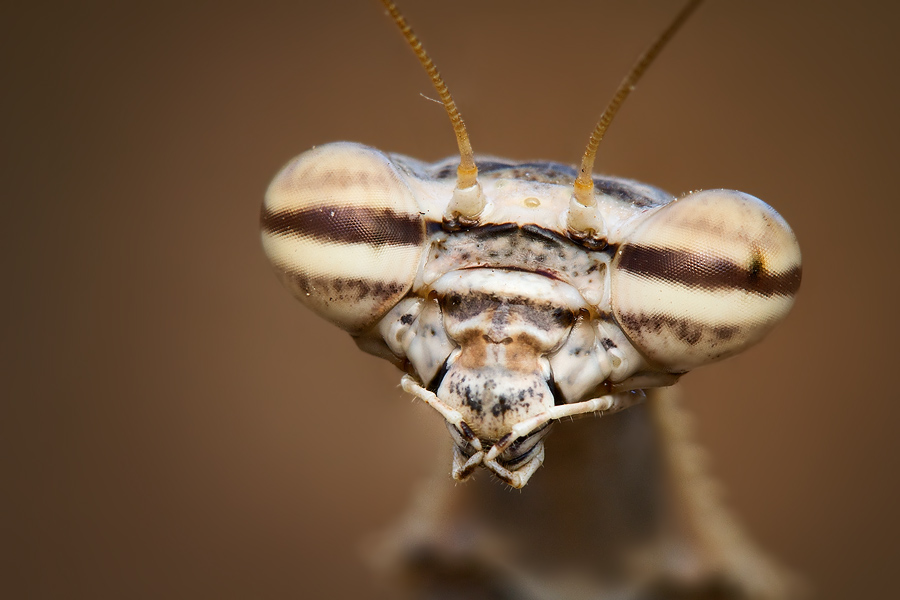
As I mentioned before, DOF is extremely shallow at very large magnifications, and when combined with a non-flat subject, this renders the first method impossible to use. The robber fly portrait below is a very good example. The subject here is just the fly’s head, and it is anything but flat: its eyes are rather spherical, and it has protruding antennae, a moustache and a long proboscis. Extreme magnification means that simply closing the aperture will never be enough to get the entire thing in focus.
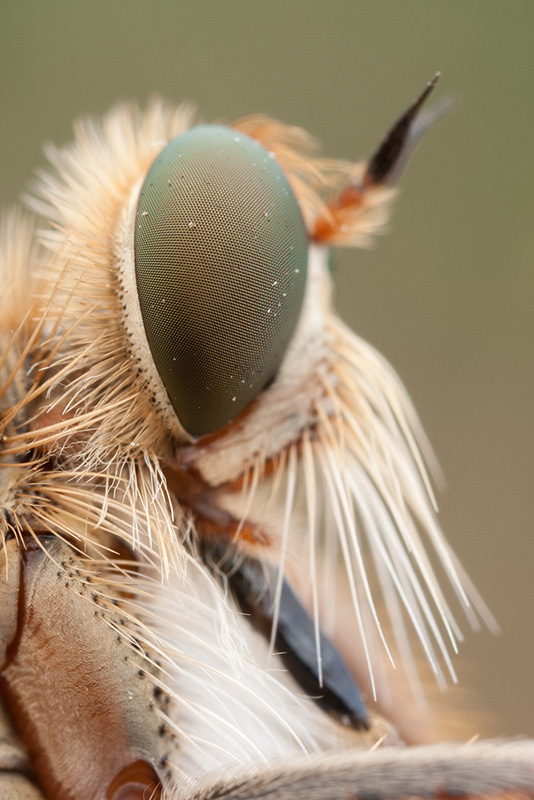
Luckily, the digital revolution has brought a very efficient method of increasing DOF. This method is called focus stacking and I’ll only explain it briefly here, since I’ll dedicate an entire article to it later. Focus stacking is a process that involves two stages. First, in the field, we need to shoot a series of images with identical composition, each focused on a plane of different depth on the subject’s body. For example, one shot can be focused on the eye, the other on the proboscis, and so forth. Every part of the subject we’d like to be focused must be focused in at least one image of the series.
Next, at home, we use a computer program which selects the focused parts of each image and stack them together (hence “focus stacking”) to create an image that has an increased DOF.
Focus stacking is indeed a fantastic innovation, but this method has its own disadvantages – being time-consuming is just one. But with the technology available today there just isn’t a better way of obtaining both detail and DOF in extreme magnifications. I’ll discuss focus stacking extensively in another article, including examples, methods and programs.
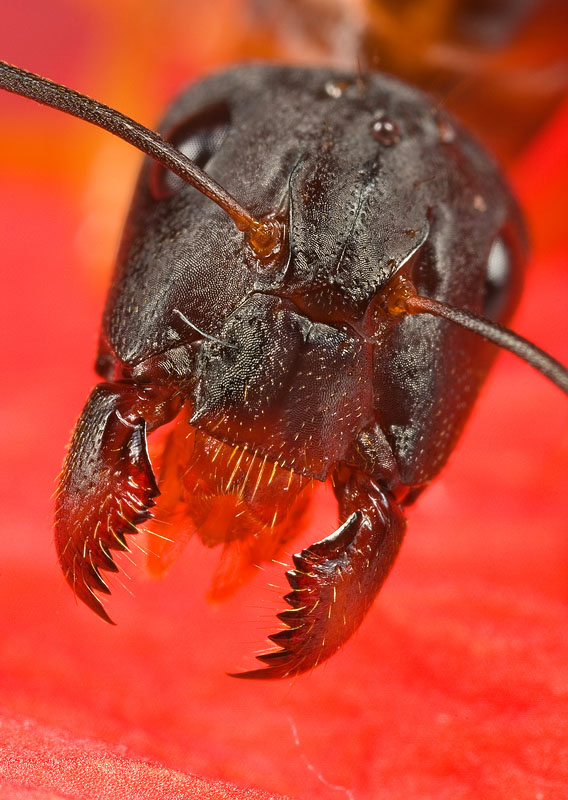
There is a third method for dealing with shallow DOF. Let’s look at the ant portrait below. Defying all rules, the eyes are not focused! But this is intentional. By using shallow DOF I caused the viewer to concentrate on the real subject here: not the entire ant head but only its jaws. So this method means that sometimes, very shallow DOF can have a dramatic appearance and can help control where the viewer’s attention is drawn. And this control is indeed critical to every photographer.