Erez Marom Photography
Article: Behind the Shot - Watery Grave
Posted on 26th June, 2015 - Back to Blog Listings
In this article I'll take you to a grisly scene I encountered, which enabled me to produce quite a rare shot. This image is special to me for two reasons: first of all, it's a very unique image, telling a story you don't come across very often. Secondly, I've had to put in work I usually don't do when it comes to post-processing, to make it look right. All in all, I'm happy with the result, and it has won good acclaim in international competitions and publications.
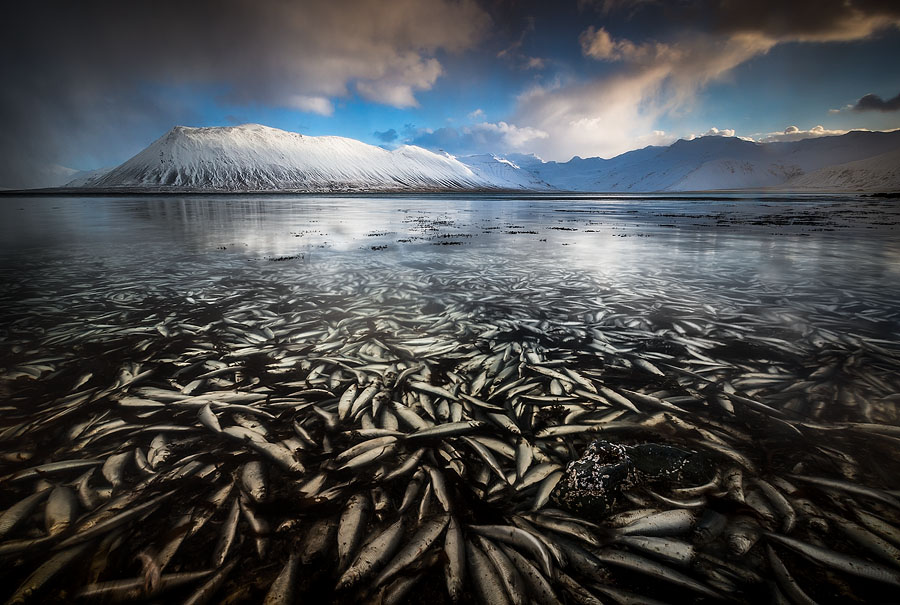
The shot was taken back in February 2013. I was visiting the Snæfellsnes peninsula in western Iceland while scouting locations for my 'Winter Paradise' workshop, and the hotel owner told me about a terrible phenomenon. Tons upon tons of herring entered Kolgrafafjörður, one of the fjords near the town of Grundarfjörður, and simply suffocated from lack of oxygen in the fjord's water. This was sadly caused by man-made constructions which limited water (and hence oxygen) circulation in the bay. A very sad outcome indeed.
I was wondering what the smell was about before being told, but as bad as it was, I had to see it for myself. When nearing the bay, the smell got worse until I got severely nauseated. There was no option but to walk on countless dead herring, not a pleasant experience if I might say so, but seeing the scene, I felt I could get a truly unique shot here, since this kind of thing only happens once every several years.
Shooting conditions were dismal. The moist air destroyed visibility, and the light situation in midday was not in my favor. Add to this the fact that I was feeling quite sick and couldn't stay for much longer, and the result was perhaps the "worst good image" I've shot. The Raw file doesn't look like what I want to convey here, not at all. But since I felt the image was special enough, I put some work in it, and transformed it into something I'm proud of, and more importantly, tells a natural story in a visually compelling way.
SETUP
I took the image using my Canon EOS 5D Mark III and my Canon 16-35mm F2.8L II lens (at 16mm). I also used a Lee Pro Glass 0.9 ND, a Lee 0.9 soft grad and a 105mm Heliopan circular polarizer. The ND filter made the exposure longer, and the grad partially balanced the global contrast in the scene.
This is a 1.3 second exposure at ISO 200, F16. The narrow aperture served to increase depth of field and to make the exposure longer in order to ensure the water was flat. The long exposure caused some movement of the fish- I actually like that, it contributes to the grizzly feel of the image in some way, and I think the amount of motion blur is quite adequate.
COMPOSITION
Composition is pretty straightforward here, but there are a few points worth mentioning.
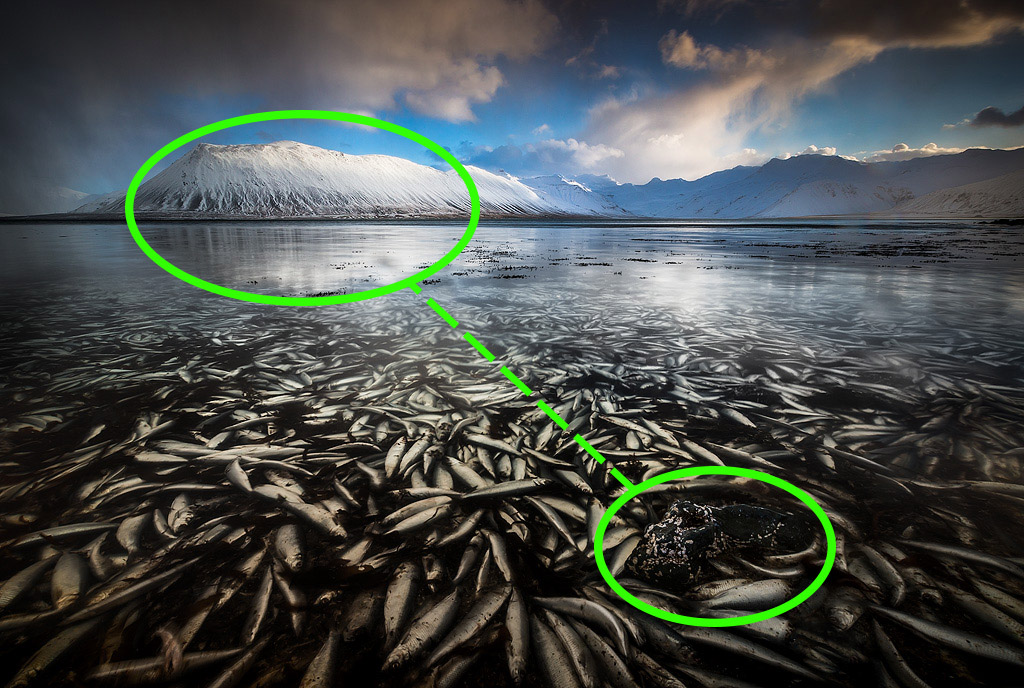
First of all, the small rock at the foreground is a very important compositional element. It serves both as an anchor - a sharp, non moving object to complement and counter the blurred fish and water - and as a parallel to the mountain. In my eyes, the top and bottom parts of the image reflect each other, in that there's a solid object surrounded by a blurred mass: on top, the mountain range surrounded by clouds, and on bottom, a rock surrounded by water and dead fish. The position of the rock in the right side of the foreground was carefully selected to counterbalance the mountain, whose main mass is on the left.
Another thing I like here is how the seemingly infinite mass of fish slowly gives way to the mountain's reflection. Personally I find this compelling both visually and as a story-telling tool.
POST PROCESSING
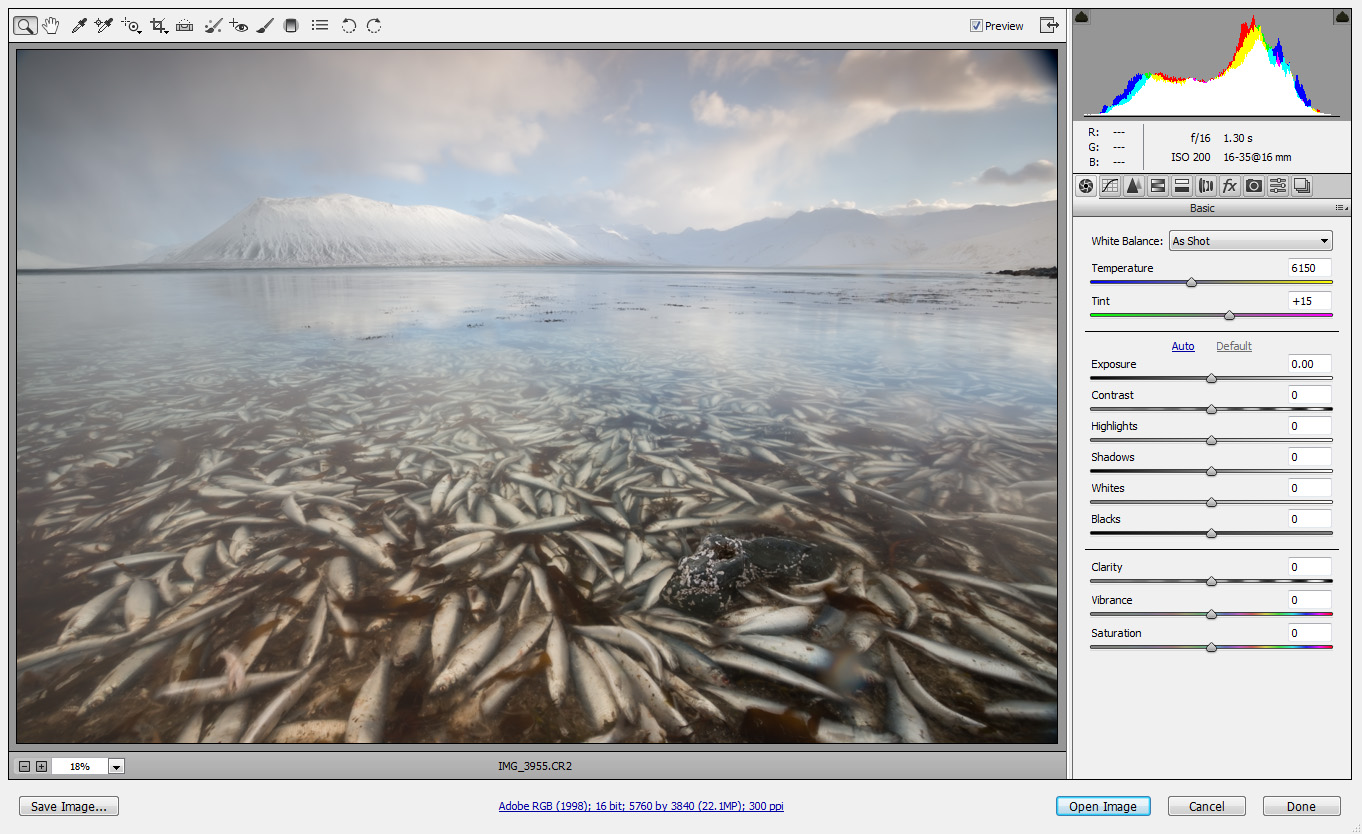
As I've mentioned before, the quality of the original RAW file is quite poor here, and if it hadn't been such a unique image, I would have probably deleted it. But since I wanted to keep the shot, I needed to make the most of it in post processing, and this meant major retouching work which might upset some. It's important for me to mention that this is quite far from the amount of processing I usually allow myself to do, but when you look at it, all I really do here is enhance contrast, clarity and color - never really adding things that weren't there. Like it or not, I don't hide my process, so let's see what I did to make the image match my artistic vision.
Most of the post processing of the image was done using Adobe Camera Raw version 8.1. I prefer working with ACR since the changes you make to the image are both easily traceable and individually undoable. First let's see the untouched RAW file.
The initial steps were automatic lens correction and cropping the image slightly to balance the composition.

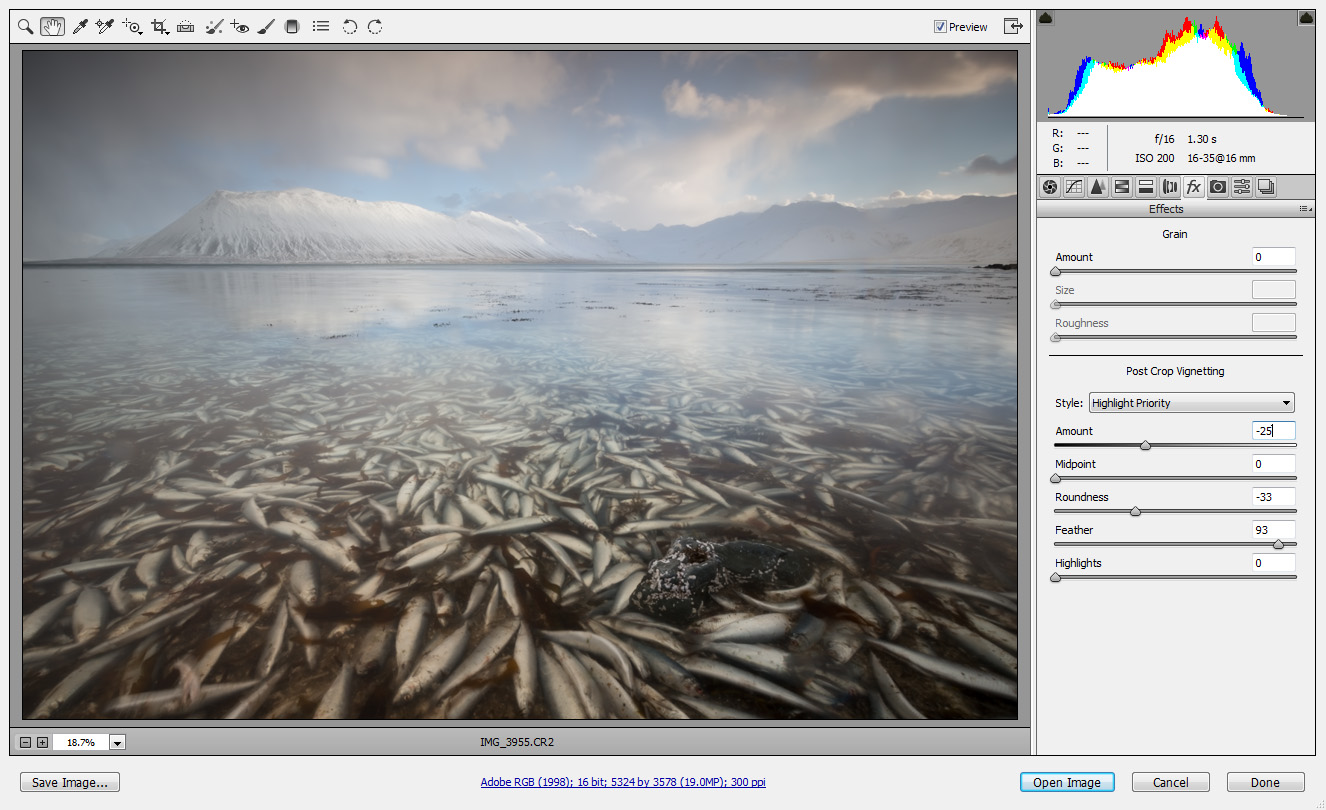
To enhance the drama in the image I even added some post-crop vignetting. This served to darken the margins and create a gloomier atmosphere.
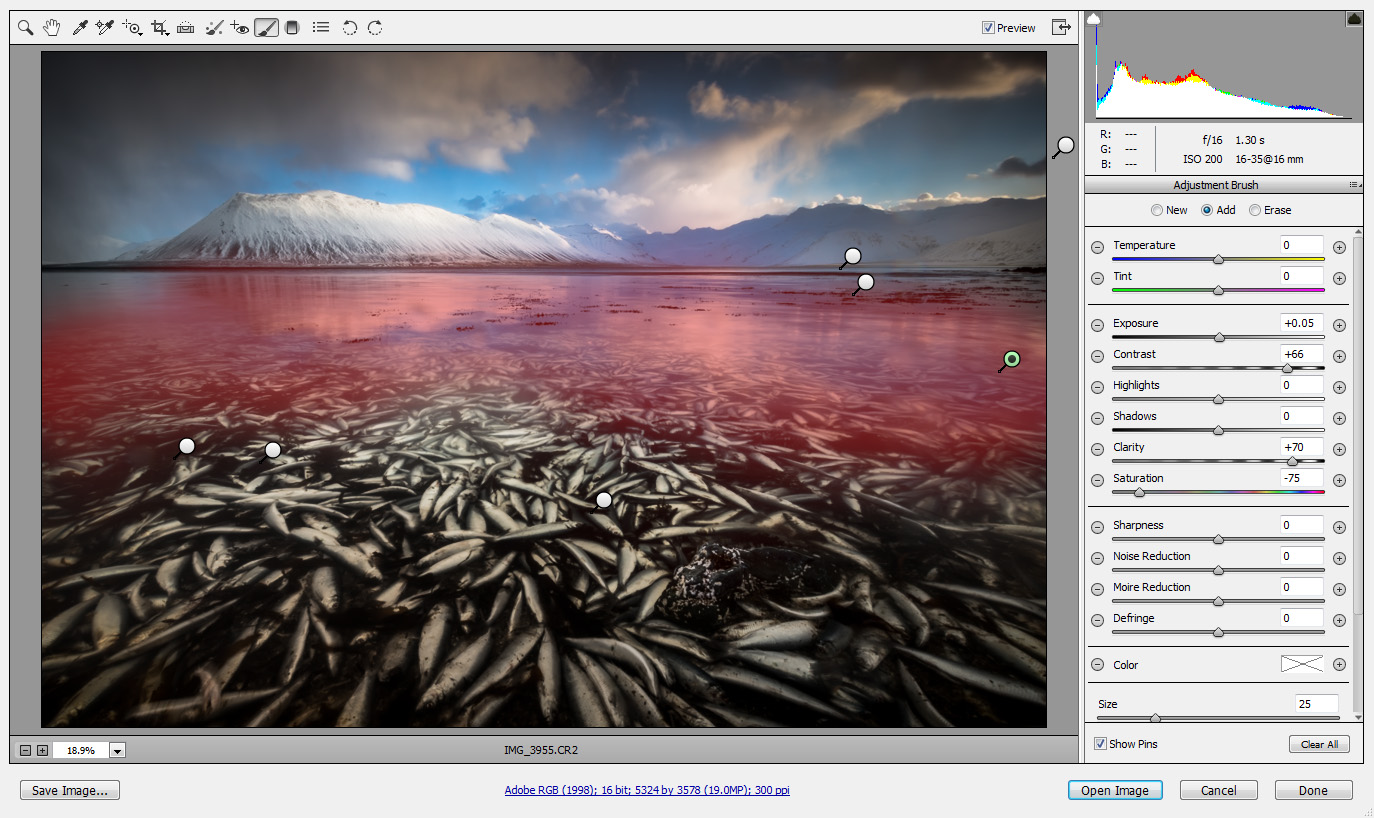
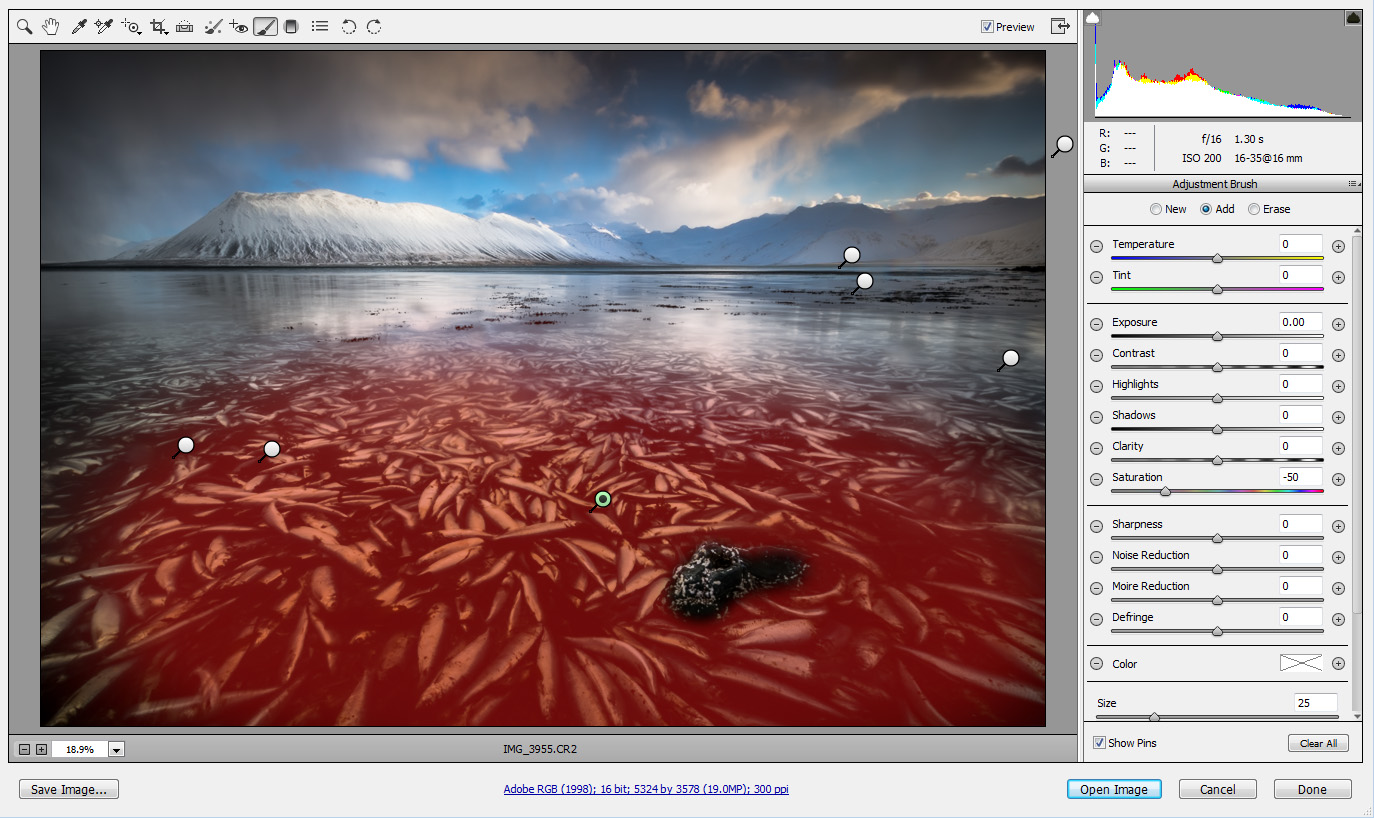
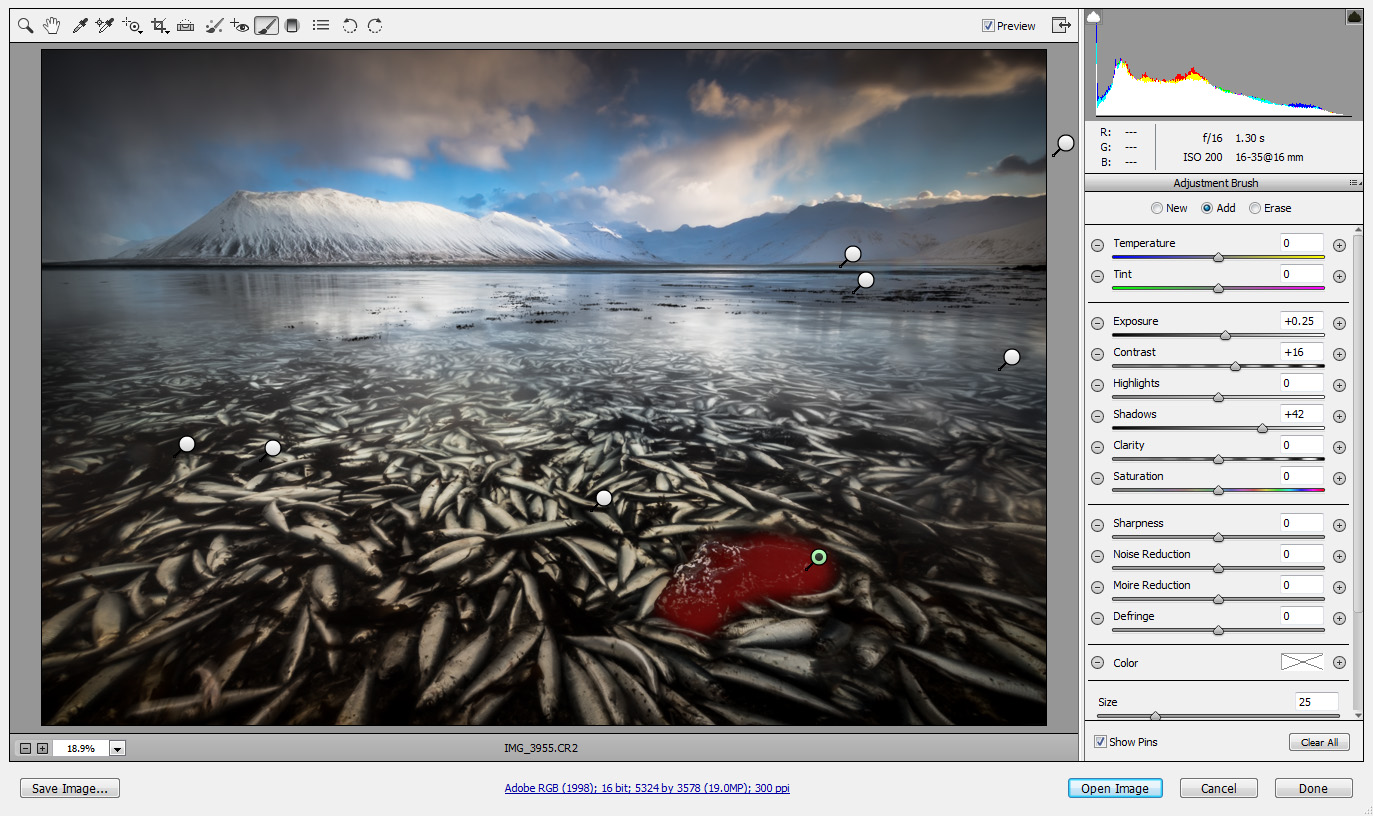
Now begins the heavier processing. First I needed to counter the poor visibility, which ruined saturation and contrast. I boosted the image's contrast, clarity, saturation and vibrance.
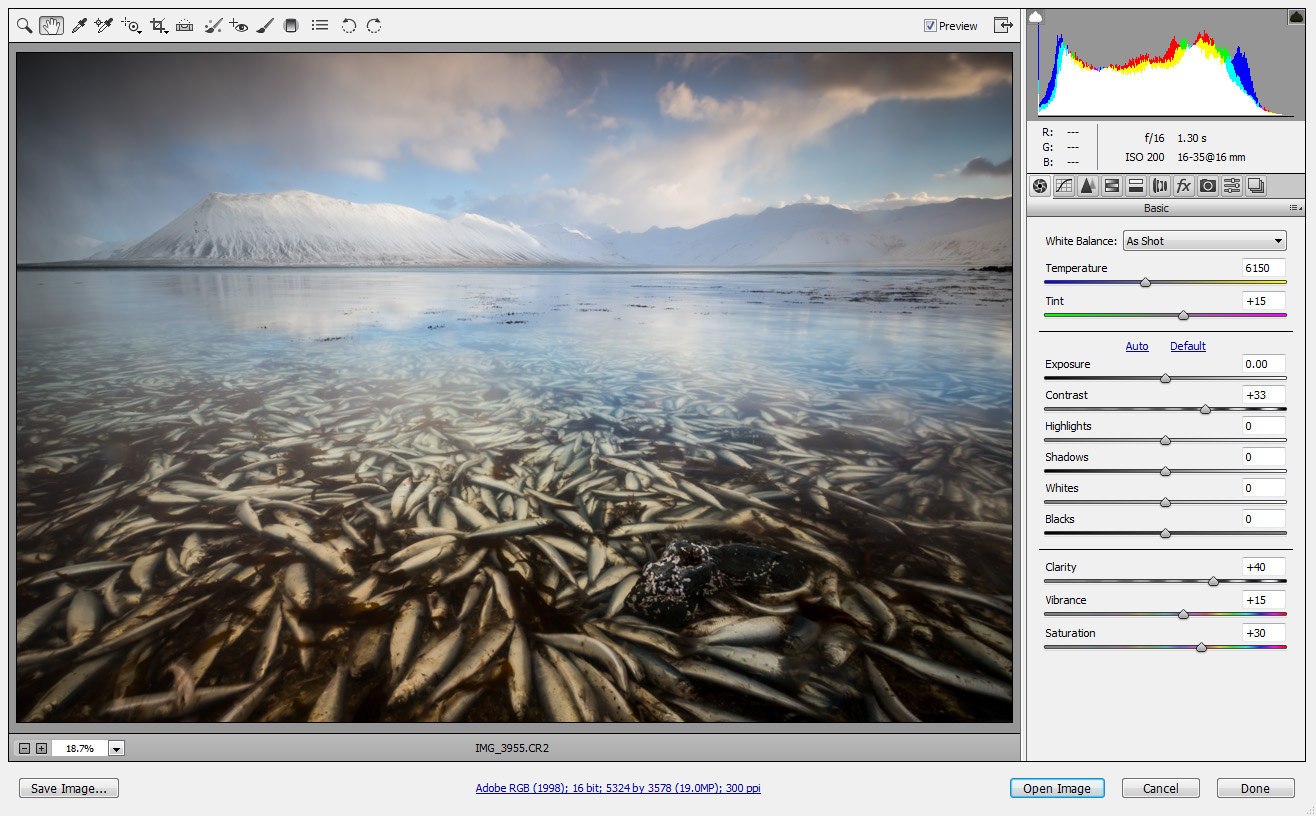
This resulted in exaggerated saturation in some parts of the image, but I'll deal with that later. First I need to make I have enough saturation where I need it.
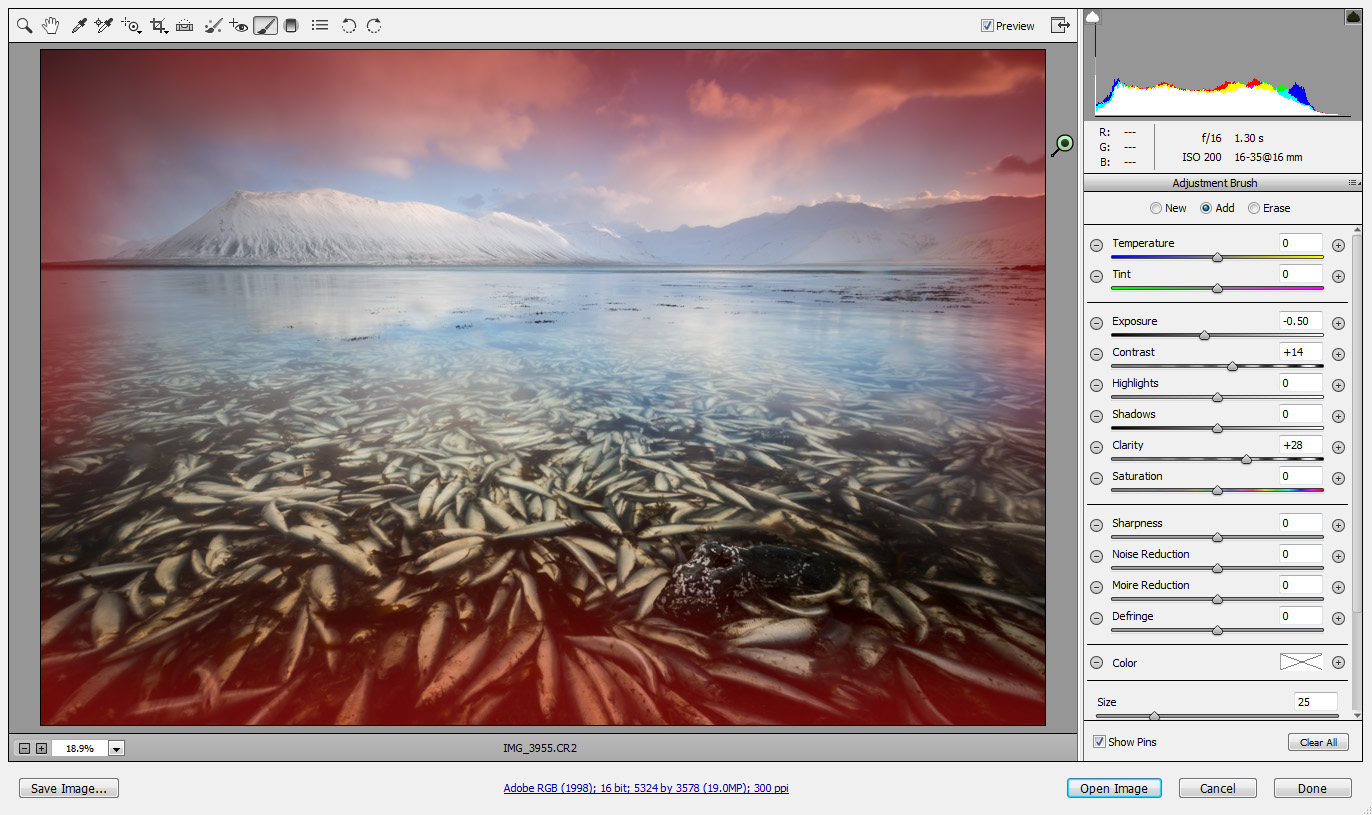
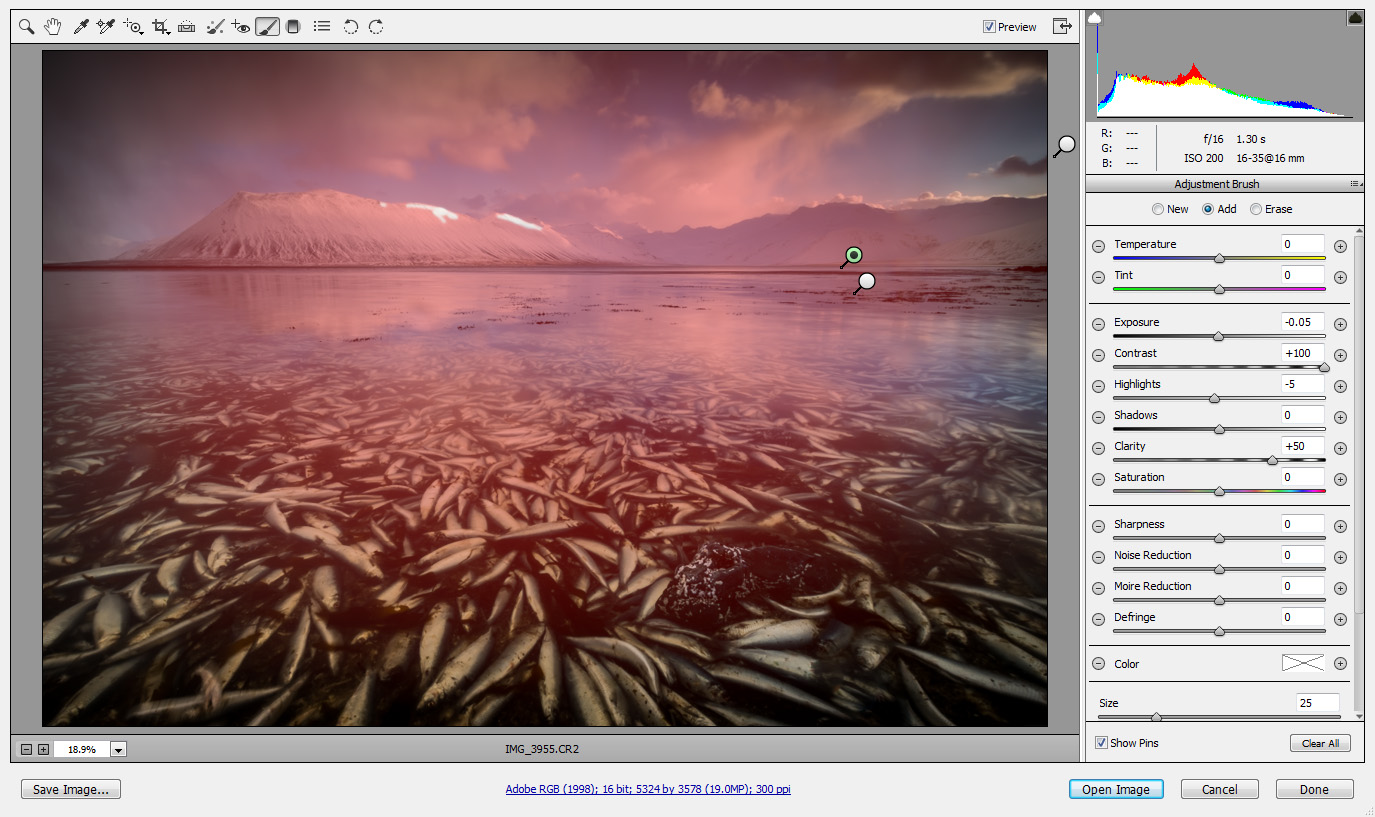
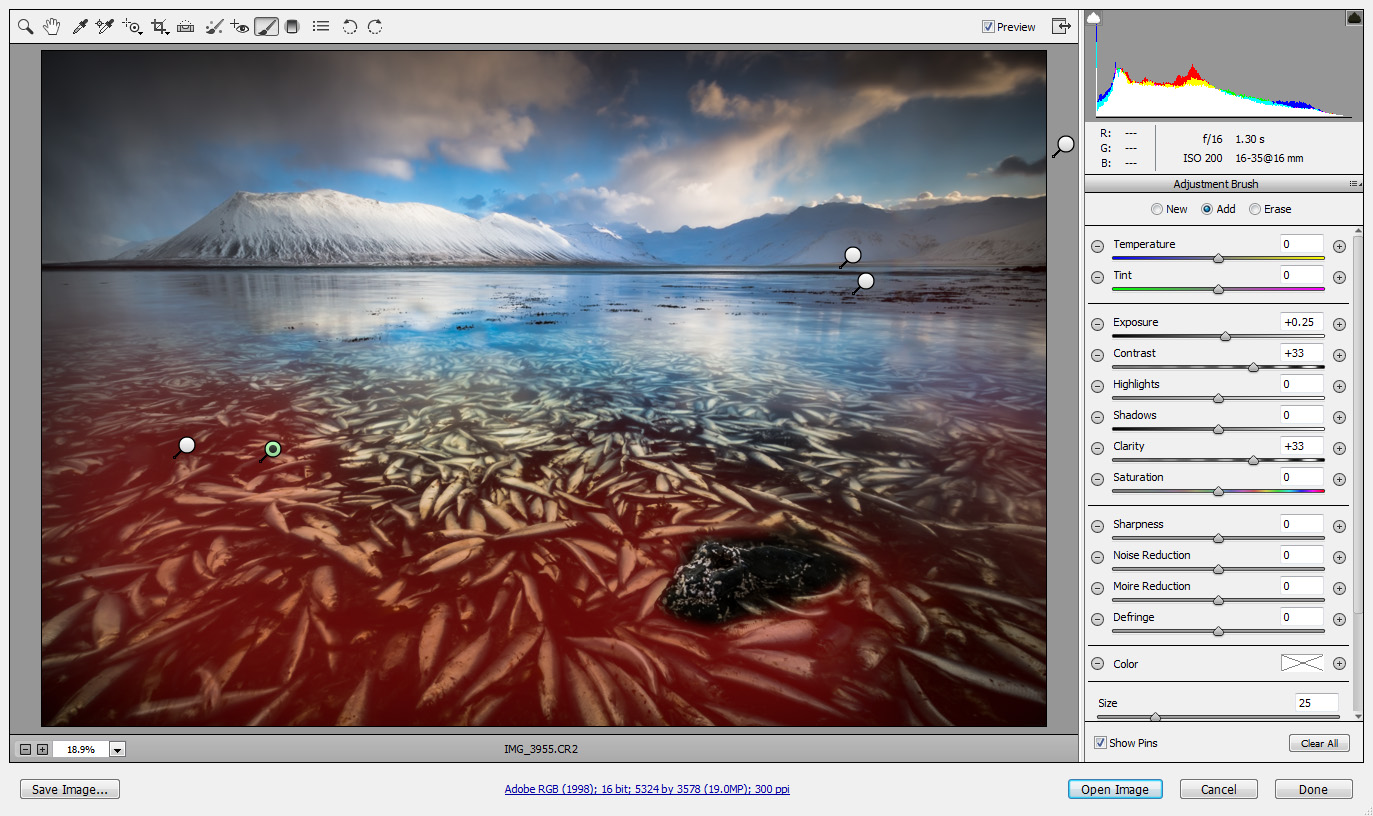
Next came quite a few local adjustments. Let's review them in a series of screenshots.
After finishing work in ACR, I saved the file as a TIFF and opened it in Photoshop.
The image still looks too bright to my eyes, and the dark solemn look I'm going for is not yet complete. I need to darken the image, but avoid losing detail where it's already dark. I did that by darkening only the not-so-dark parts of the image. The process was already explained on my article 'Behind the Shot: Winter Paradise', but I'll explain again quickly.
First, I needed to create a selection restricted to the very dark pixels. This was done by inverting the image (duplicate layer, then ctrl-I), and creating a selection of the brightest pixels of the inverse image. This is done by ctrl-clicking the channel mask (channels view), and then multiplying the selection by itself several times by Ctrl-Alt-Shift-clicking on the channel mask.
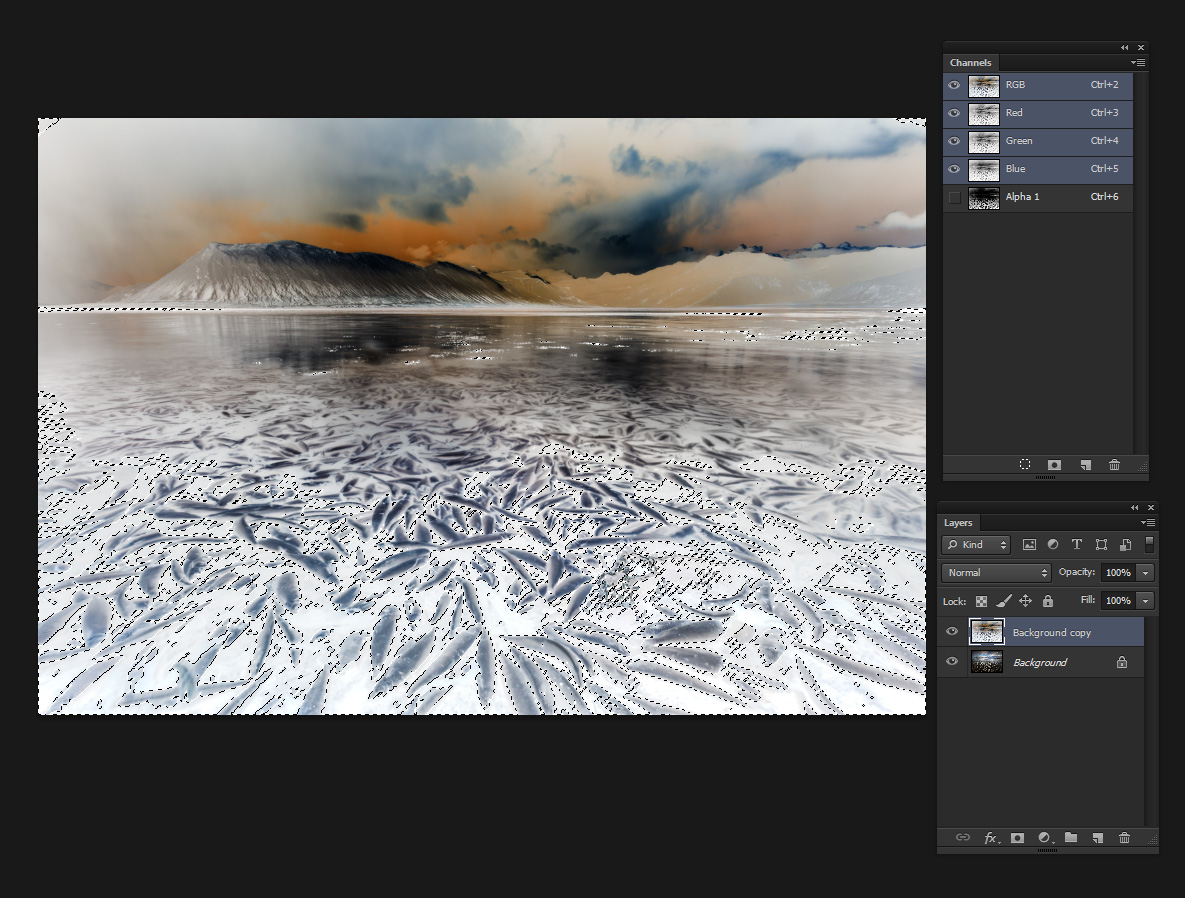
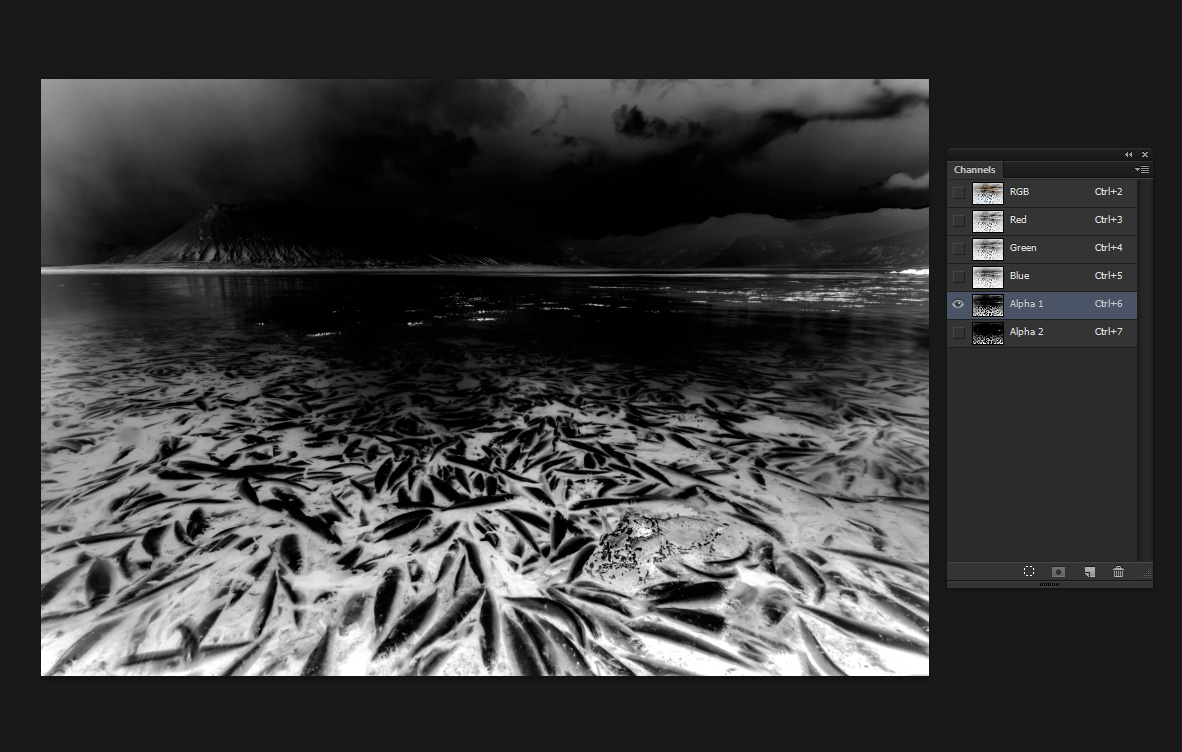
By using this mask for a levels adjustment layer, I could darken the image without losing detail.
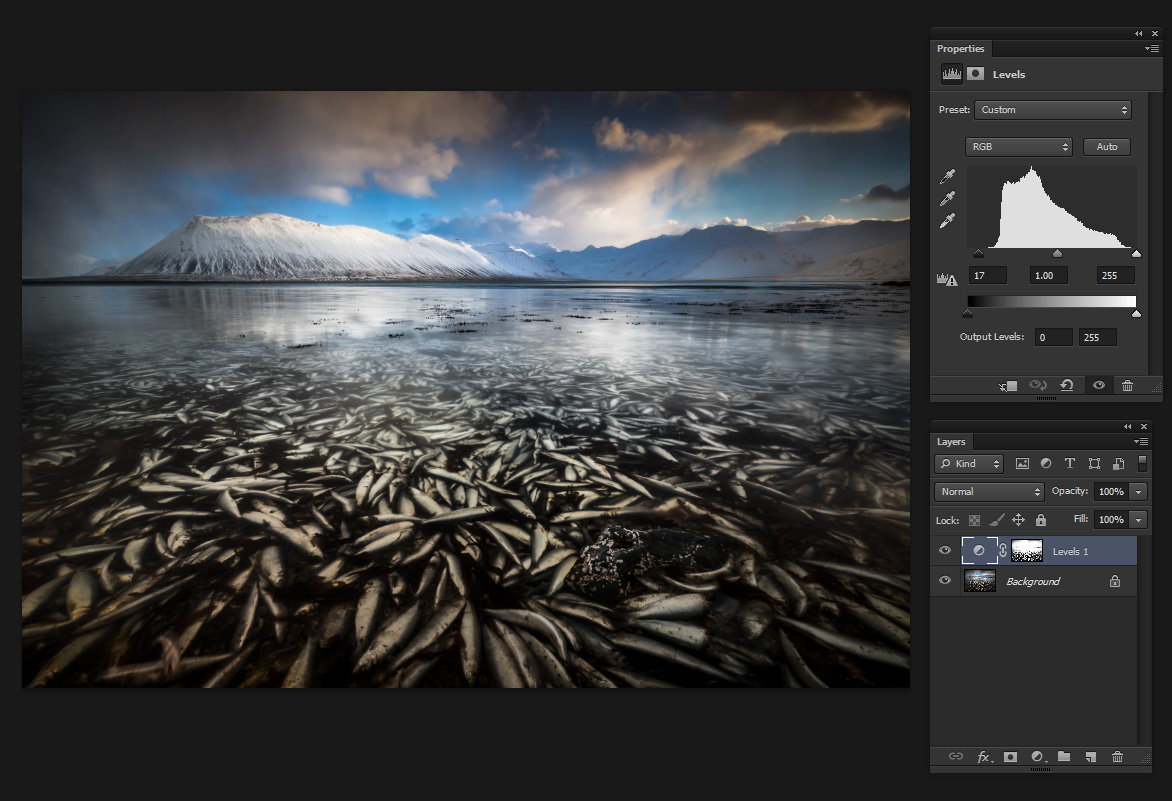
Now it looks very gloomy, exactly what I wanted.
To finish the work and prepare the image for internet-use, I converted the color space to sRGB, performed size-reduction and some sharpening and I was done.