Erez Marom Photography
Article: Behind the Shot - Flames of the North
Posted on 14th December, 2014 - Back to Blog Listings
In this article I'd like to talk about an Aurora shot I achieved using a special technique. I took the image during the first of two 'Land of Ice' photo workshops I guided in Southern Iceland earlier this year. I was leading the group when we arrived at Iceland famous glacier lagoon, Jökulsárlón.
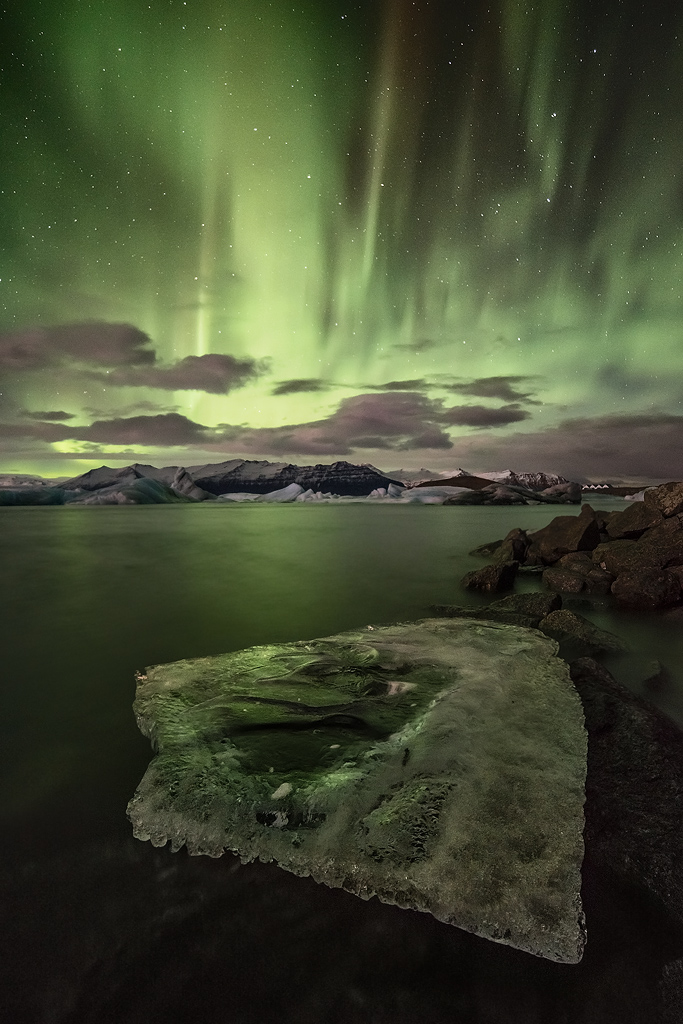
The sky was mostly clear and the Northern Lights were starting to pick up about an hour after arrival. We set up our cameras, found compositions and started a long, spectacular shoot. Somewhere in the middle of the display, the participants were comfortable shooting by themselves, so I could wander a bit, looking for something to shoot. I found a large chunk of ice stuck on the rocks in the southern bank of the lagoon.
I carefully descended on the slippery rocks and got close to the ice. It was literally glowing green, reflecting the dancing Aurora. Since Northern Lights displays are temporal, and since the lagoon's water could move and shift the ice, I had to work fast. But in order to get sharpness across the image, regular techniques weren't sufficient.
SETUP AND EXECUTION
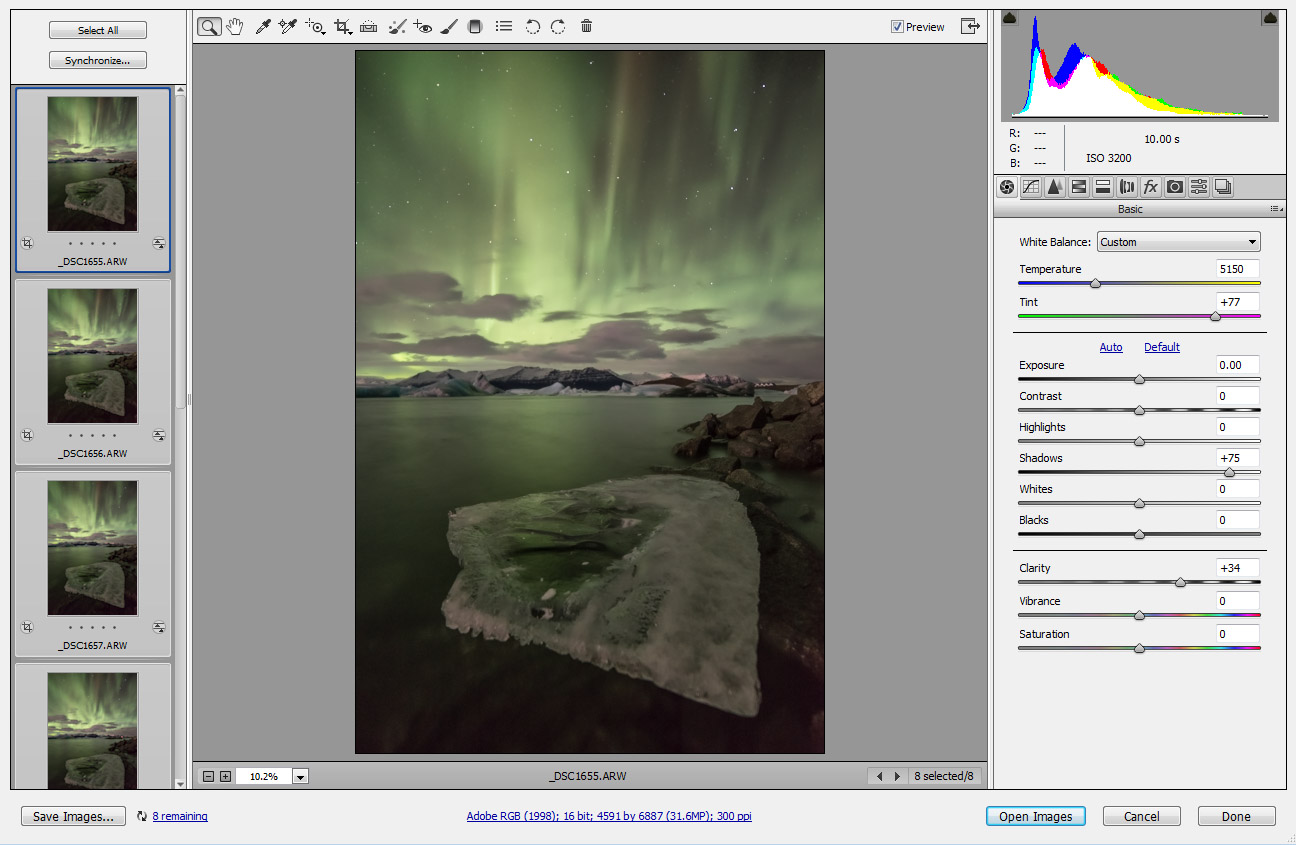
The image was taken using my Sony A7R and a Samyang 14mm f/2.8, attached via adapter.
The lights were very active and kept moving fast, and to prevent the Aurora from smearing too much, I needed to keep the exposure short. I set the aperture open wide at 2.8 and used ISO 3200. I could thus keep exposure time down to 10 seconds, and have the Aurora well defined.
The most important and interesting aspect of the image is that it's focus-stacked at f/2.8. In addition to one shot for the mountains and sky, I shot 7 images for the piece of ice in the foreground, using the same exact parameters. This raises 2 questions: how I did this at night, and why I chose to shoot this way.
As to why: firstly, the image had to be focus-stacked, even if I was shooting at f/16. I was very close to the ice (in fact, my feet were under water - inside thermal boots, of course!), and there was no chance to get the entire thing in sharp focus with one exposure. I could have used a narrow aperture such as f/16 and get the foreground in less exposures. The problem is that time was of the essence (remember I was fearing the ice would move and the Aurora would change in strength, thus changing the ambient light), and keeping the exposure time down I could cover the ice as quickly as possible, even though I needed more exposures to do so.
The next question I need to answer is how I focus stacked. Since it was night (Aurora was bright but notthat bright...), and since live view on the Sony A7R is not amazing in the dark, I had to do it by feel. That means I simply took a shot, then move the focus back a bit, without having any feedback on where I was focusing, and then took another shot and so on. I made the focus shifts small enough to make sure I had the whole piece of ice covered and sharp throughout.
Here are the 8 images I composed this shot from.
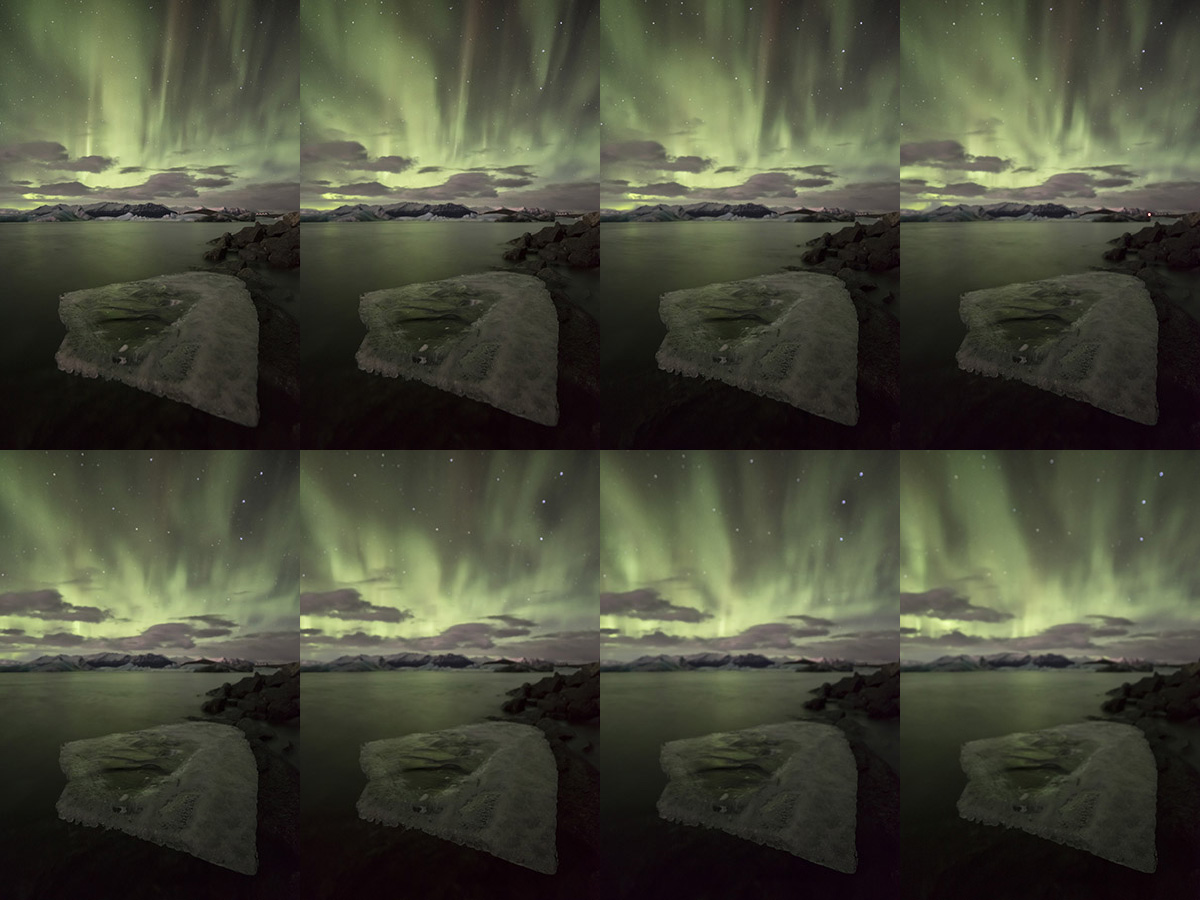
While in this size its hard to see fine detail, you can still notice how the sharpness gradually moves from the sky (top left image - the ice is very much out of focus), through the depth of the ice chunk, and all the way to the closer edge of the ice (bottom right - see how the stars are completely out of focus). This way I could make sure the whole scene was covered in terms of sharp focus.
COMPOSITION
Composition of this shot is extremely straightforward: foreground and background, without too much connection between them other than the color. It is important to mention that the vast majority of Aurora shots we see lack any sort of foreground, and so I think including one, especially as nice as this, adds a lot to the image. Another subtle point is that the foreground and background balanced one another pretty well with regard to compositional mass: the piece of ice feels heavier on the right, whereas the mountains and Aurora are heavier on the left. This balances the composition, and creates some sort of continuity.
POST PROCESSING
Before stacking the image, I performed some minor corrections using Adobe Camera Raw. Firstly, I loaded the images into ACR and cropped them, to perfect the composition.
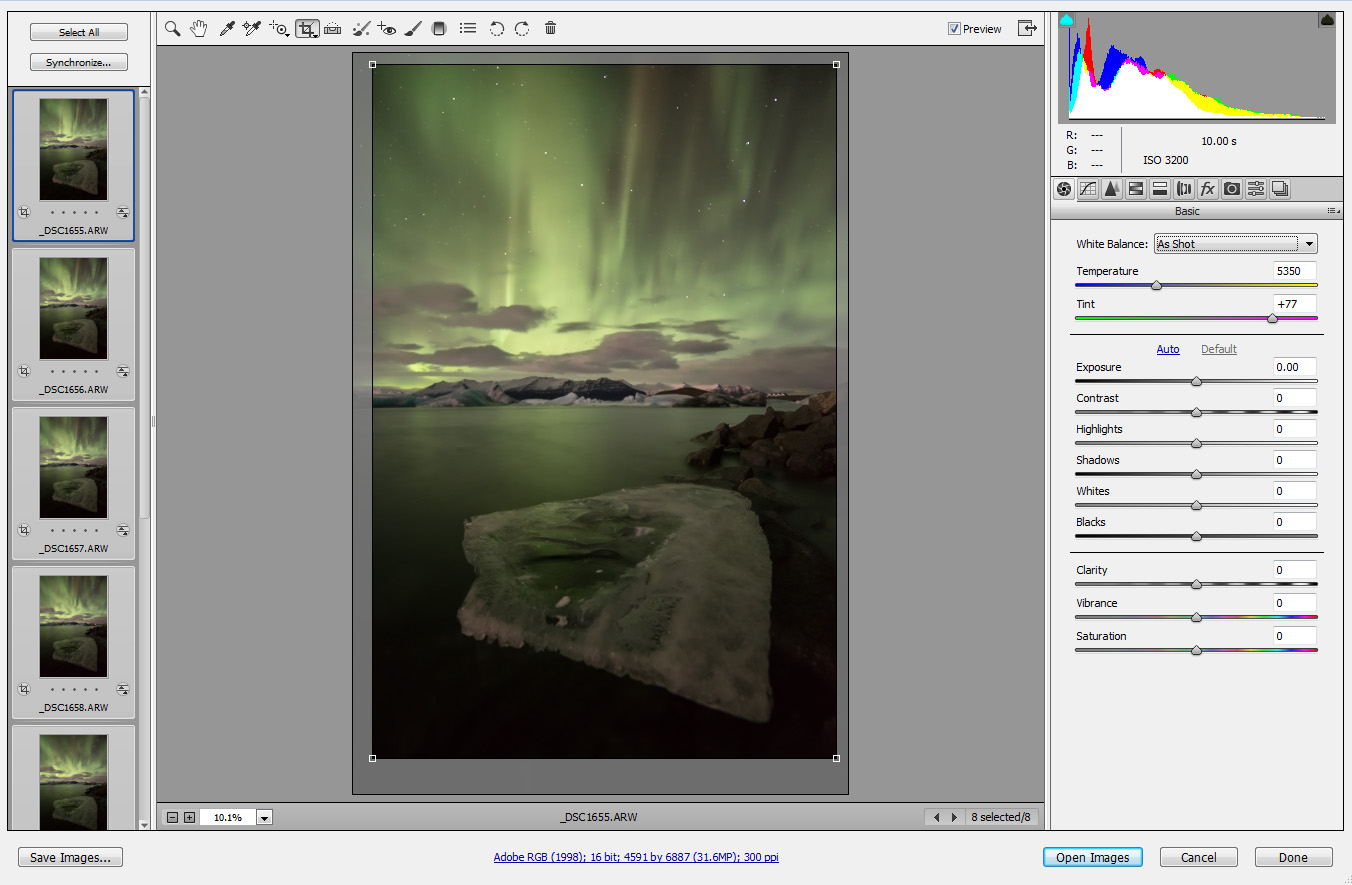
I also performed some additional corrections, such as brightening the shadows, adding clarity and removing some of the vignetting.
Next I uploaded the 8 images as layers in a Photoshop project (File->Automate->Photomerge). This is required since focus shifting changes magnification a bit, and so the images need to be properly aligned before stacking.
Next begins the actual stacking process. In images like this, I prefer doing the stacking completely manually. I.e., use the eraser and delete the part of the uppermost layer that's not used in the final image, then merge the two upper layers, and repeat with the layer beneath, and so on. I'll show an example to make it simpler to understand.
The project initially contains 8 layers. I'd like to delete the unusable part of the top layer. This layer is in sharp focus only in the background (sky and mountains), so I'll delete the foreground from this layer and expose the layer underneath.
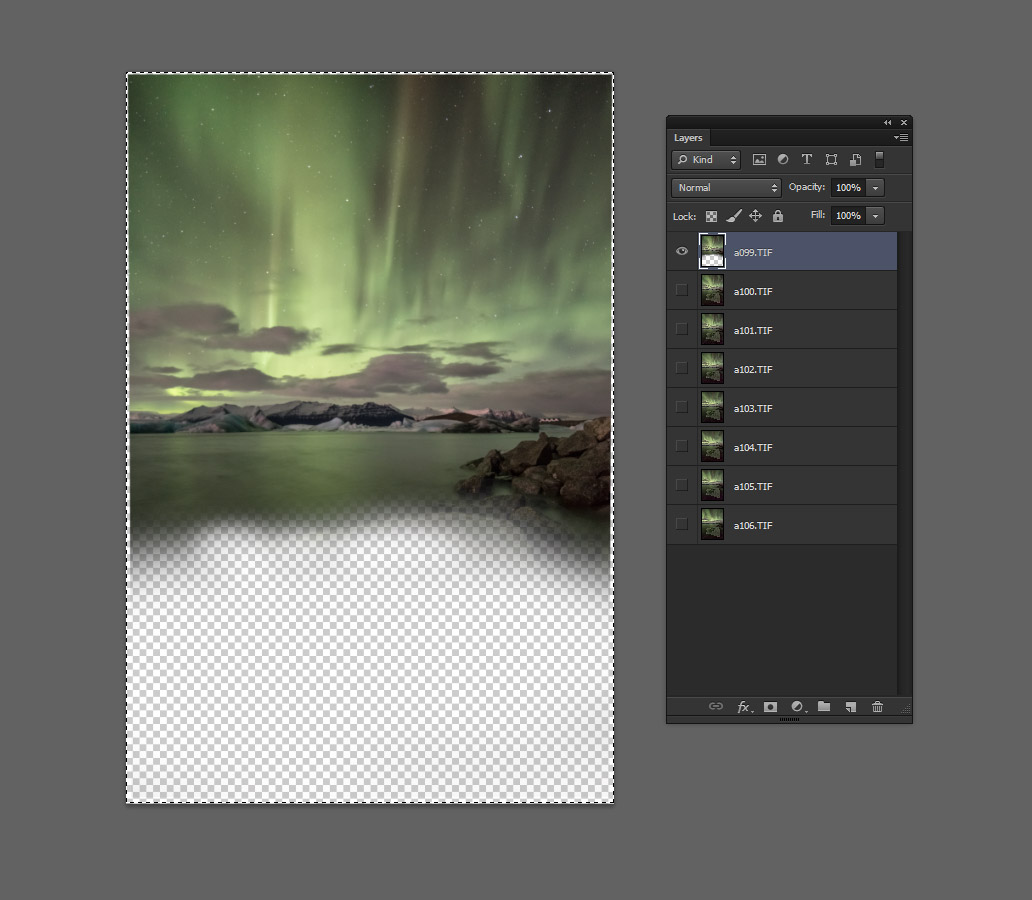
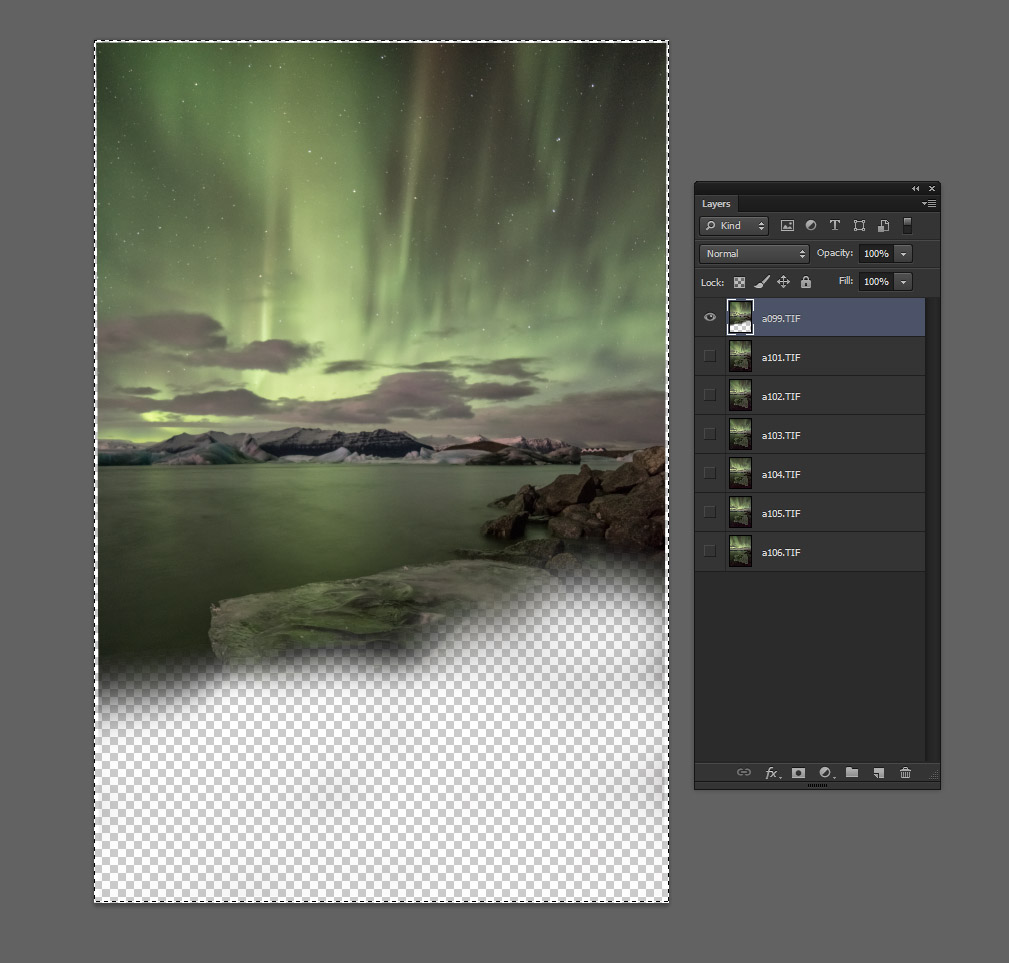
When I was done deleting in one layer, I merged it with the one beneath it. The process continued, albeit with less of the image erased in each iteration, until I was left with one layer where the image was focused throughout.
In the end of this procedure, I got the following focus-stacked image.

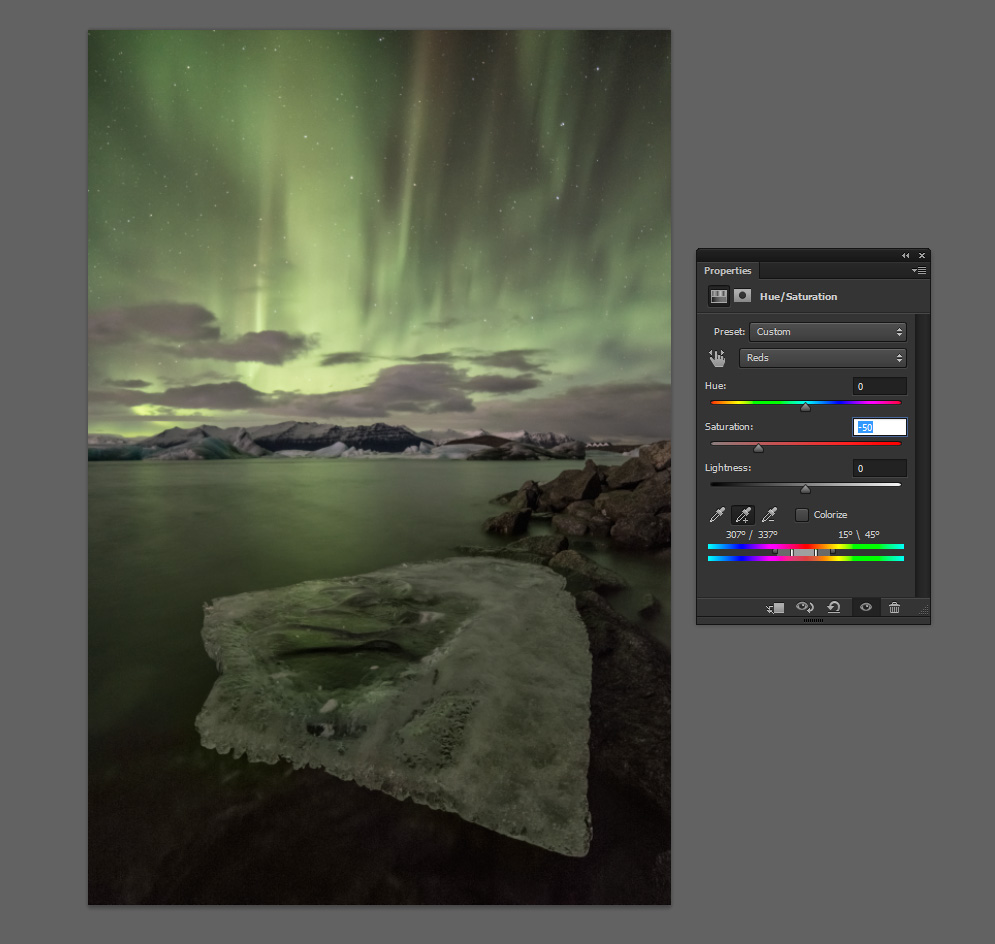
While it's looking good, there are a few minor things I still need to do here. The local contrast in the sky area needs a small boost, and the piece of ice needs to be much more prominent, since it's the main subject. In addition, the red color cast on the mountains (probably caused by artificial ambient light) needs to be dealt with. Here's what I did.
First, the cast. This is very easy to deal with. I just added a hue/saturation adjustment layer, sampled the red on the mountains and knocked its saturation down. This solves the issue immediately.
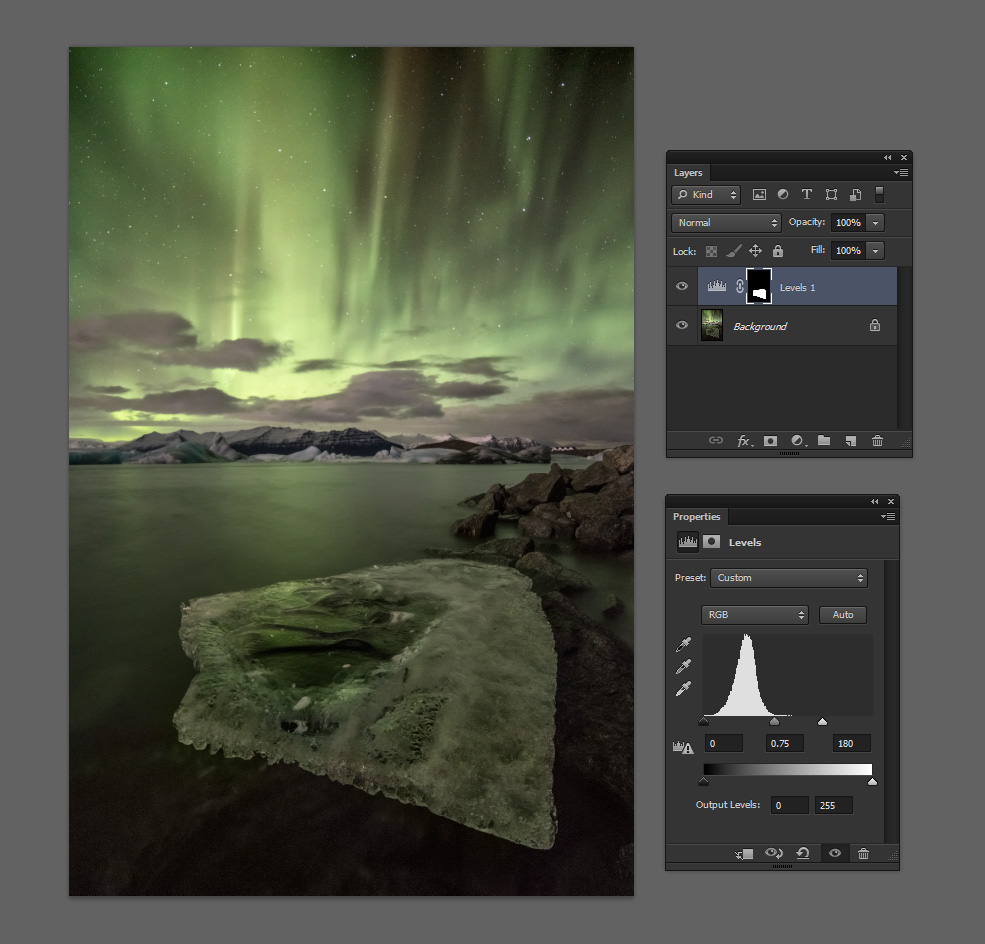
After flattening the image I went on to the sky: I selected the area needing a contrast boost using the quick selection tool and refined the selection to avoid hard edges. I then added a levels adjustment layer and used it to enhance the contrast.
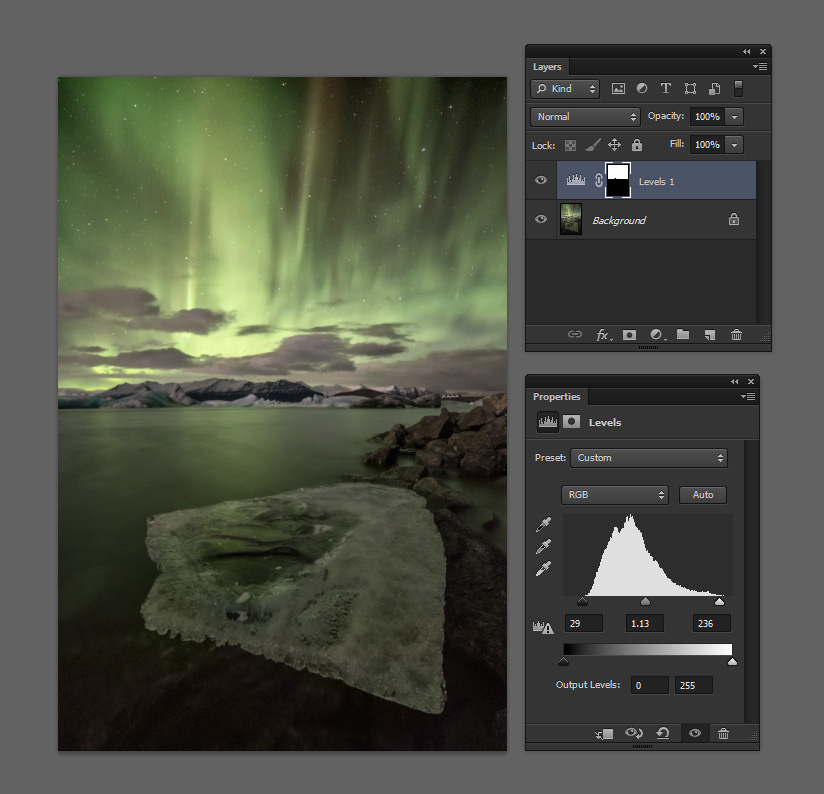
The final mission is to bring out the piece of ice. Again, I selected it using the quick selection tool and refined the selection to avoid hard edges, and then boosted the contrast using levels.
That's about it! I flattened the image, performed size reduction and sharpening, converted to sRGB for Internet viewing and I was done.