Erez Marom Photography
Shooting Kīlauea Volcano, Part 1: How to Melt a drone
Posted on 6th December, 2017 - Back to Blog Listings
In October this year, I spent 2 weeks shooting in Hawaii. My first stop was Big Island, where a friend and I shot the lava flows of Puʻu ʻŌʻō—a volcanic cone in the eastern rift zone of Kīlauea, a currently active shield volcano in the Hawaiian Islands, and the most active of the five volcanoes that together form the island of Hawaii (commonly known as Big Island). The Puʻu ʻŌʻō crater has been erupting continuously since January 3, 1983.
I had booked my flights (about 22 net hours per direction!) to Hawaii before I knew of the lava situation, but a friend told me that there were good inland flows so I kept my hopes up. Still, I went there knowing I could fly all this way and get lousy conditions. Volcanoes are unpredictable, and Kīlauea is no different. For example, as I'm writing this, the Ocean Entry is devoid of any flowing lava. The surface flows come and go. Some say Pele (the Hawaiian goddess of fire) does as she pleases.
I did not get lousy conditions. Instead, I got the most incredible lucky streak I could've imagined, which helped me produce a set of images I'm very happy with, and encouraged me to write this mini-series I hope you enjoy. I'll start it with an article about shooting the lava with a drone.
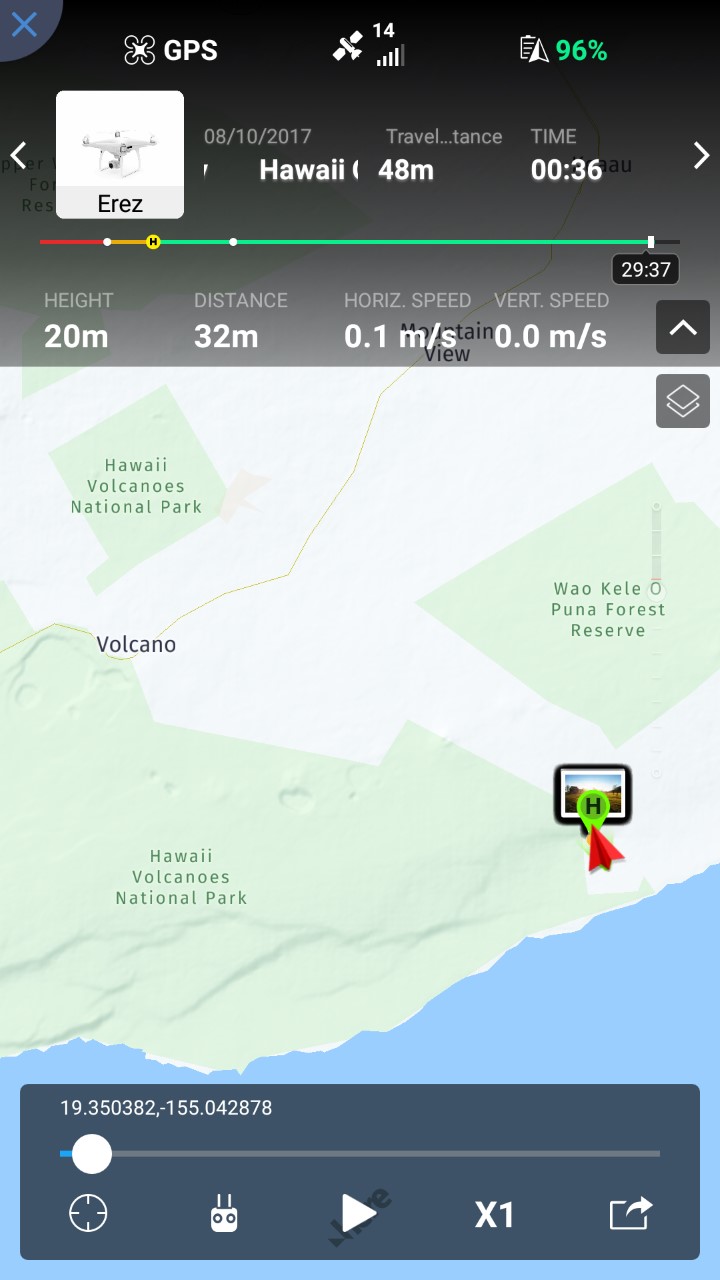
Before I continue, here's a very important statement. All of these drone shots were captured outside the Hawaii-Volcanoes National Park No-Flight Zone and within FAA drone regulations (line of sight, 400ft, not operated near manned aircraft), without exception.
Flying drones in national parks is strictly prohibited and can get you in very serious trouble (rangers roam the park and its boundaries and some of them arrived when we were shooting). Moreover, responsible flight is mandatory since there are helicopters flying nearby. Naturally, I didn't fly my drone anywhere near the height the helis fly at. Don't even think about doing that if you care about other people's lives and your own. I highly recommend hiring a good local guide, who can assist you with determining if you are on park grounds.
The day after landing in Hilo Airport in Big Island, Hawaii, we met our guide at 14:00 in the afternoon, and started the hike. It wasn't an easy walk—we had to traverse about 7-8 kilometers on uneven, hardened lava to reach the surface flow area. Luckily, it was cloudy but not rainy; if the sun had been shining right on us the experience wouldn't be as nice, and rain would have been very annoying as well.
The hike took about 2 hours, give or take, and I carried all of my DSLR equipment, my drone with several spare batteries, and 2 liters of water on my back (after drinking 1.5 liters right before heading out). I'd take 3 liters if I were to do this hike again, as I ran out of water at some point in the late evening.
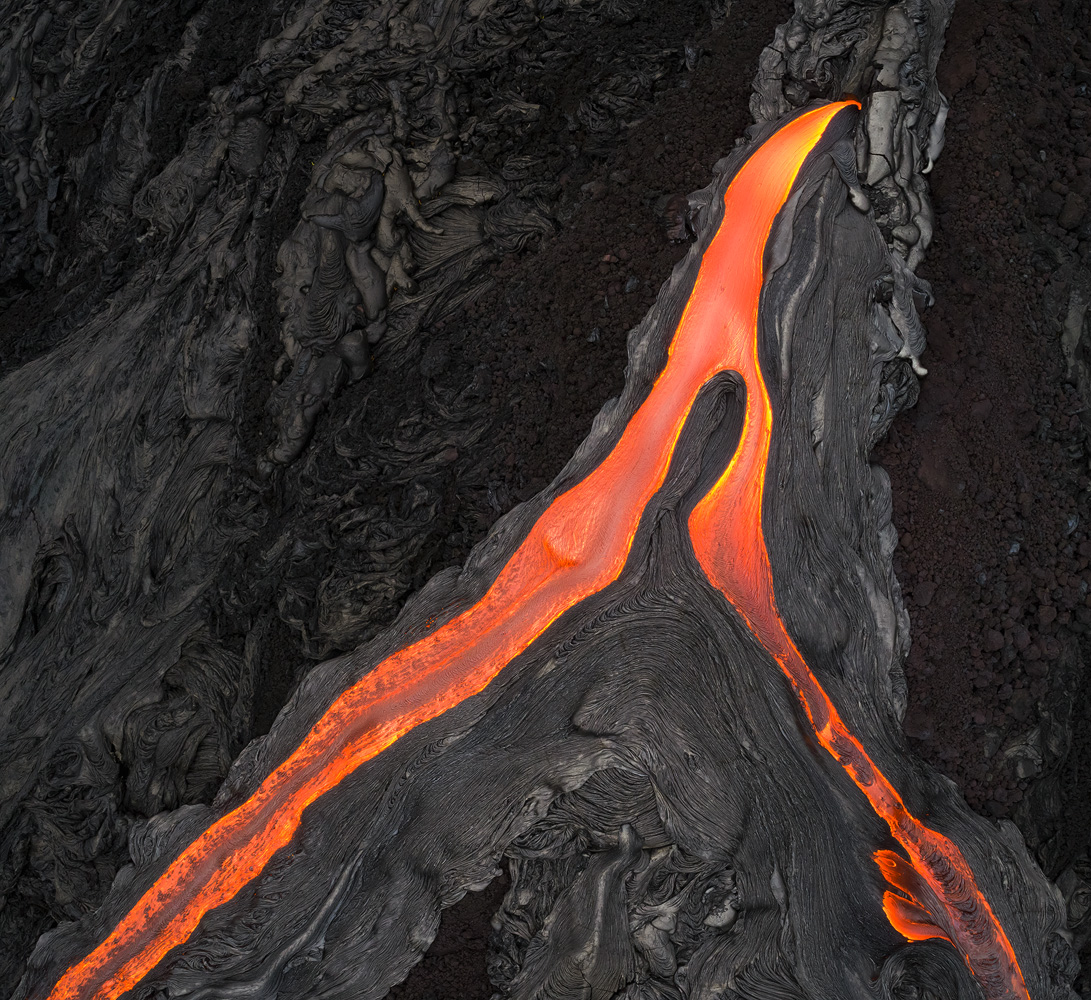
We reached the lava at about 16:00, and apart from one other person, we had the place to ourselves for the next 2 hours before the tour groups came. I began to scout around and test how close I could get to the lava, and at the same time, started flying and shooting with my Phantom 4 Pro.
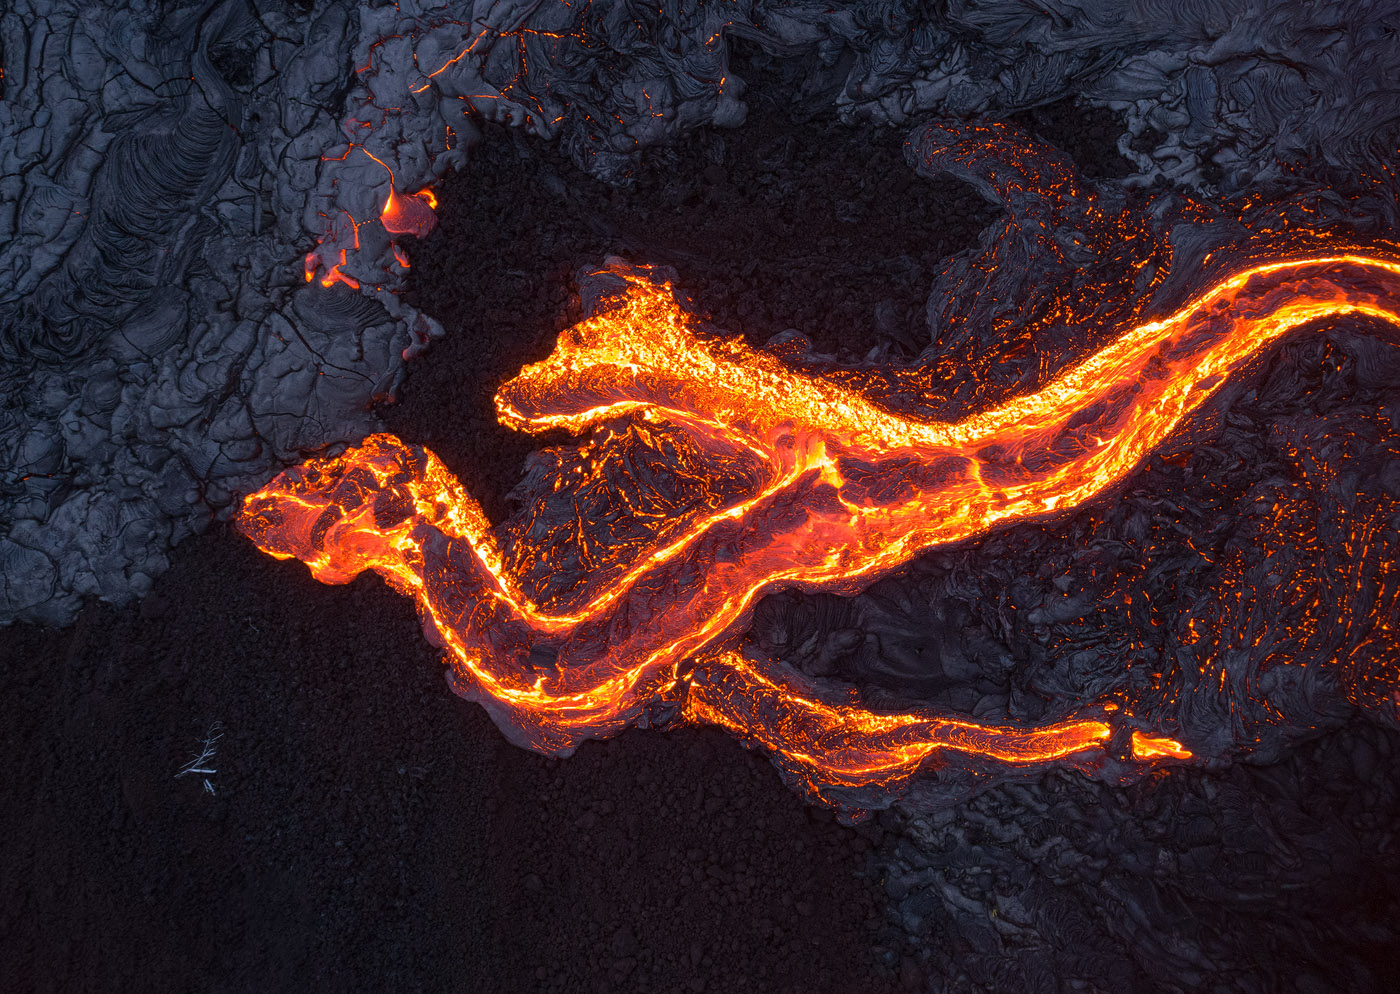
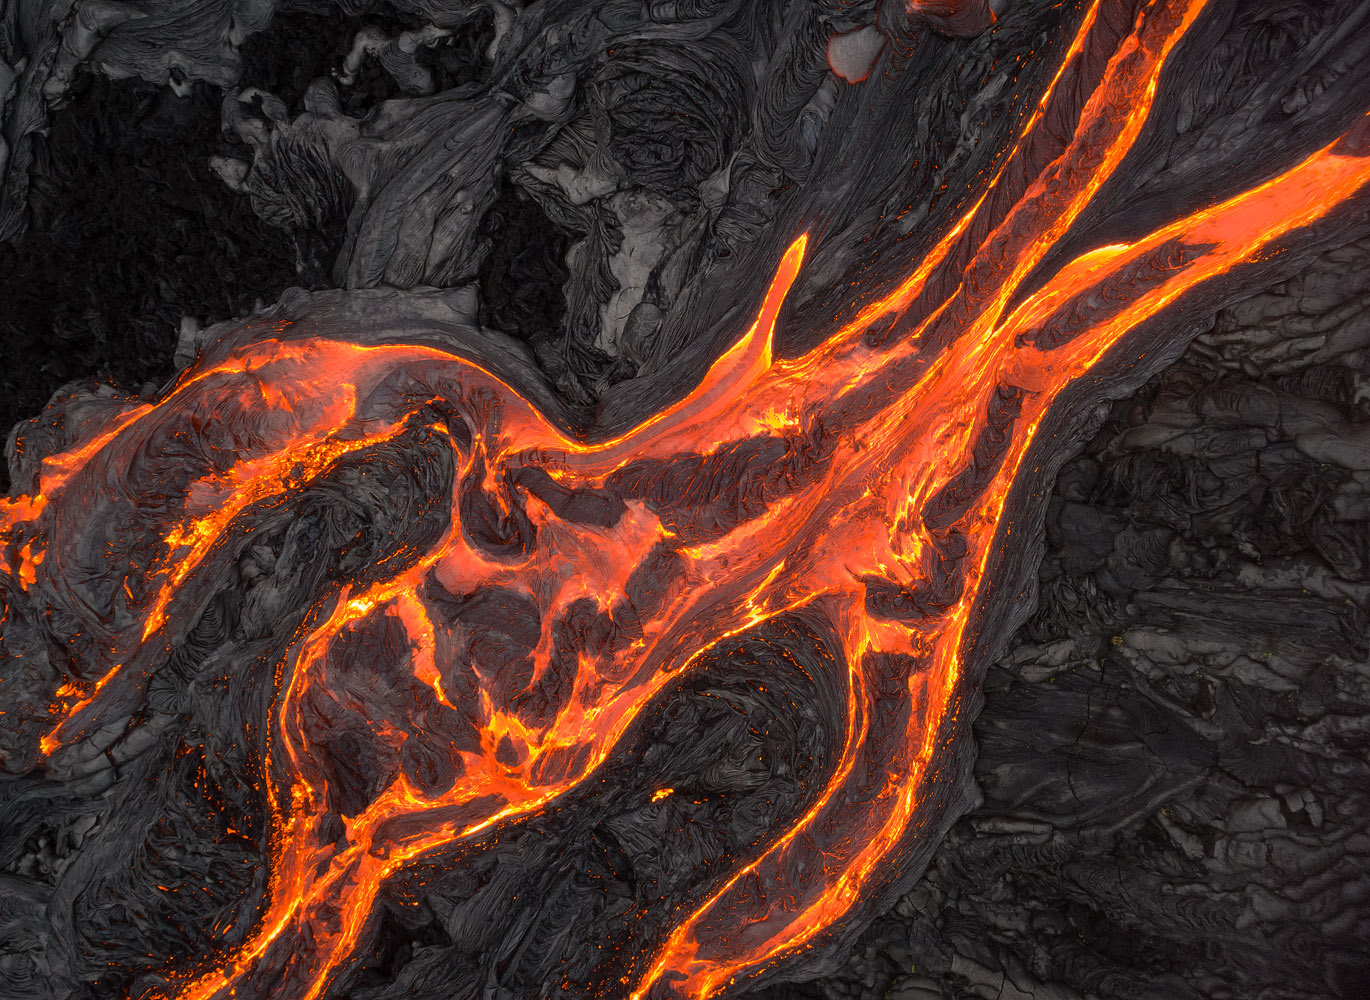
The lava had been flowing beautifully since before we arrived, but about an hour into our visit, I started hearing people shouting, and my friend screamed at me to look to the right.
I couldn't believe what I was seeing: one of the lava rivers quadrupled in force, simply bursting a huge mass of lava straight out of the mountain side, and flowed, diverging and converging, down the slopes, right in front of our eyes.
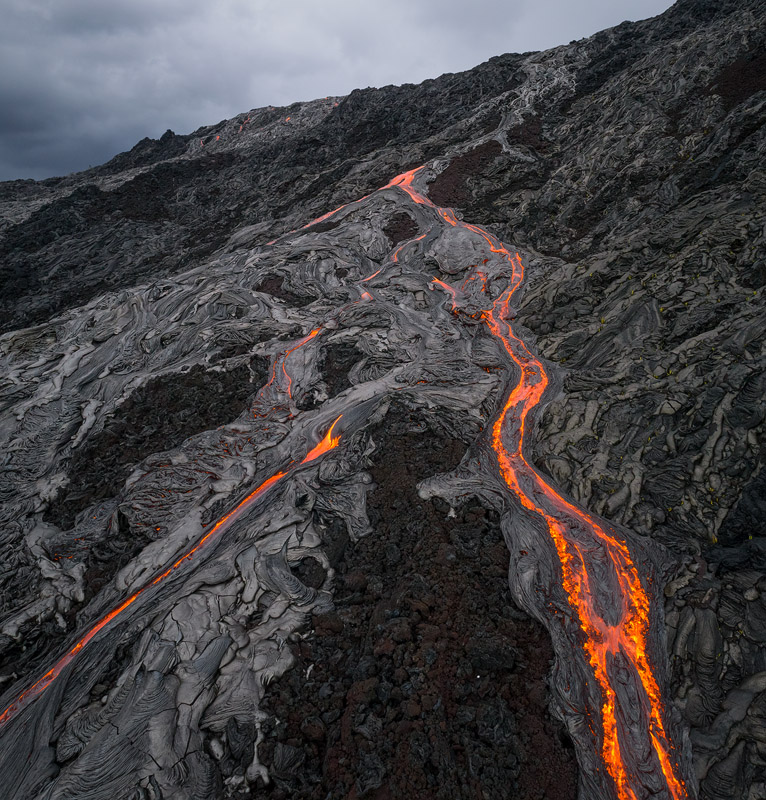
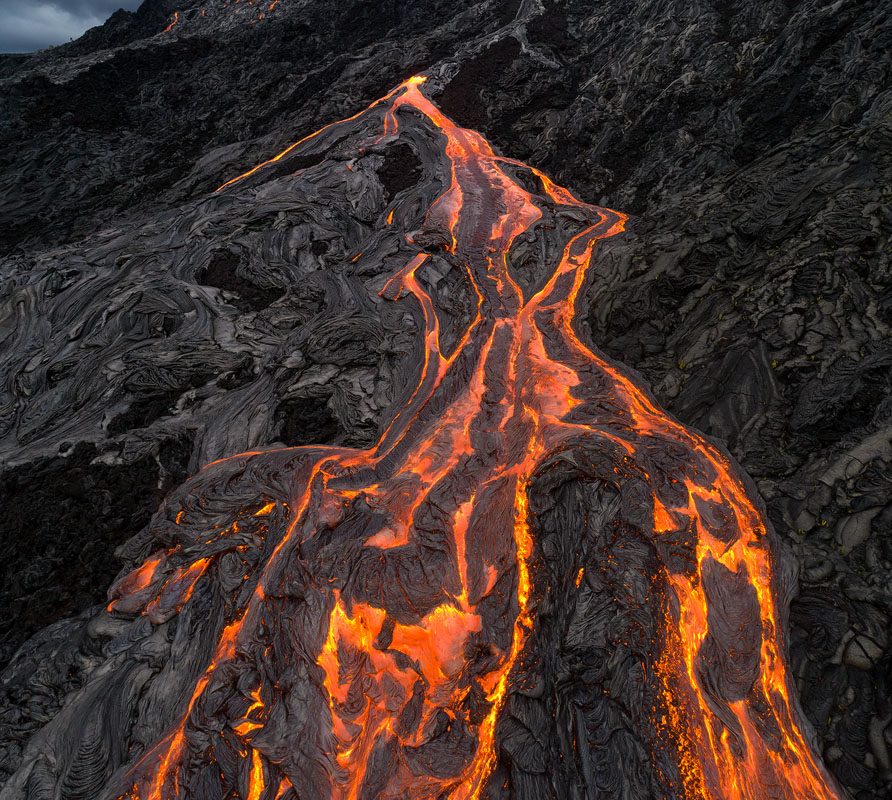
I continued shooting with the drone and with my DSLR. Here are 2 more shots:
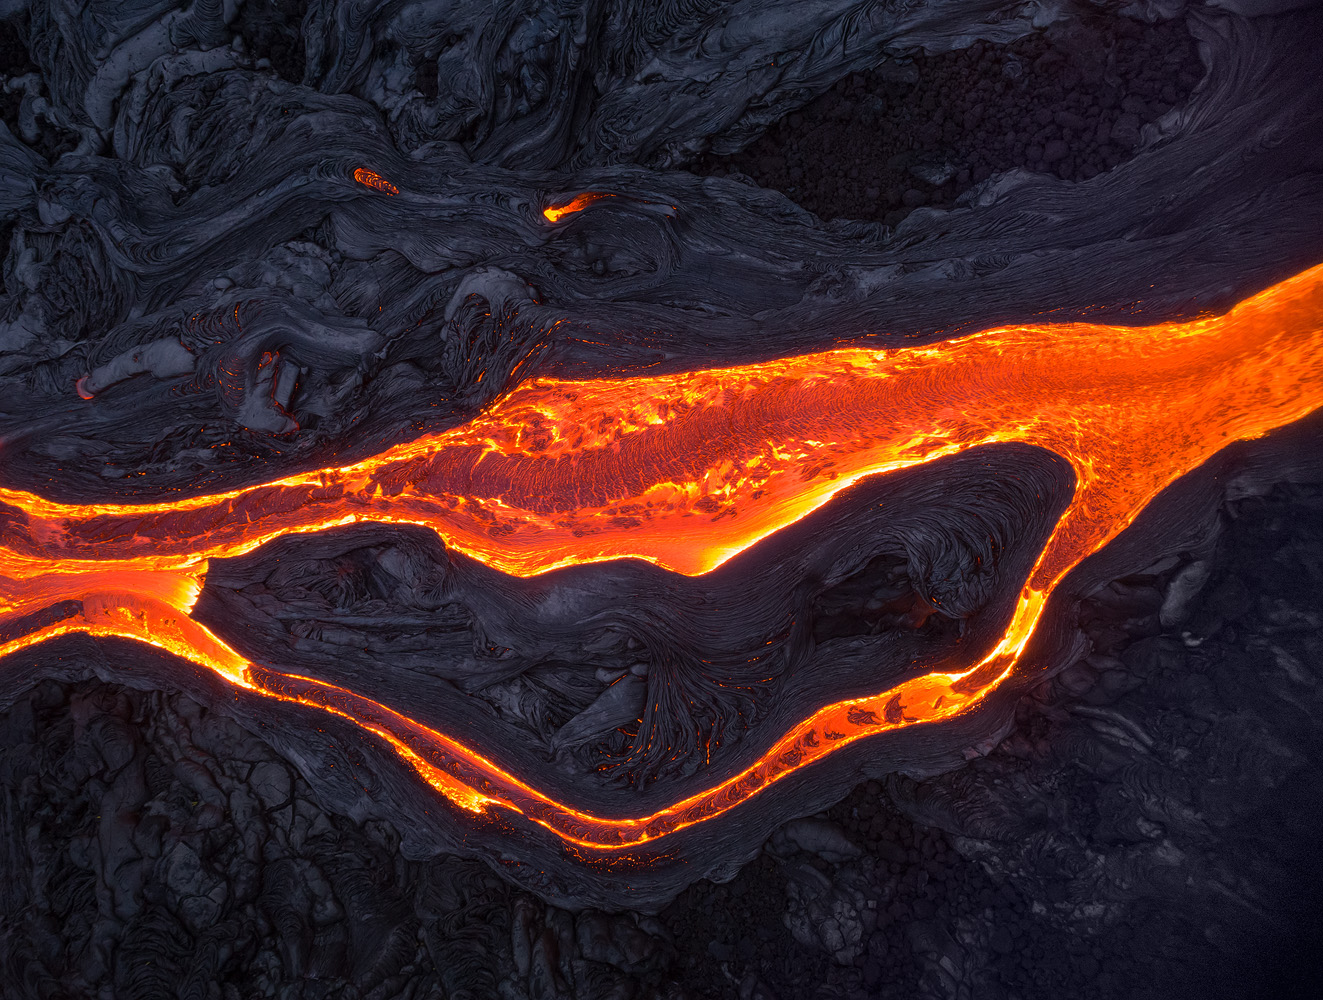
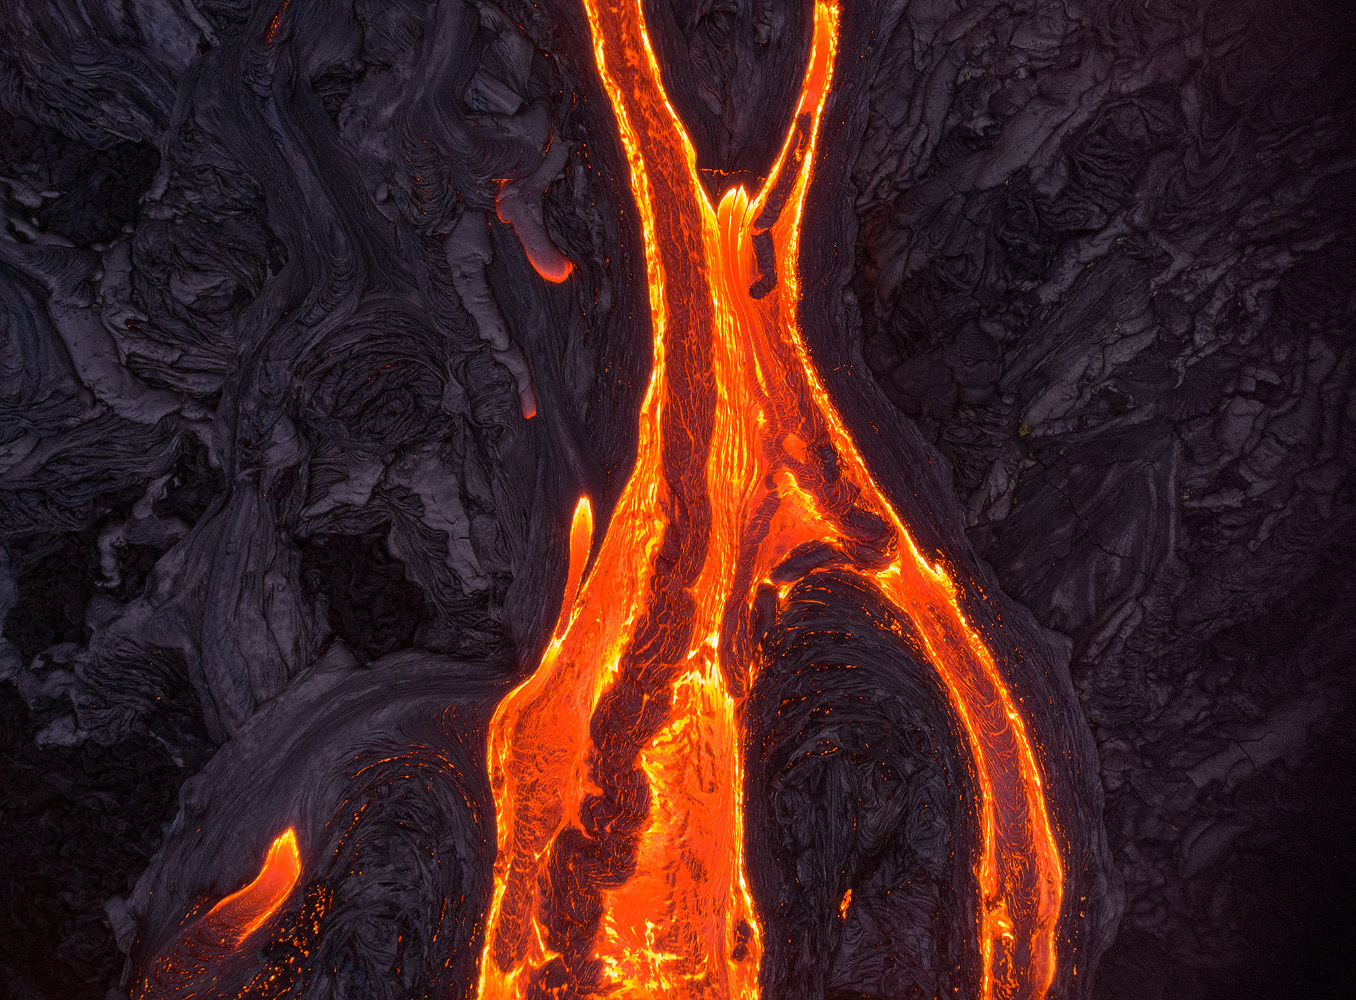
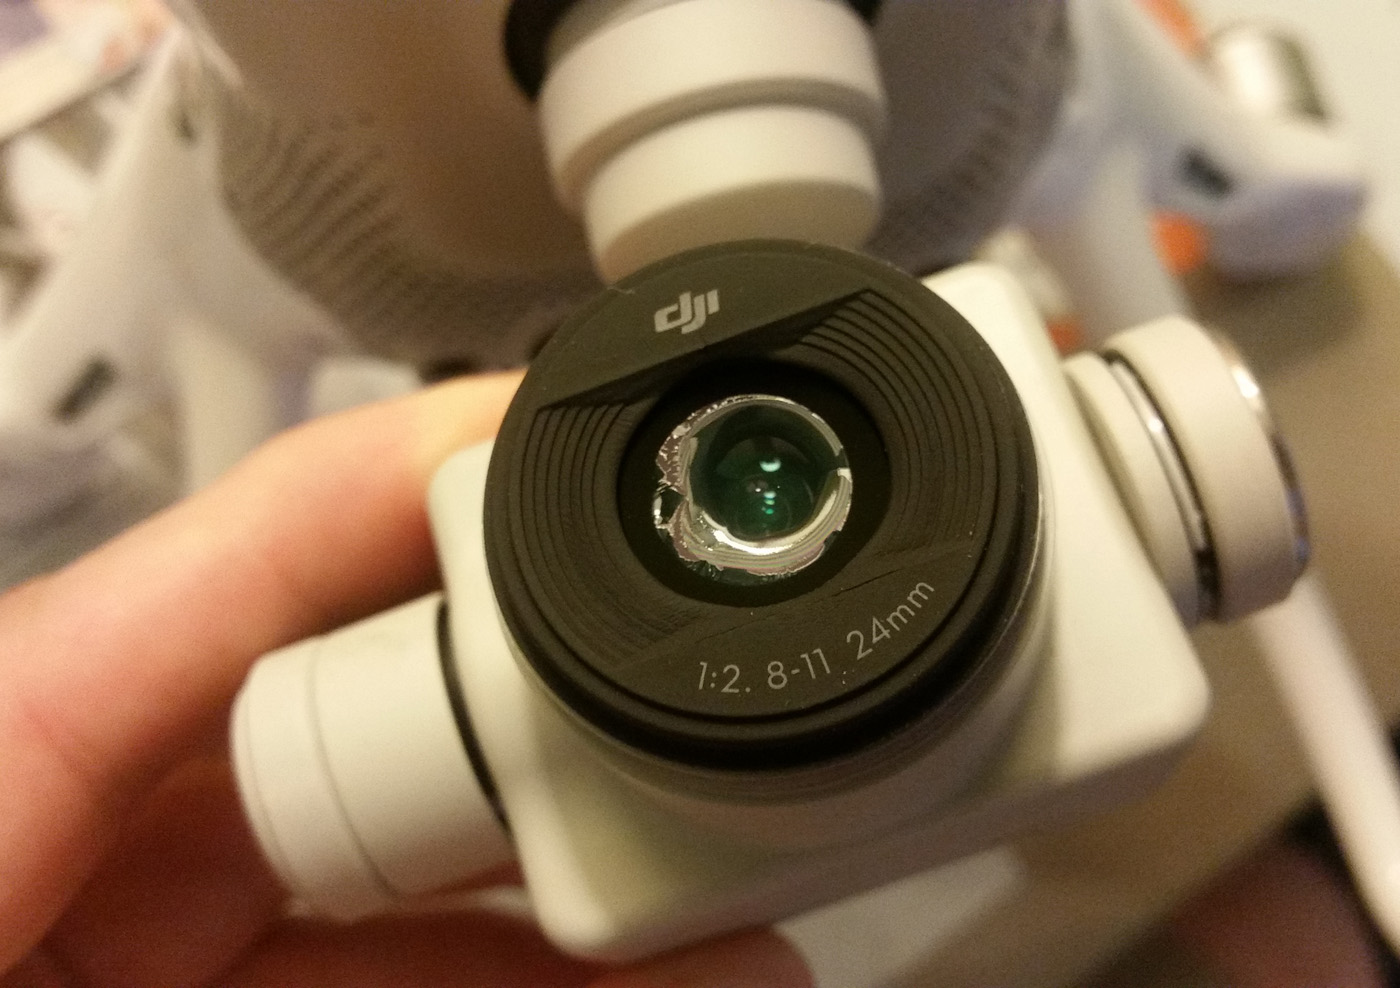
At some point I was noticing the right side of the drone images was getting darker. I continued shooting but when I went back to the apartment, I was surprised to see the plastic inside the drone camera had melted!
It appears that I was so enthusiastic that I kept getting closer and closer to the lava to reach the compositions I wanted—that was the source of the dark patch. If you watch the video I attached above carefully enough, you'll be able to see the right side growing continuously darker.

Shooting lava with a drone was an exhilarating experience, even though I managed to melt it. There aren't many technical considerations I can give you apart from watching the histogram, since global contrast can be harsh when it's dark. The sun goes down fast in Hawaii, so make sure you use your time wisely—the really good light is short-lived.
If you're reluctant to get your drone molten, be careful getting too close to the lava. For me, getting the right compositions was very much worth it. It was also a really captivating story, and my lava shots were all over the internet these last few weeks. There's good to find in everything, I guess. DJI charged me about $450 to fix it, and the National Geographic article alone paid more than that, not to mention multiple licensing deals.