Erez Marom Photography
Article: Behind the Shot - Shredded
Posted on 29th October, 2014 - Back to Blog Listings
In this article in my 'Behind the Shot' series, I'll tell you about an unusual image I took in Iceland.

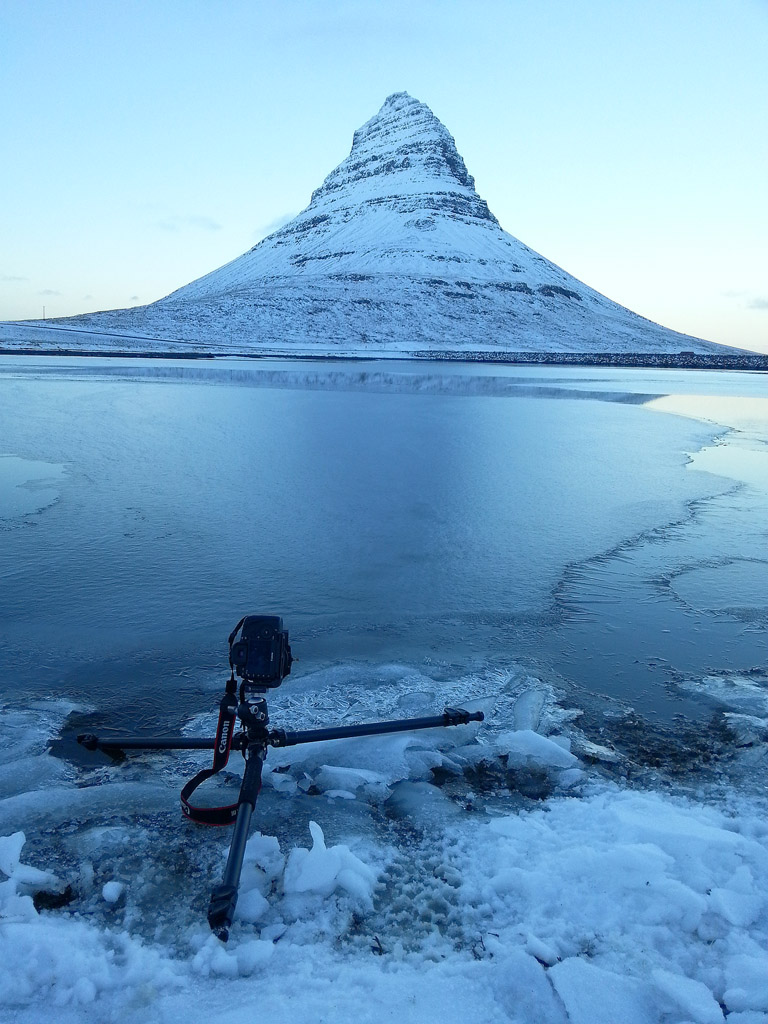
The image shows the ice shards on the bank of a shallow, ice-covered lake very close to Kirkjufell (Icelandic: Church Mountain). I visited Kirkjufell in 2013, while scouting locations for my 'Winter Paradise' workshop. The mountain is situated a short distance from the quiet town of Grundarfjörður, in the north of Snæfellsnes peninsula in west Iceland. Nicknamed 'Pyramid Mountain' due to its shape when viewed from a certain angle, from this angle it looks more like a wizard's hat.
LOCATION AND SETUP
The majority of the images taken of Kirkjufell are taken from an angle emphasizing its pyramid-like shape. I was looking around and found the interesting foreground in a place forcing me to shoot from this less-classical angle. The good thing is that the mountain has a more symmetric shape when viewed from this direction, and this symmetry has an important role in the image, to which we'll get later.
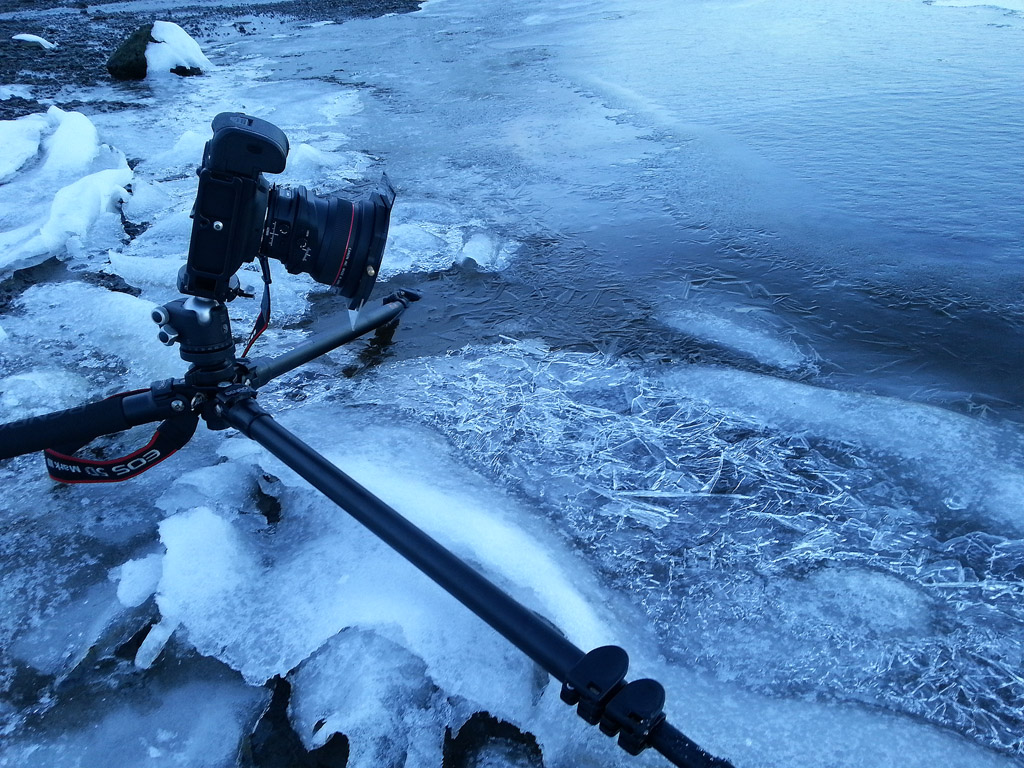
The most interesting feature in the image is, naturally, the ice shards in the foreground. It was a bit tricky getting close to the shards without ruining them, since the ice wasn't strong enough to hold the tripod and camera’s weight (not to mention yours truly!), so it was pushed down to the point that water started touching the shards and putting my precious foreground in peril. I solved the problem by placing one of the tripod’s legs in a hole in the ice crust, so it could be submerged without pushing the ice downward.
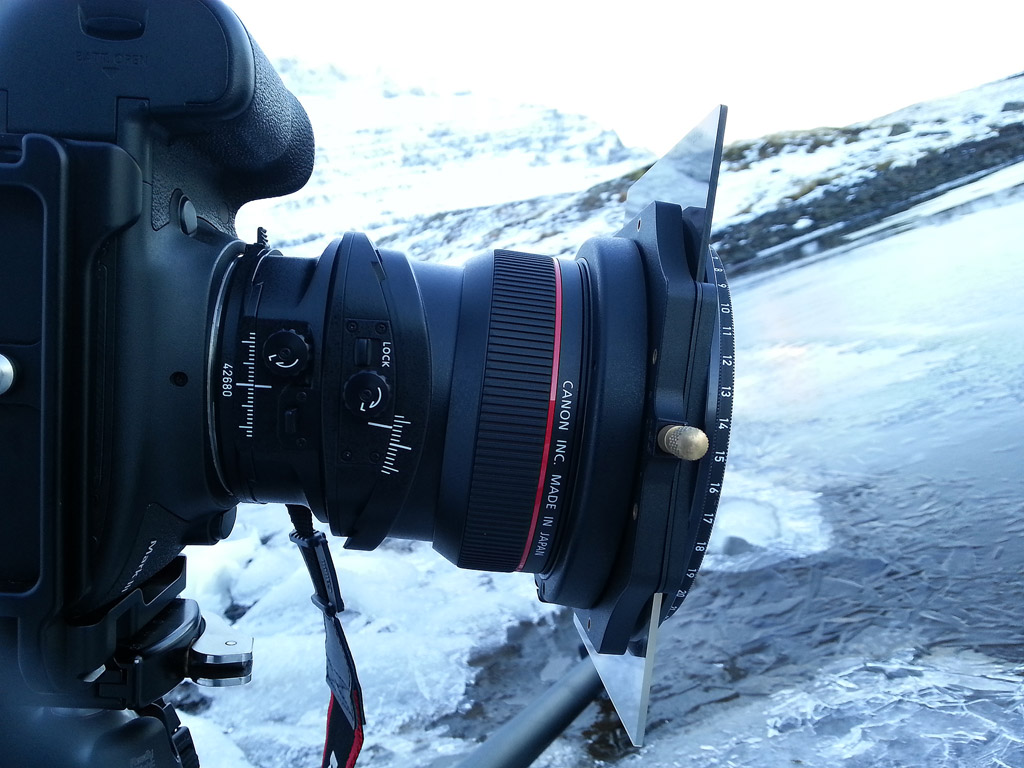
Another interesting thing about the ice shards is that they’re quite close to the lens. In order to get good focus on both the foreground and the mountain in the back, I had to use my Canon 17mm TS-E tilt-and-shift lens. By tilting the lens, I could change the orientation of the focus-plane, so that it was more or less parallel to the plane connecting the shards and the mountain. By doing this I got a super-sharp foreground, which is critical here. Since there wasn't much movement, I could have focus-stacked the image, but if possible I always prefer getting the image in one exposure, and the TS lens allowed me to do that.
Working with a tilt-shift lens isn’t easy, but once you get a feeling as to the amount of tilt needed for each shot, the process of adjusting the lens becomes fast enough for field-use. In this image I tilted the lens about 3.5 degrees downward.
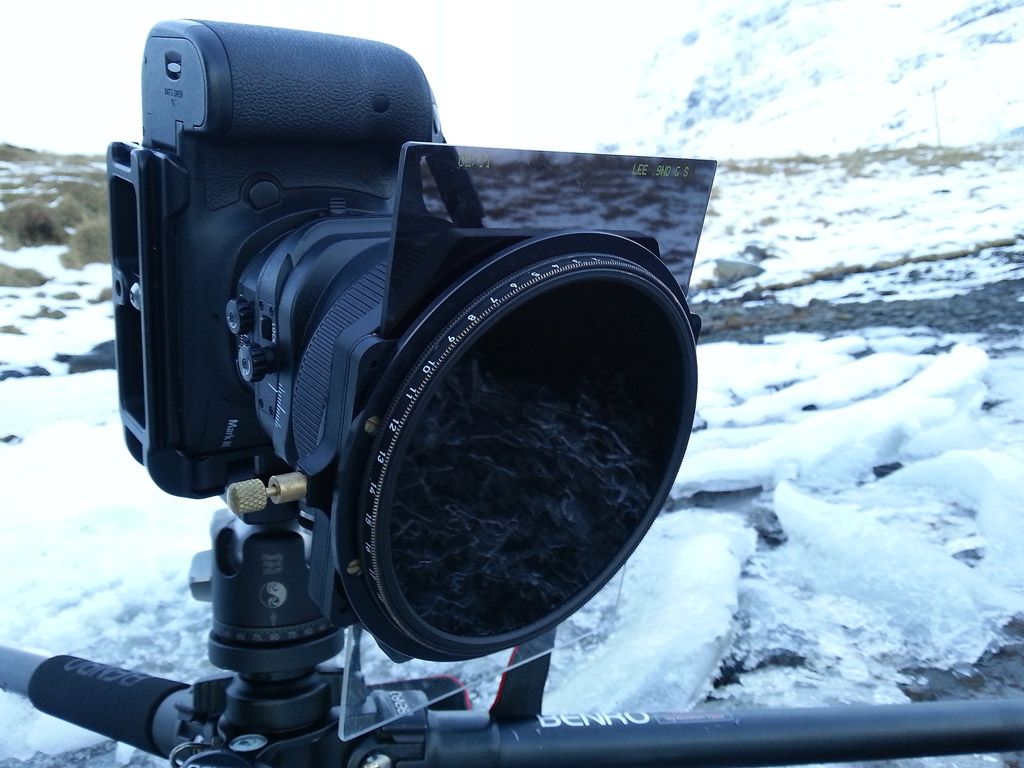
An important addition to my setup is a custom-built adapter, which allows the use of the Lee filter system on the (usually unfilterable) 17mm TS-E (this was long before Lee came out with their holder!). I was thus able to use a Lee 0.9 Pro Glass ND, a Lee 0.9 soft grad and 105mm Heliopan circular polarizer while tilting the lens to get the desired effect. The graduated ND filter served to balance the lighter sky, and the polarizer decreased the reflections on the ice, giving it a deeper, more saturated appearance.
As to image parameters, I used ISO 100 to get the best quality possible, and f/14 to get the corners sharp. This resulted in a 1.3 second exposure, but since I was shooting on a tripod, that didn't matter.
COMPOSITION
The composition of this image is very simple. There are two main subjects, the ice-shards and the mountain. Both are located in the middle, one above the other- seems straight-forward enough. Yet there is something deeper in the exact way I chose to place them in the frame. If you look more carefully, you’ll notice the mountain is not completely symmetrical: it’s facing right, just a tiny bit. The general sweep of the ice shards 'faces' left, at least in my eyes. So to make use of these tiny irregularities, I deviated from a perfect alignment, and chose to place both subjects just a tiny bit off-center: the mountain to the left, the ice-shards to the right. This way, I balanced the subjects' apparent 'directions' and created a more flowing image.

POST PROCESSING
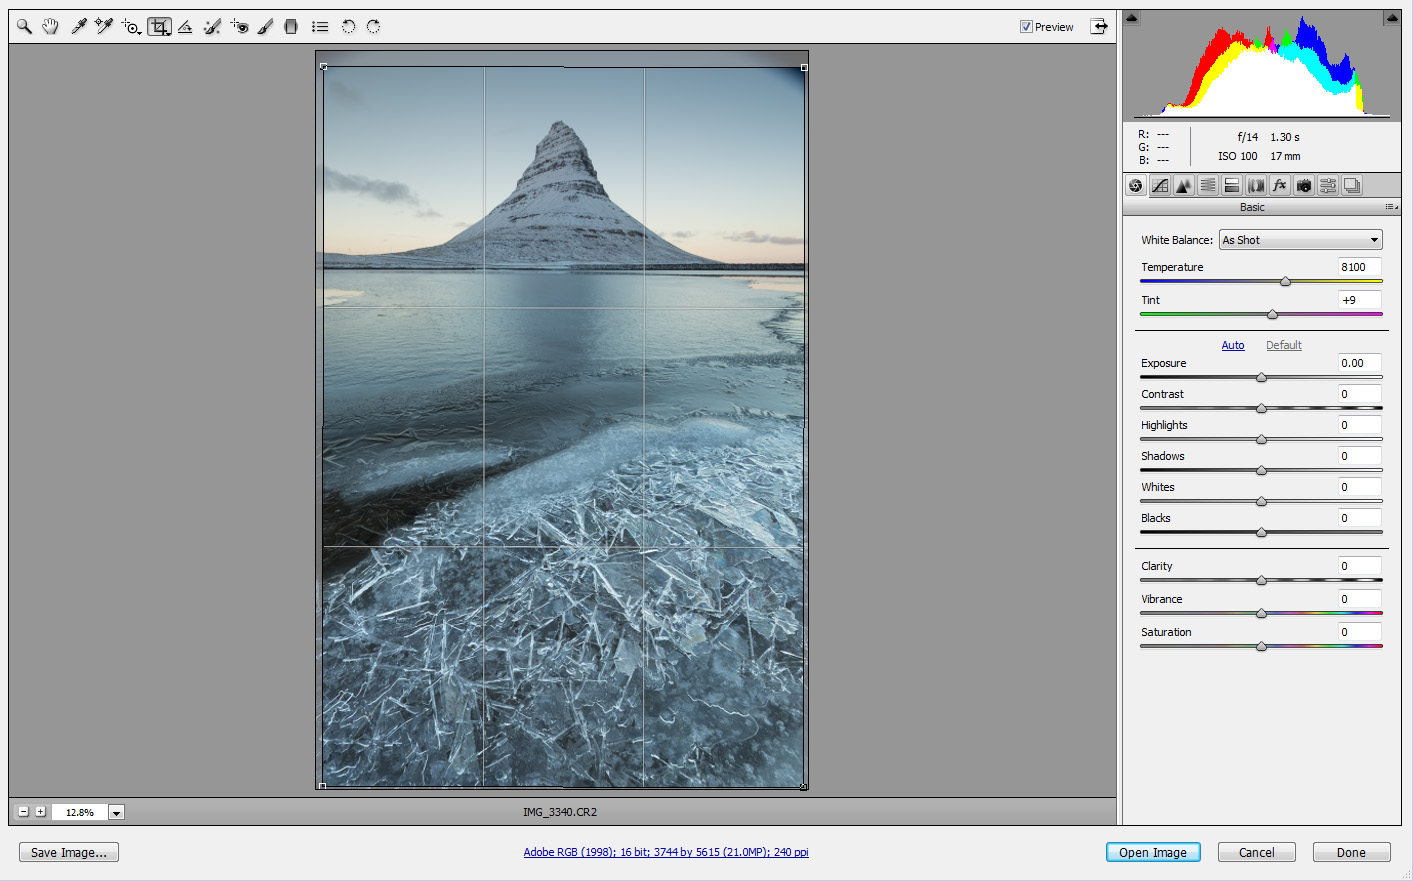
Here is the untouched Raw file. The thing that jumps immediately is the black corners, resulting from use of the filter system with the custom adapter, together with the tilting of the lens. I got rid of that easily in Photoshop, but a few other things came first.

First, cropping. I took a bit off the top and left of the image, to get the balance just right. Then came a few global adjustments. I pushed the tint slider a bit to the red side to counterbalance the greenish colors. I also added some contrast and clarity to make the whole thing look crisper.
I also applied some local adjustments in ACR, which I’ll quickly survey. Let's look at the image below. The top 3 pins are very minor adjustments to the exposure and contrast of the top part of the image and to its boundaries. They made a small difference but more important is the lower pin, which is shown together with its mask (red area) in the image below.
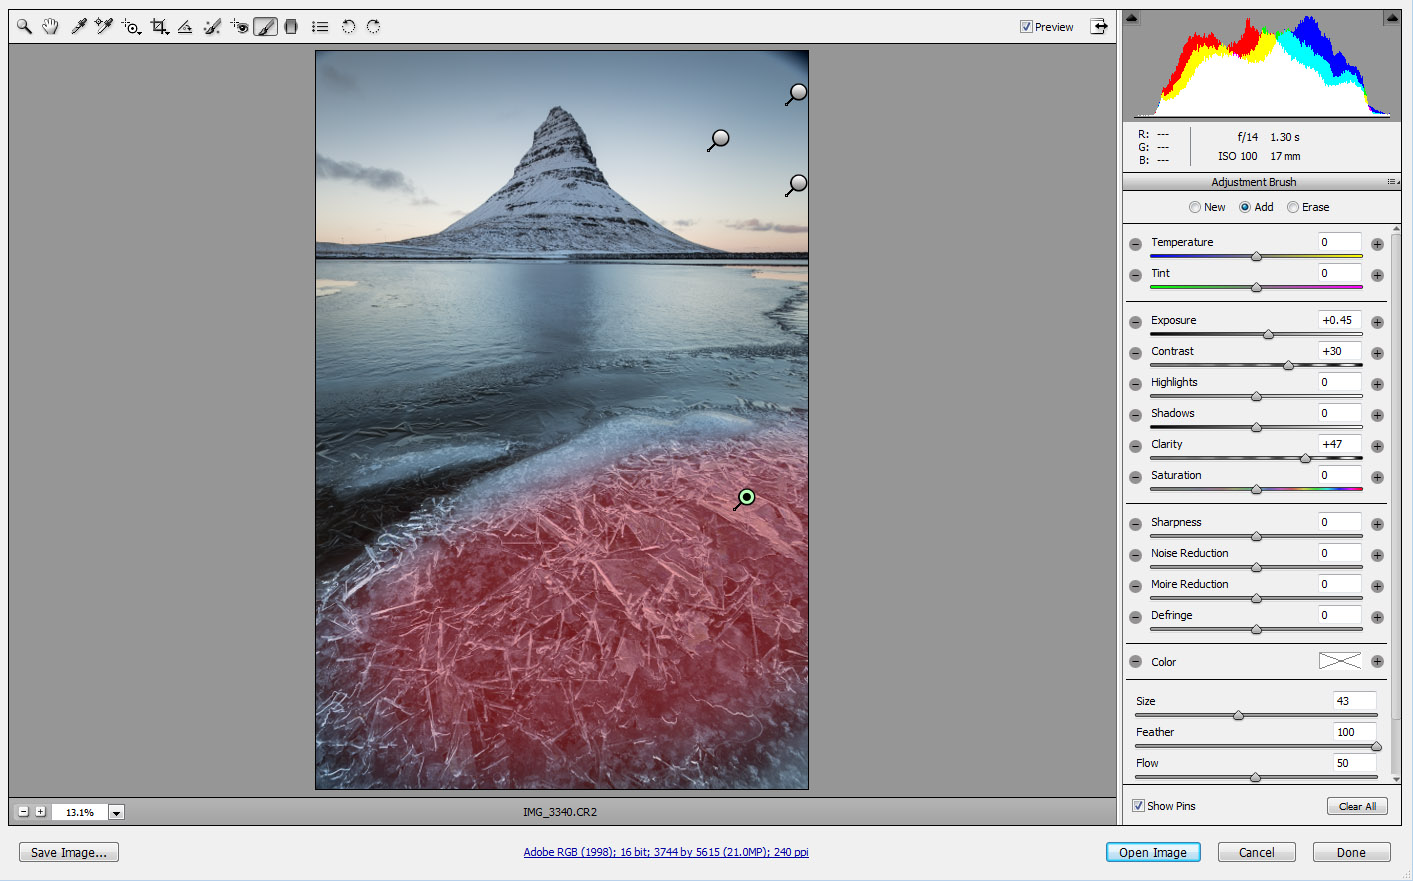
This adjustment basically makes the ice shards much more defined by boosting their contrast, clarity and brightness. This serves to enhance the icy look and draw more attention to this (quite special) foreground subject.
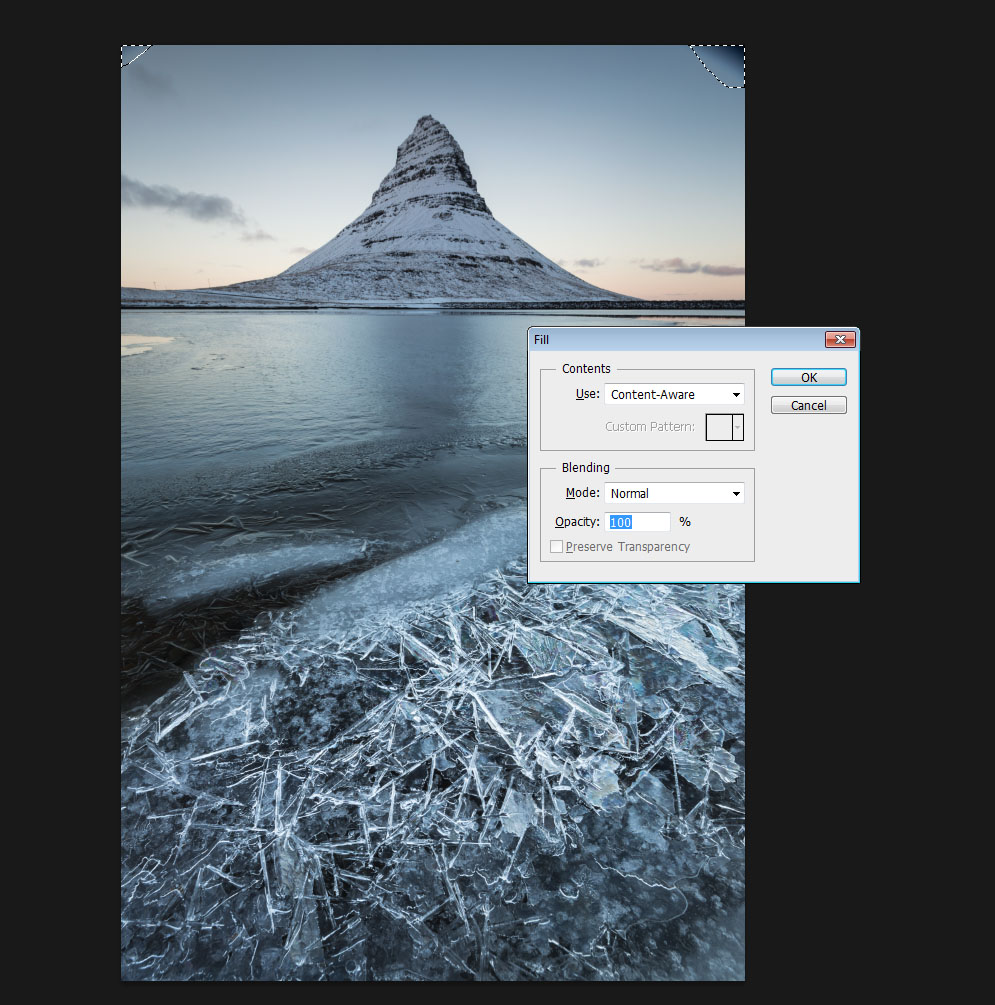
After finishing the Camera Raw work I saved the image as a TIFF file and went on to Photoshop. The first thing I did was get rid of the black corners caused by the filter holder. I selected the two corners freely using the lasso tool and used content-aware fill to get the sky to fill the corners.
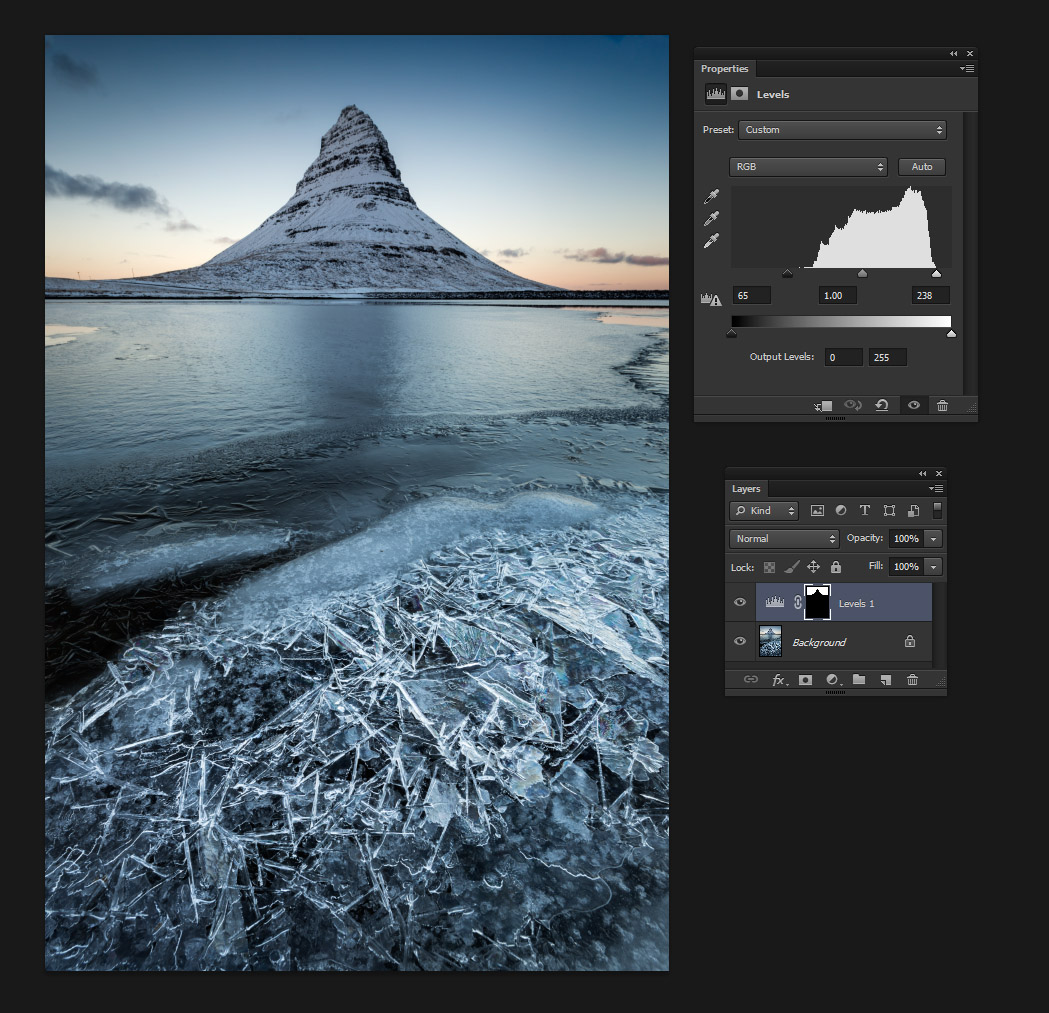
I then used a levels adjustment layer to balance the histogram. There werent any true blacks so I tweaked the input levels to counter that.
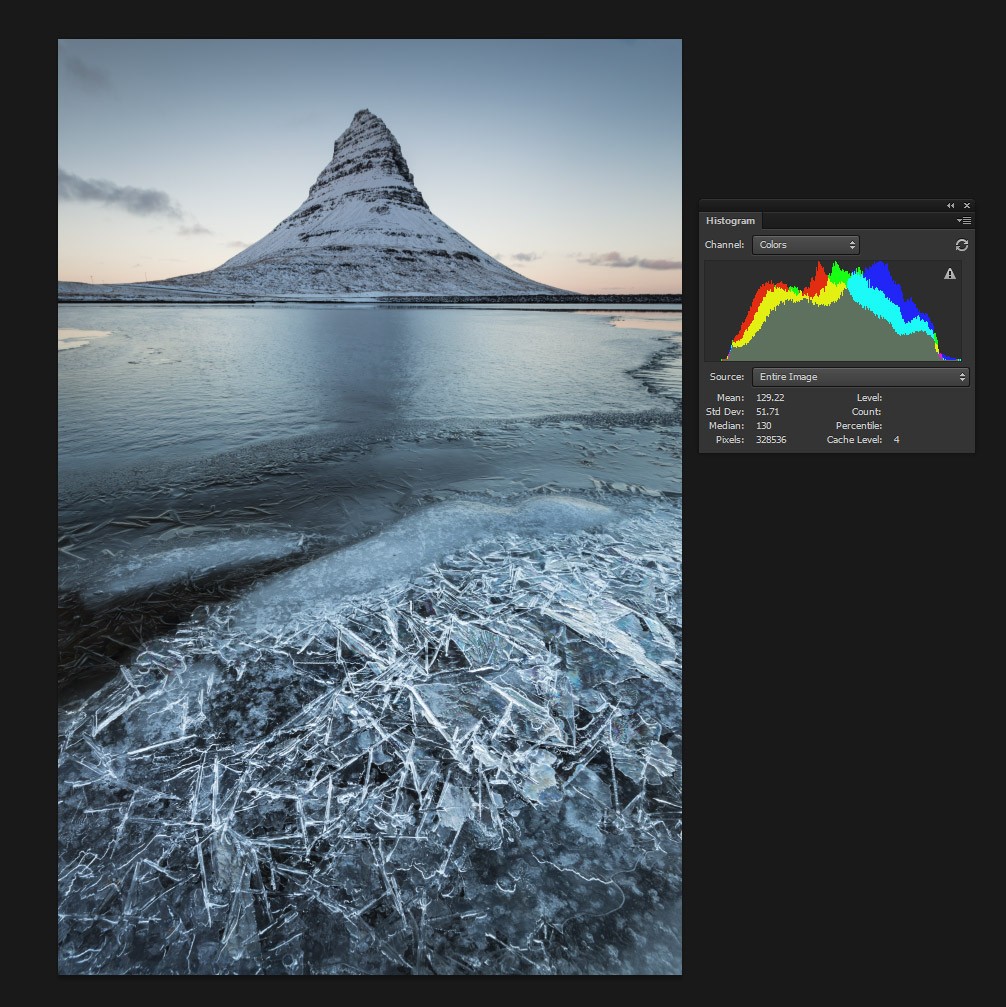

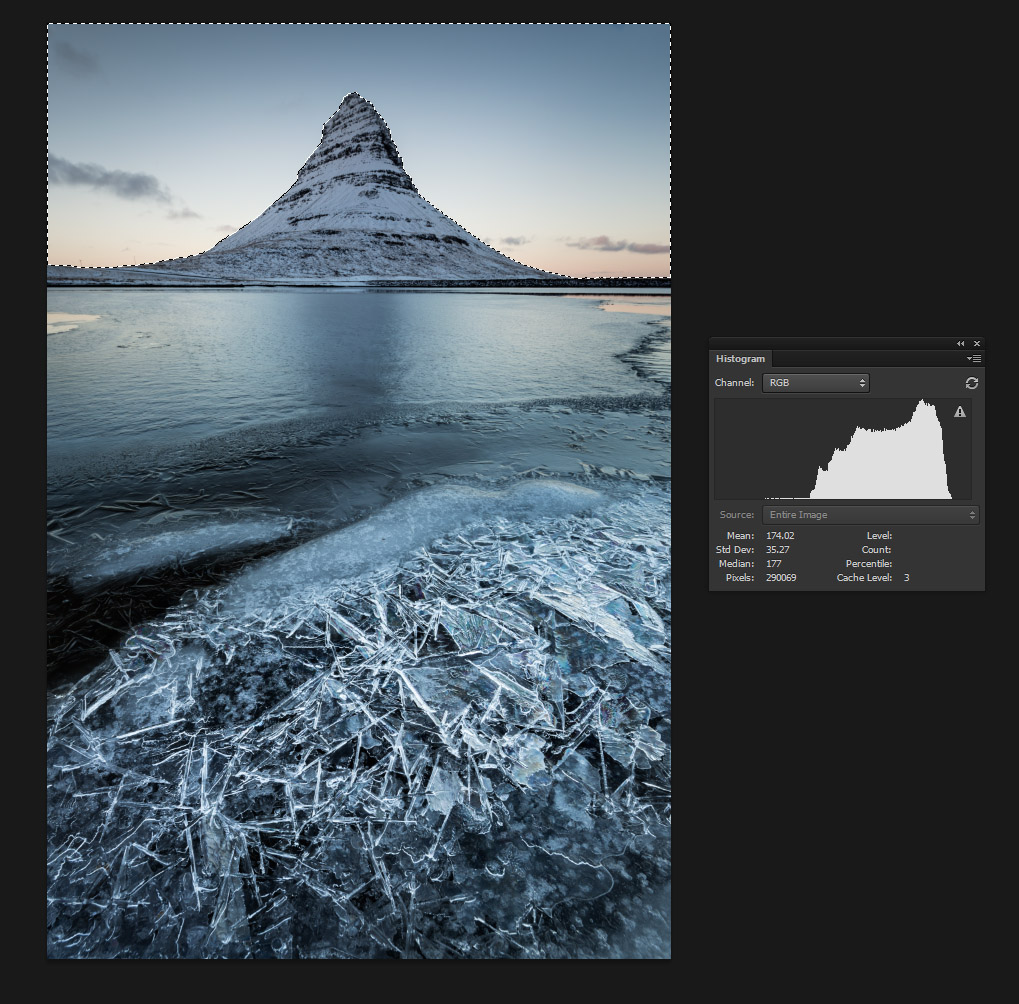
In addition, the sky didn’t look too great as it lacked contrast and detail. I chose to deal with it using selective processing. I used the quick-selection tool to create a selection containing only the sky (you should always use the refine-selection tool to make sure this doesn’t result in bad-looking borders), and added a second levels adjustment layer to boost the contrast in the sky.
The final touch was adding some saturation, converting to the sRGB color-space for internet viewing, size reduction and some sharpening, and we’re done!