Erez Marom Photography
Article: Behind the Shot - Dark Matter
Posted on 26th August, 2014 - Back to Blog Listings
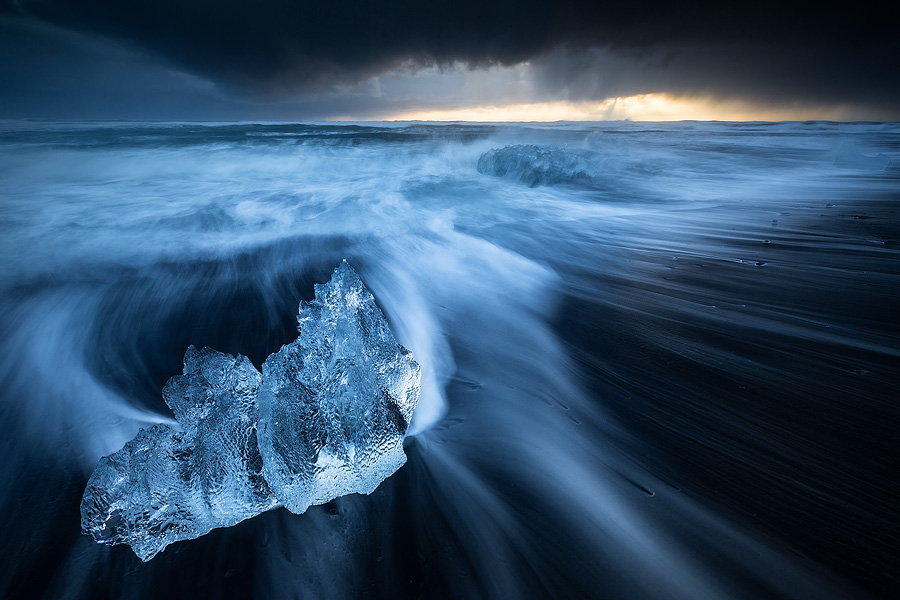
'Dark Matter' is a personal favorite, shot during my 'Land of Ice' photographic workshop held in January 2013. One of the most popular photography locations in Iceland is Breiðamerkursandur - the ice beach, pitch-black and covered in countless pieces of ice which disconnected from Breiðamerkurjökull glacier, dropped to the famous Jökulsárlón glacial lagoon, carried by the small stream connecting the lagoon to the ocean and deposited back on shore by the Atlantic.
Location, Conditions and Shooting Technique
The entire day was quite stormy and the sunrise not very different. Instead of the classic red-orange colors we got major storm clouds, rain and wind. But as always in Iceland, you have to take advantage of the opportunities nature gives you, and an opportunity quickly arose. The rainclouds gave way just a bit, allowing for the sun to add a tint of color to the scene. Added to the carefully-selected foreground, this resulted in a very dramatic shot, full of motion and atmosphere.
It may seem otherwise, but it’s definitely not trivial nor easy to combine all the aspects needed to execute such an image. To start analyzing the shot, let’s understand at how I got to capture this piece of ice exactly when the waves formed such wonderful lines. The secret is this: in this beach, the sand’s slope is very moderate, meaning the waves go very deep inland, and take their time receding back to the ocean. This means that a) you need to very extremely careful not to get chased down by a rogue wave, getting yourself and your precious photo gear soaked and b) you have, relatively speaking, quite a long time to run to your preferred foreground, stick you tripod legs deep and hard into the sand to avoid camera-movement, compose and take the shot while the flow is still happening. That’s exactly what occurred here. I noticed this beautiful piece of ice, waited until a big wave came and when it started to recede, I got to the position as fast as I could, getting the water-lines in the shot.
Equipment and Parameters
I shot the image with my Canon EOD 5D mark III, using a Canon 16-35 f/2.8L II lens, a Lee 0.9 Pro Glass ND filter to make the exposure longer and a Lee 0.6 soft grad to balance the lighter sky. I took a 1.6 second exposure (resulting in major smearing of the water and an enhanced dynamic look) at ISO 200, f/13. The relatively narrow aperture setting allowed for a longer exposure time, but was mainly used to ensure sufficient depth of field, as I was quite close to the foreground.
Composition
A well-known compositional guideline is the creation of balance in the weight which different elements carry in the frame. Here, the ice in the foreground was put to the left of the shot to counterbalance the dominant yellow sunrise color on the right. Had I put it to the right, there wouldn't have been anything interesting on the left and the image would appear imbalanced, having too much compositional weight on its right hand side. Another important thing about the composition here is the fact that if we study the image from top to bottom, the flow of water takes us left up until about mid-height, and then turns right, straight to the gushing waves surrounding the second, further piece of ice. The flow is then completed when reaching the brightly-colored yellow clouds. Another anchor is the dark cloud at the top, which completes the balance.

Post Processing
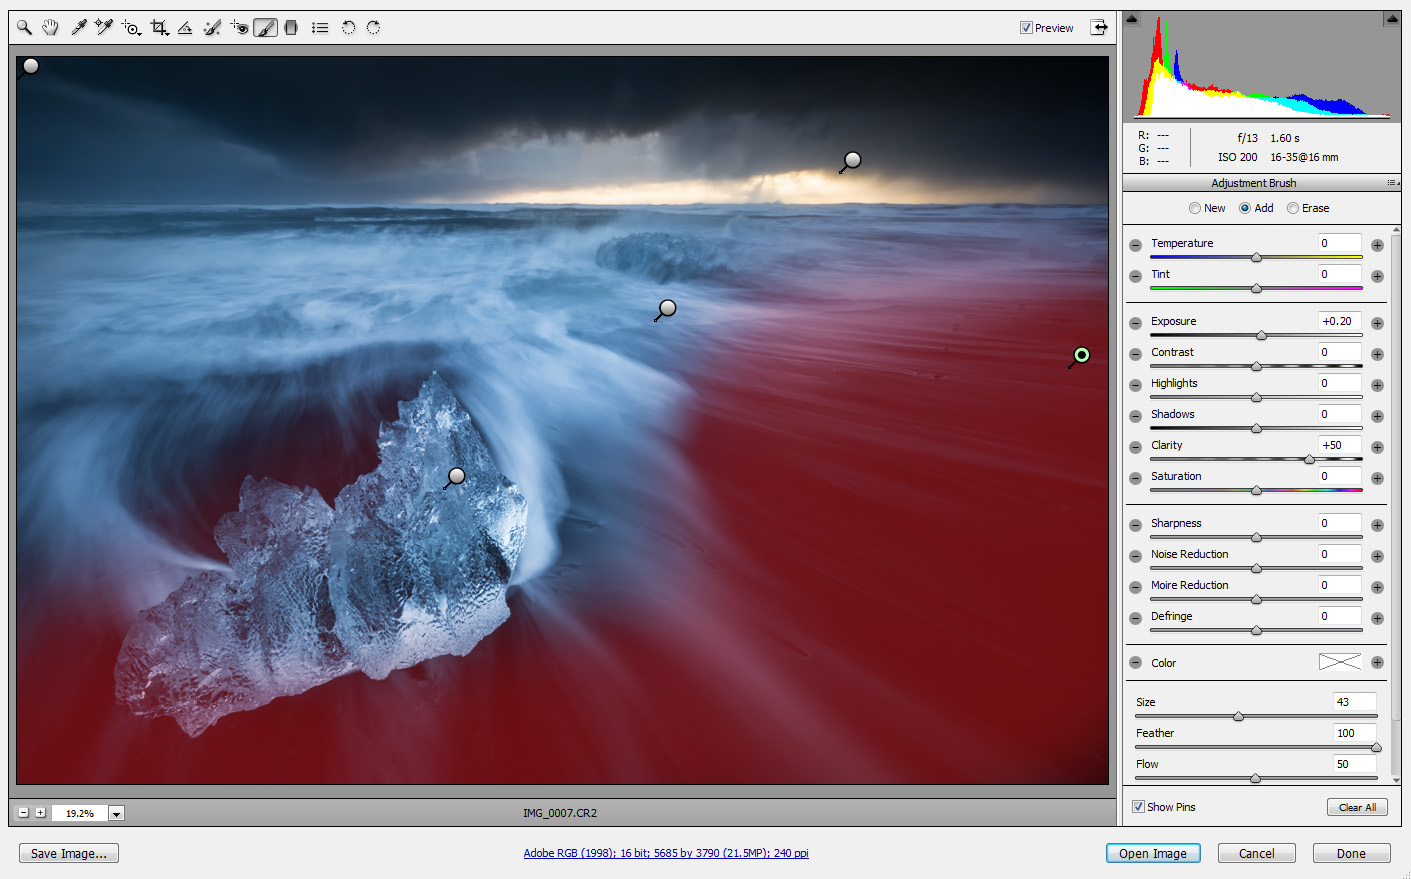
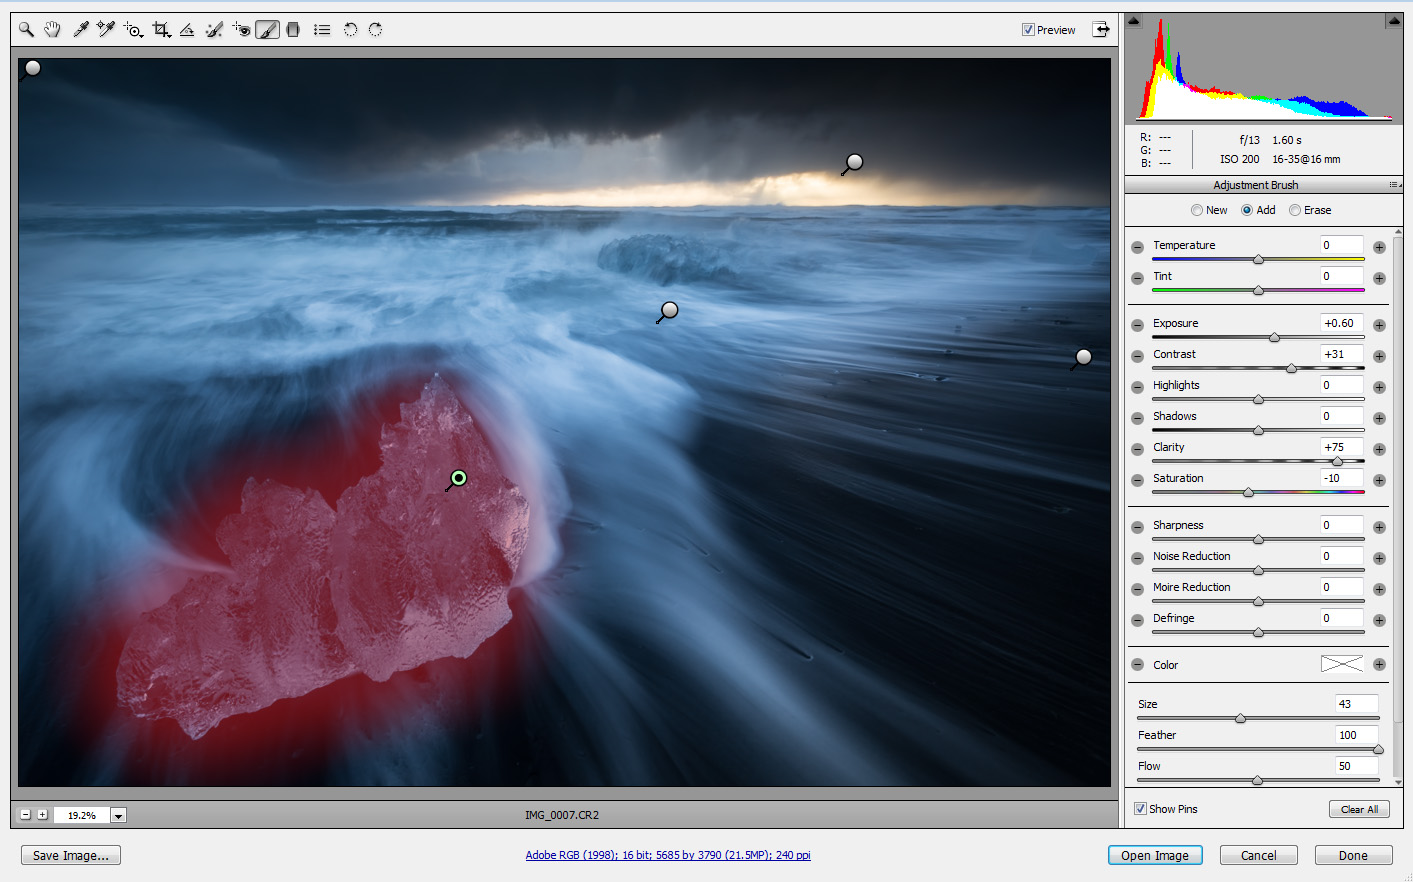
Below is the original RAW output. As you can see, it's not very different from the final result, but there are several points I’d like to discuss and demonstrate. The RAW files was processed in Camera Raw and saved as a TIF file, and then processed using Photoshop CS6.
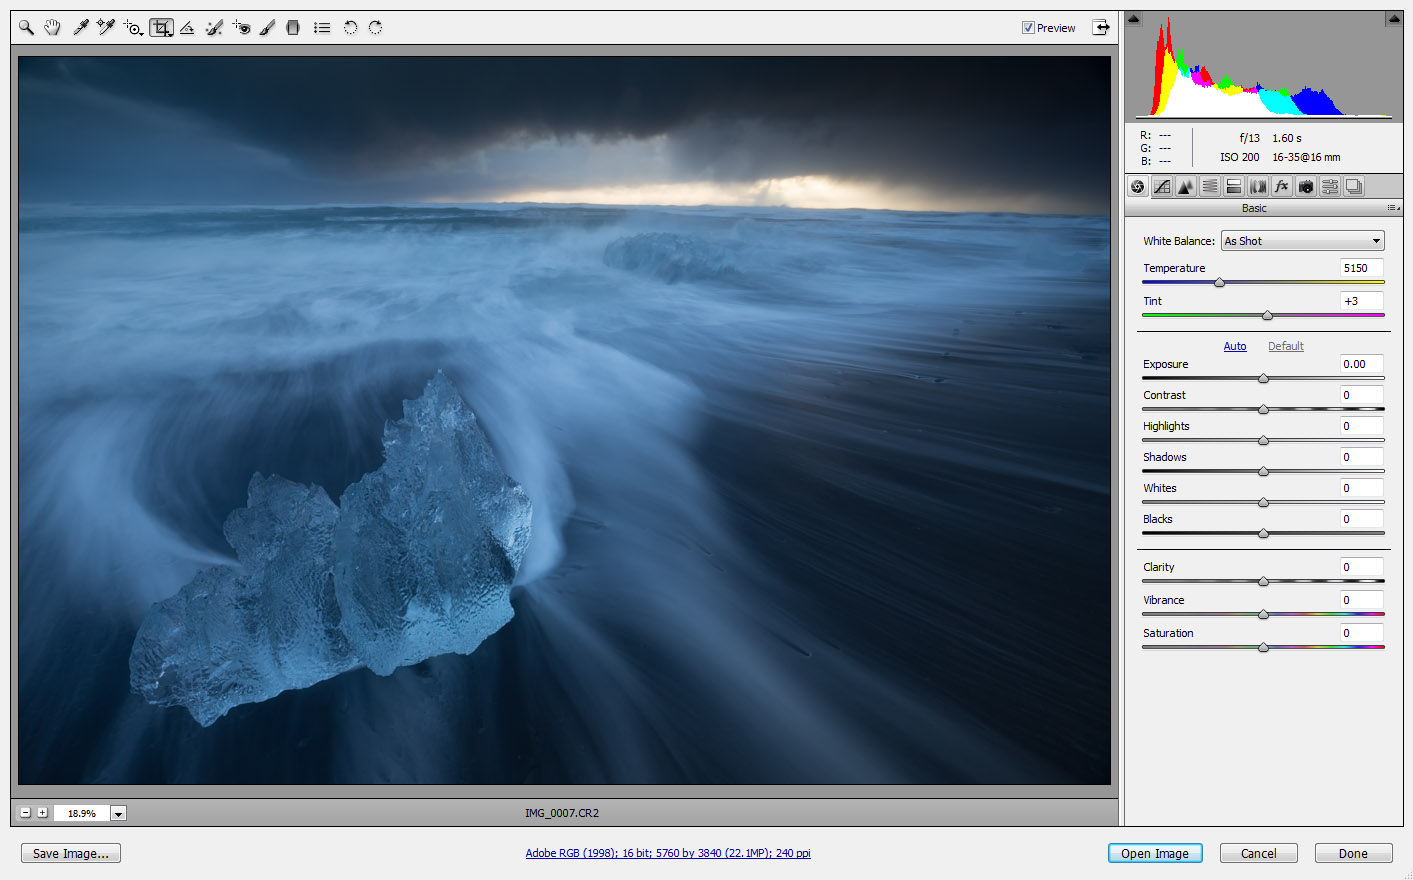
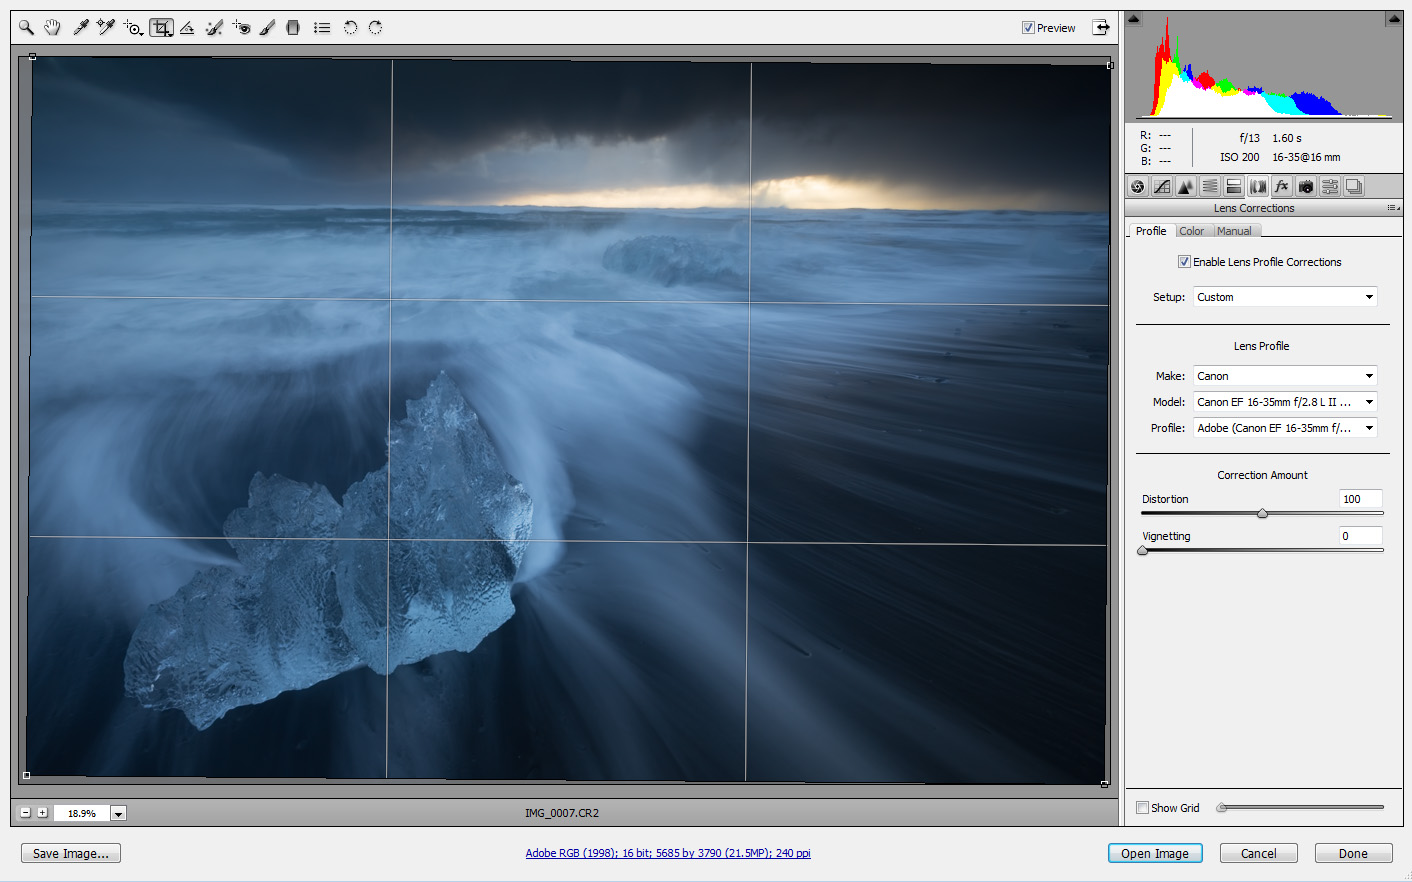
First, I didn't have time to make sure the camera was perfectly leveled, since I was trying to get the shot before the wave had completely receded. This, plus the lens aberration, were corrected in ACR using the lens correction tool. Notice I cancelled the vignetting correction since I actually found it rather appealing. I even added some post-crop vignetting to make the framing clearer.

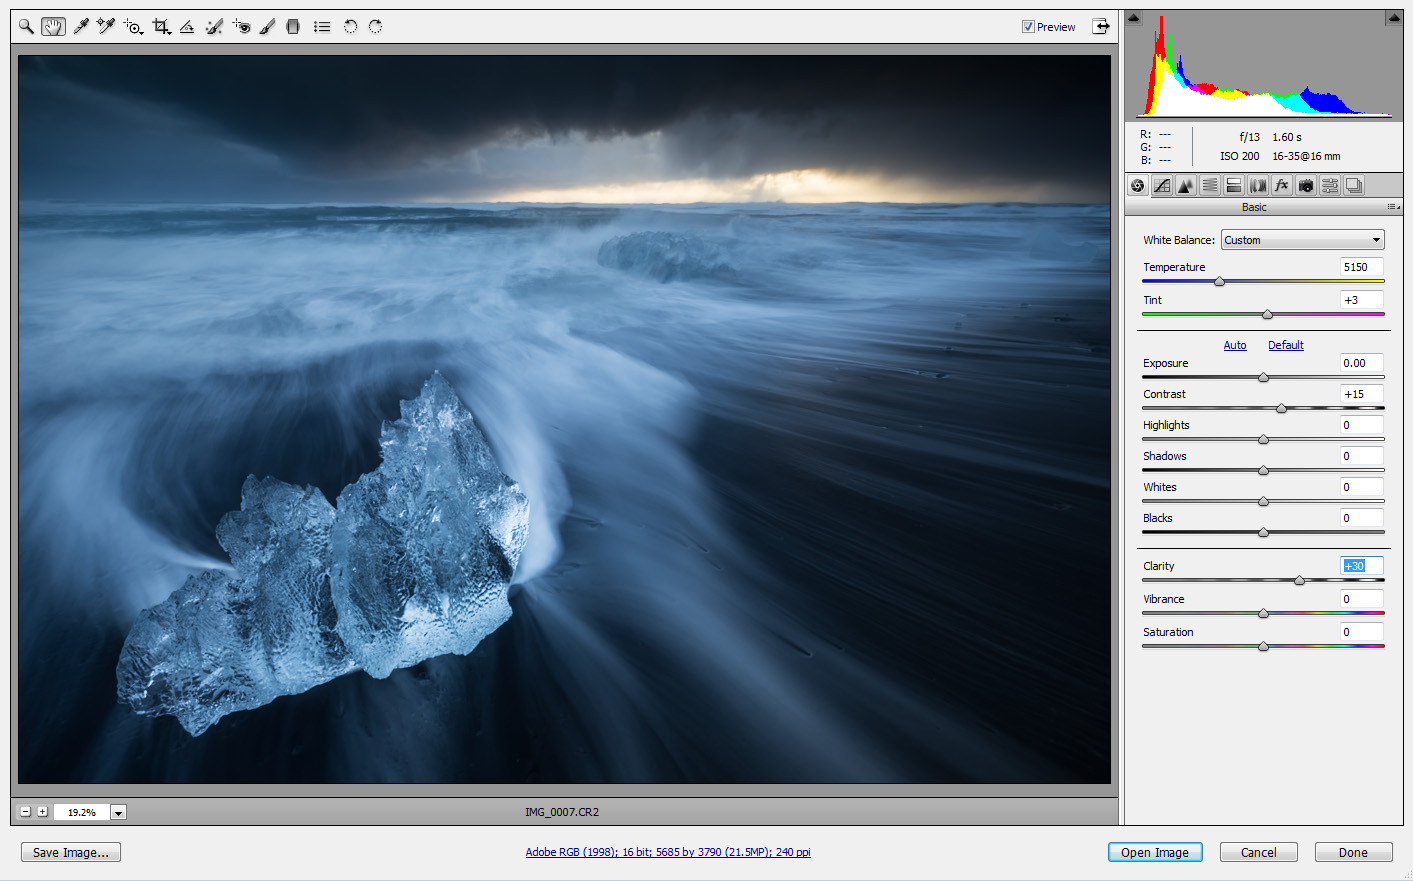
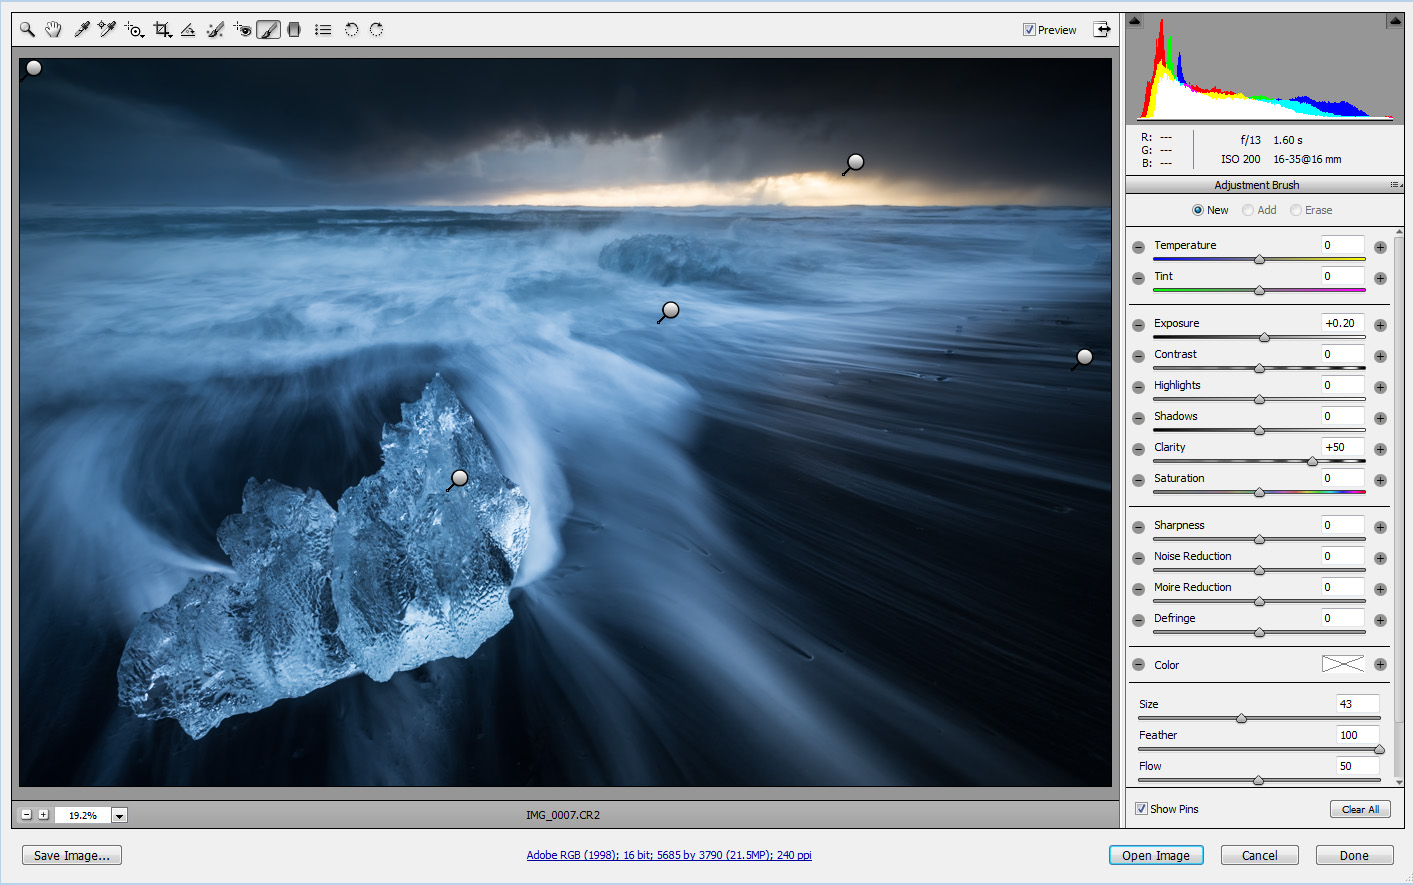
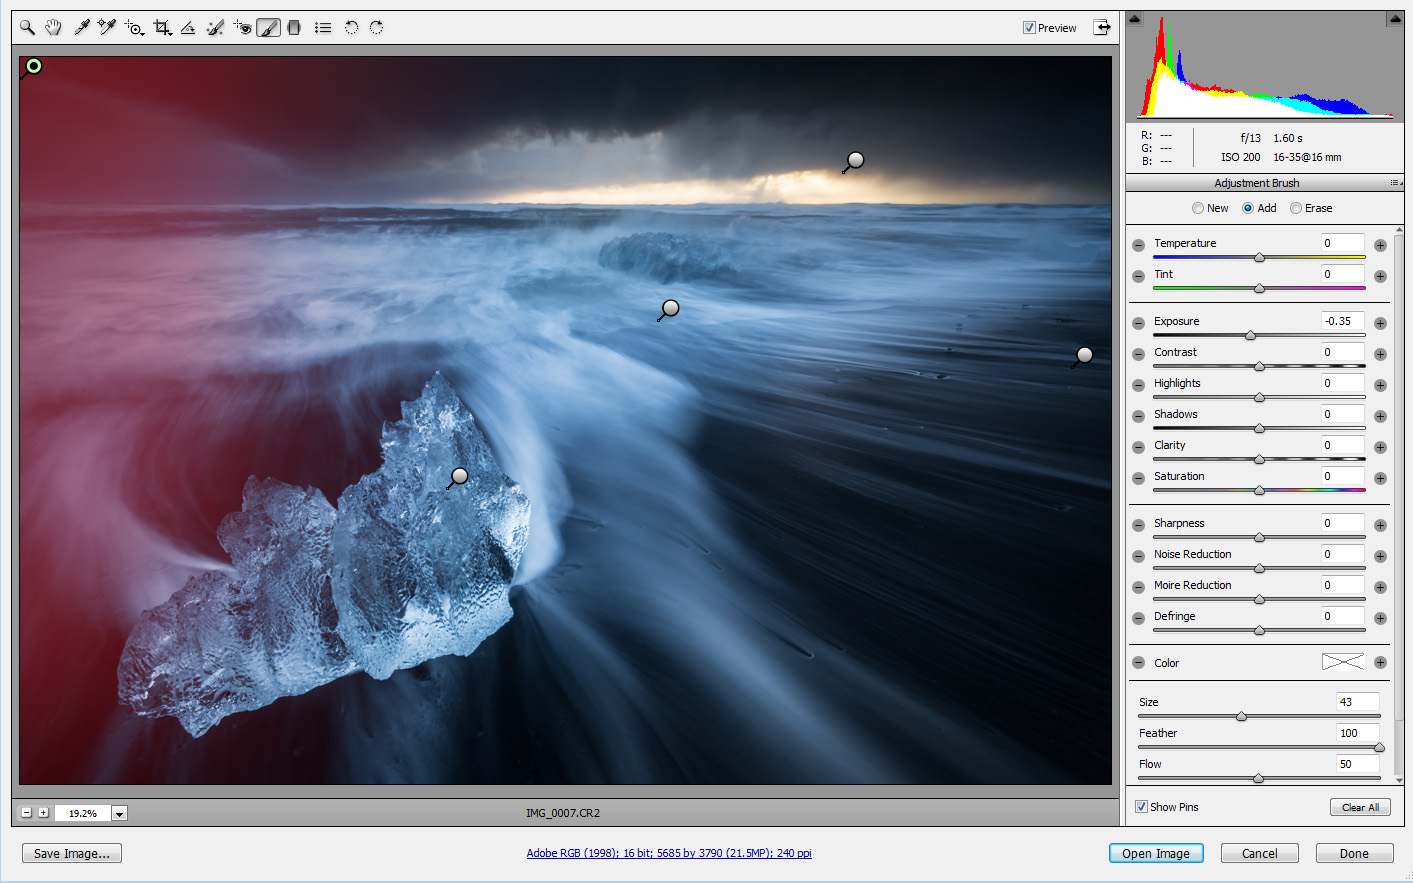
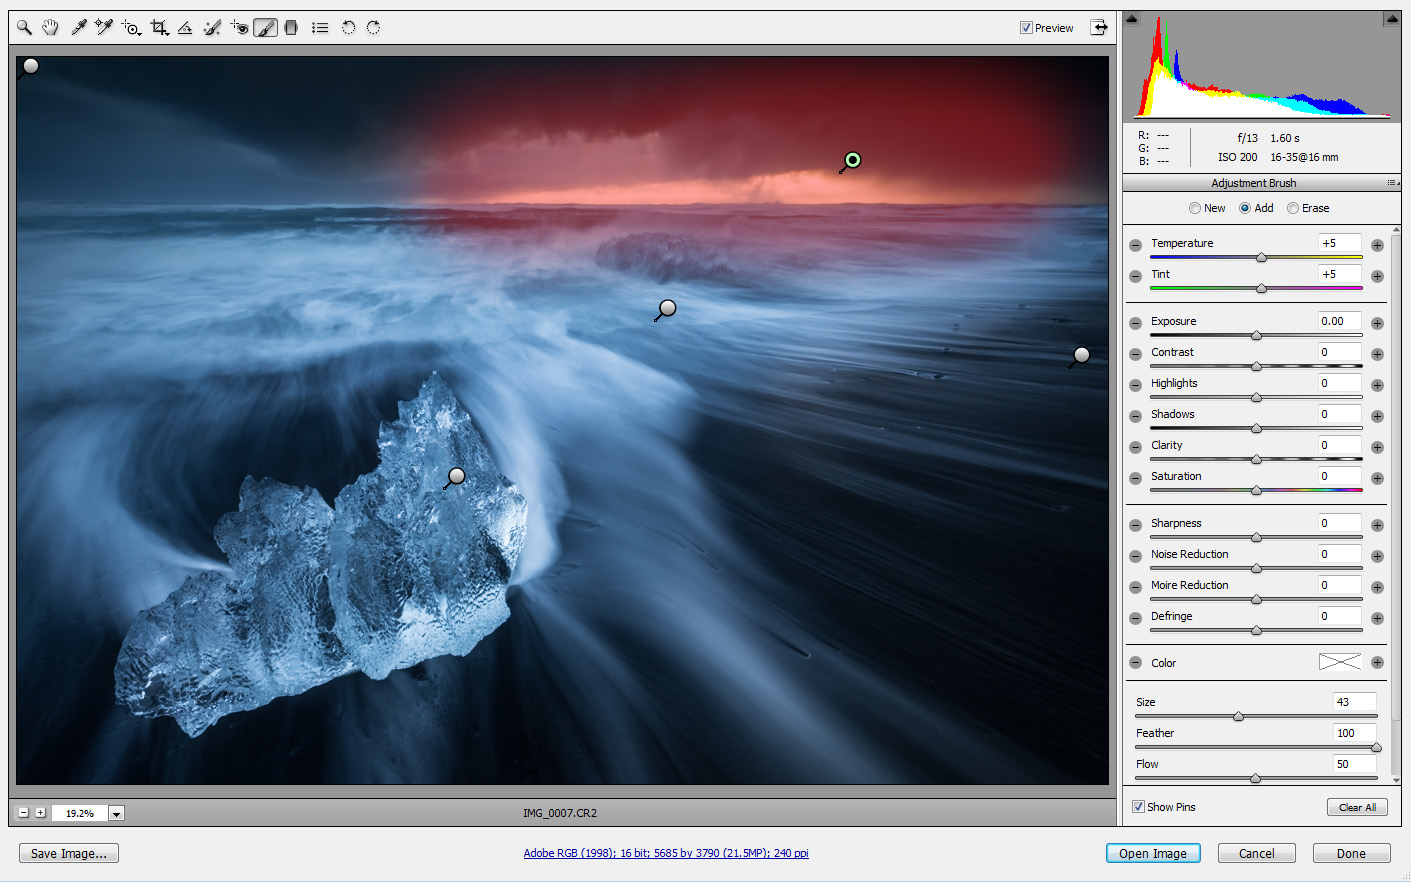
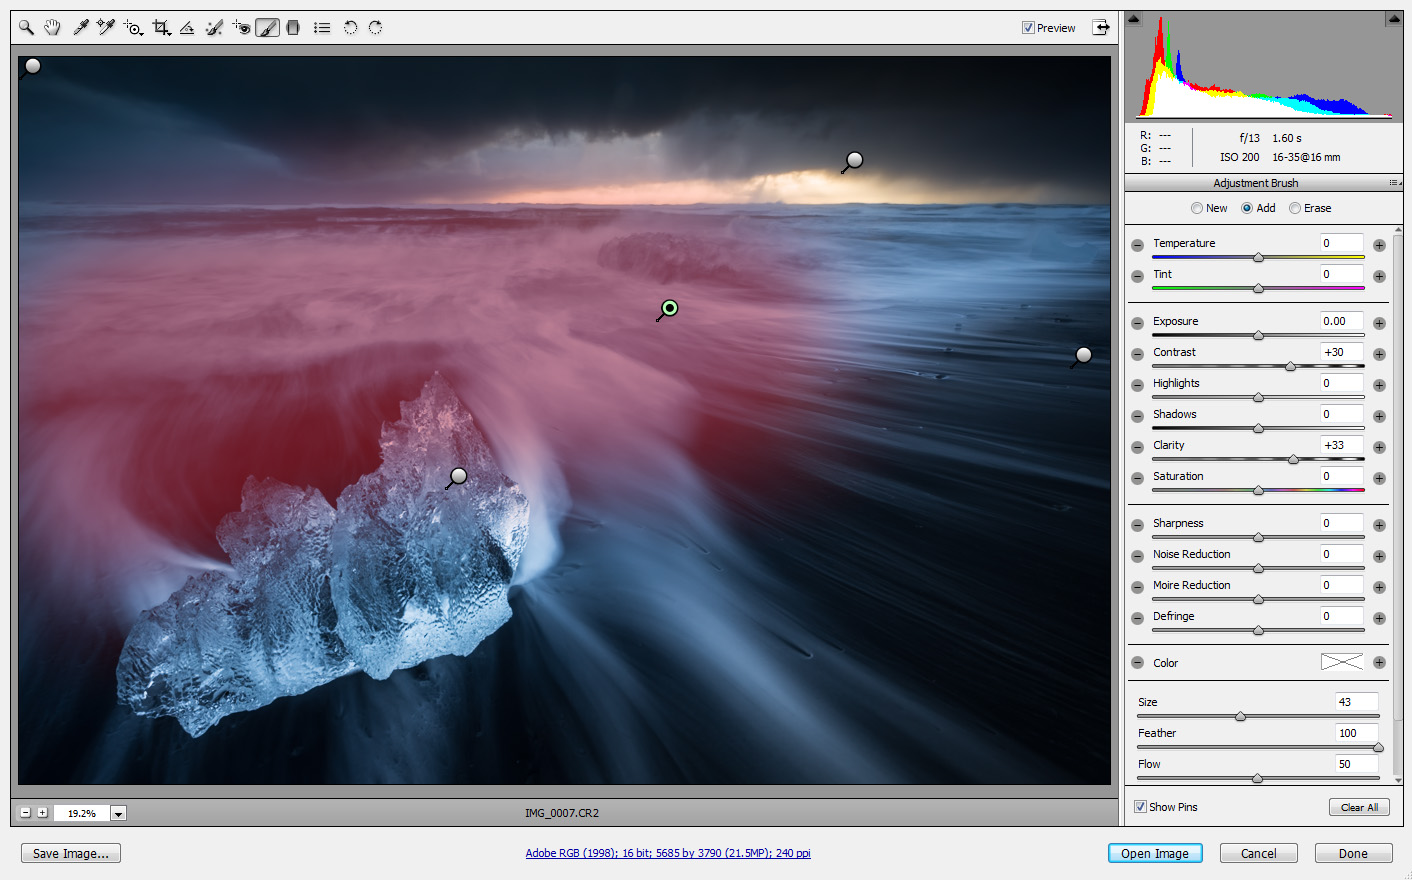
Next, let's look at the local adjustments I made in ACR, from top to bottom. The adjustment levels are visible in the sliders to the right.
Upon completing this work, I saved the file as a TIFF and went on to boost the levels just a tad in Photoshop. I then converted it to sRGB color-space for internet-use, size reduction and a bit of sharpening and I was done.
The final, yet also important step was naming the image. I wanted the title to complement the visual by emphasizing the darkness and stormy weather, and ‘Dark Matter’ has a spacy, dark feel to it. I feel it adds a lot to the emotion carried in the image.