Erez Marom Photography
Article: Behind the Shot - Crystalline
Posted on 6th December, 2015 - Back to Blog Listings
In this article I'll tell about the interesting process of producing my image 'Crystalline'. I shot it during January 2014, and processed it at the time, but lately the addition of new Photoshop features lead me to revisit it, and reprocess it in a different way. This image is an HDR-Panorama, a kind of shot which is usually technically difficult to produce, but as I show below, this difficulty is now relegated to the past. I hope you find the explanation interesting and helpful.
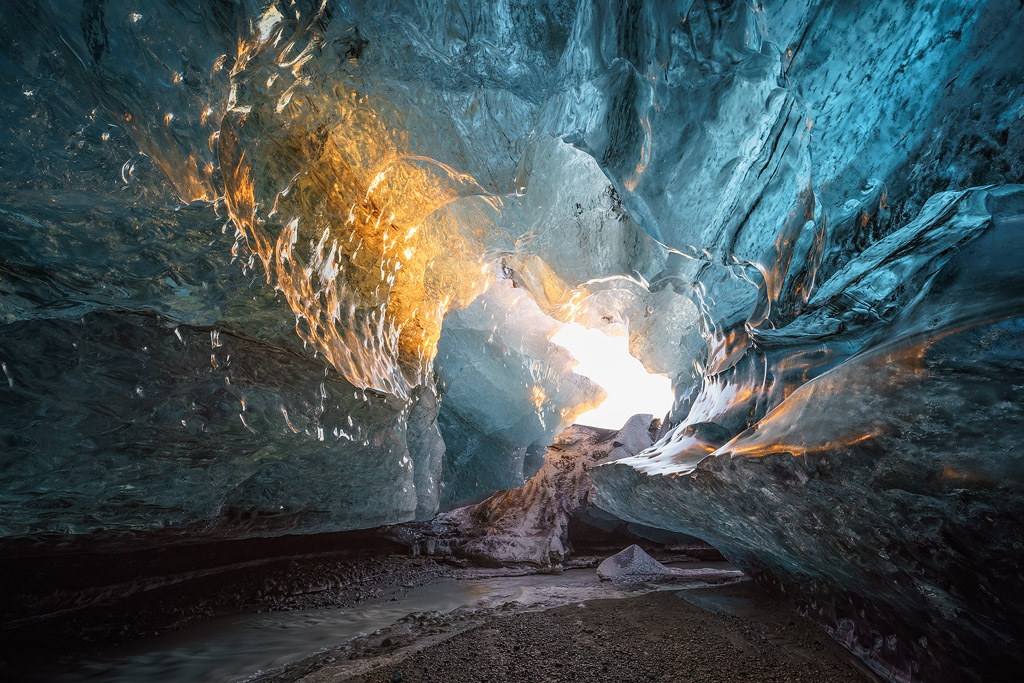
This image features an ice cave we visited in Breiðamerkurjökull glacier, an outlet glacier of the larger glacier of Vatnajökull in southeastern Iceland. Breiðamerkurjökull ends in Jökulsárlón, the famous glacier lagoon, and after spending 3 days in the lagoon area during my 2014 'Land of Ice' workshop, we ended the trip with a visit to this spectacular cave. The ice cave was one of the biggest that I'd ever seen, and it stretched over a hundred meters into the glacier. Low winter light and clear skies produced a huge bonus: the cave's wall was struck with wonderful golden light, which contributed greatly to both the color and the composition.
COMPOSITION
The composition mainly consists of a central interest point (the cave opening) and several linear elements going away from it. See the scheme below.
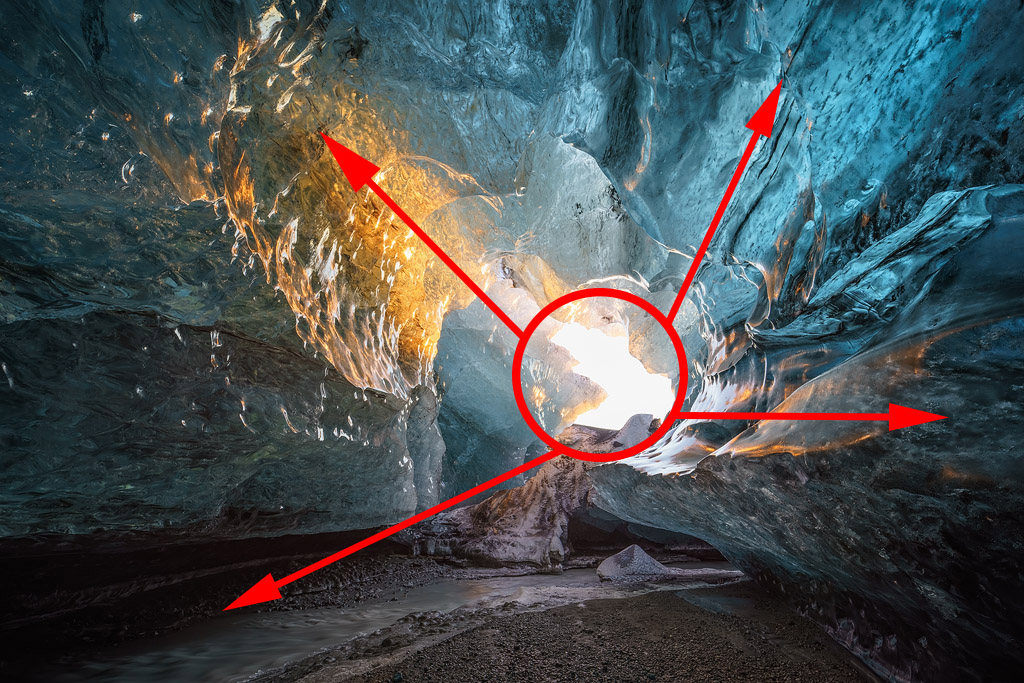
By having the longer lines on the left, I balanced the position of the central interest point on the right.
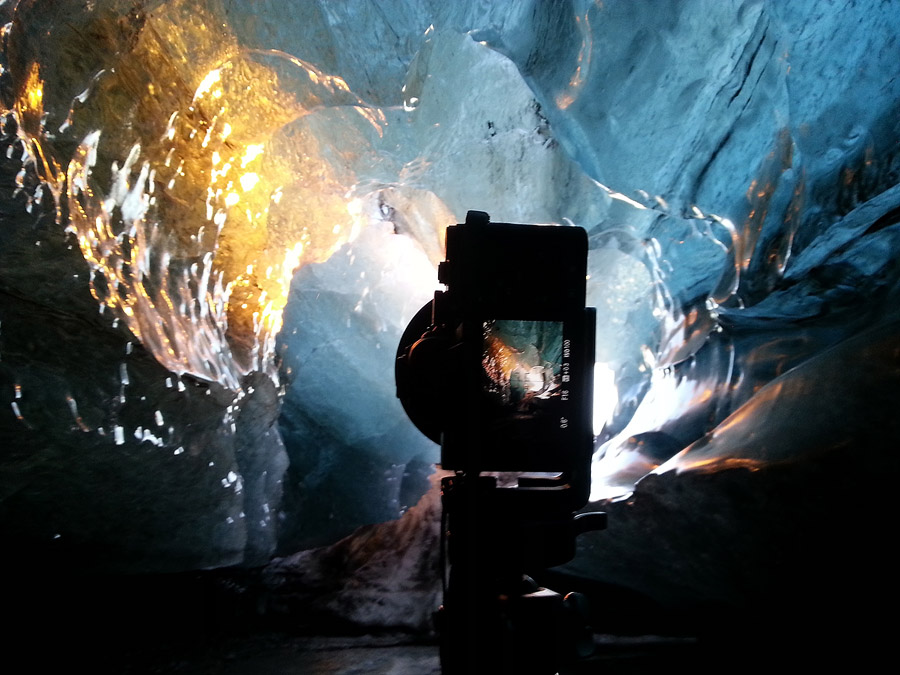
SETUP AND SHOOTING
The image was taken with my Sony A7R, which I purchased right before the trip. The A7R has a 36 megapixel sensor, but to get even more detail, I used a Canon TS-E 24mm F3.5 and shot what I like to call a 'shift-o-rama'. This means I used the shifting ability to produce 3 overlapping shots, which, when stitched, make up a panorama with greater total resolution. The unique thing about producing panoramas with the TS lens is that the resulting images are perfectly aligned straight out of the camera, which means less loss of quality once the panorama is created.
In addition to this, since the scene had very large global contrast, I used a HDR technique. That means I should call this an 'HDR-shift-o-rama'! Quite a mouthful, but it sums up the idea.
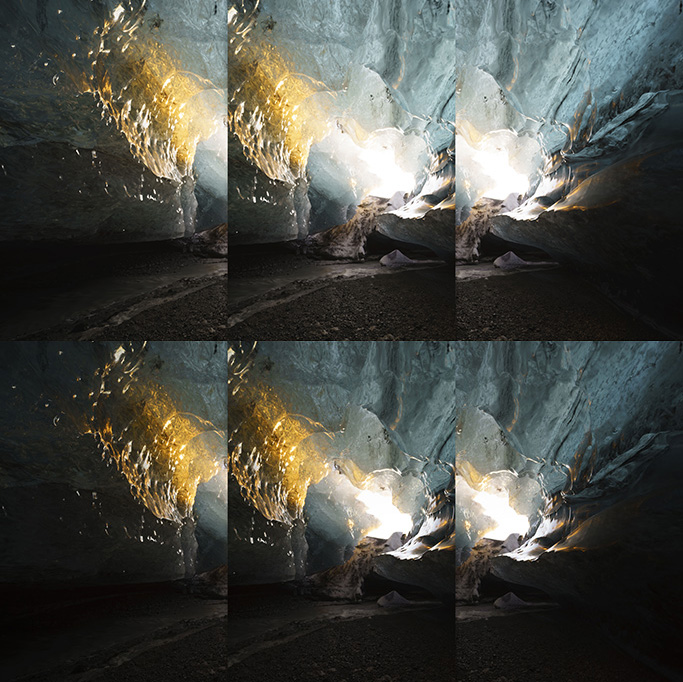
To get the dynamic range I needed, I used two exposure settings. For every exposure setting, I took three shots: one with the lens shifted to the leftmost position, one without shift and one with the lens shifted to the rightmost position.

I then changed the exposure setting and did it again. The two series of shots were taken at F16 (for sufficient depth of field), ISO 100 (for maximal quality) and at 0.6 and 1.6 second exposure times.
Some of you might rightfully say that I should've taken another, brighter set of images. That's true, but I was limited in time and frankly, I didn't notice there were still very dark parts. Thankfully, the Sony A7R has amazing shadow recovery, and I was later able to get all the detail I wanted in post processing. Another thing I could've done better was shoot at a wider aperture (and focus-stack) to get a bit more sharpness, but again, I didn't have enough time and the TS-E 24mm is amazingly sharp even at F16.
Here are the 6 (untouched RAW) images I used to make this shot.
POST PROCESSING
After shooting this image I went through a very tricky process of merging the 6 exposures to an HDR panorama. I was still not too happy with it and decided to leave it alone. A few months ago, however, a new version of Photoshop came out with the astounding feature of both HDR and panorama processing during the RAW file stage. This triggered my imagination and threw me back to this image. I knew I could do something better with it now.
Thanks to Adobe Camera Raw's newest feature, post processing of this image was conducted almost exclusively in ACR. I played a bit with the controls when I realized the new features don't only allow you to create HDR and panorama files - they allow you to create an HDR-panorama! Let's see the stages and understand how I created the file.
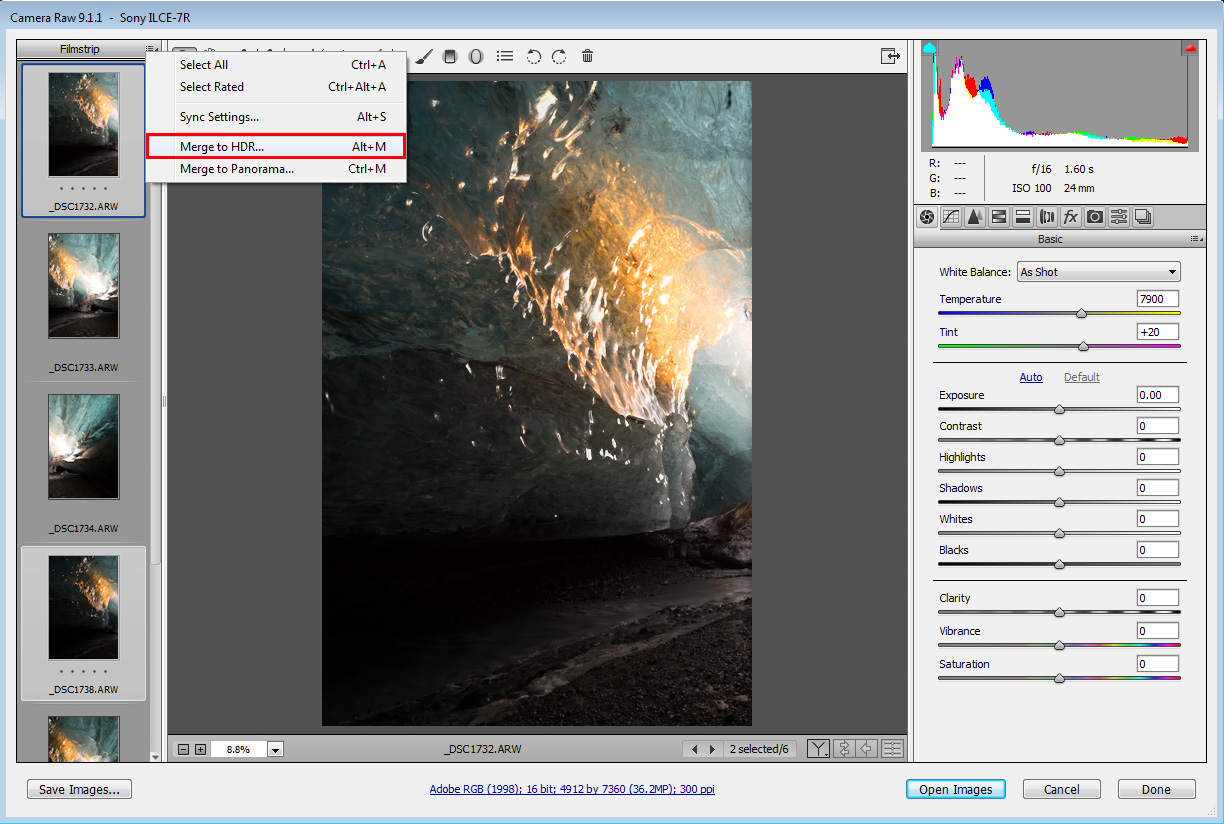
The first thing I did was load all 6 files to ACR. I then proceeded to create three HDR files, each from 2 exposures. This was done by selecting each pair of files, then right-clicking on the filmstrip options, selecting 'Merge to HDR'.
In the HDR menu I chose to align the files (just to be safe), and I also chose auto-toning, which doesn't really matter but usually results in a low-contrast setting which I find comfortable to continue working from.

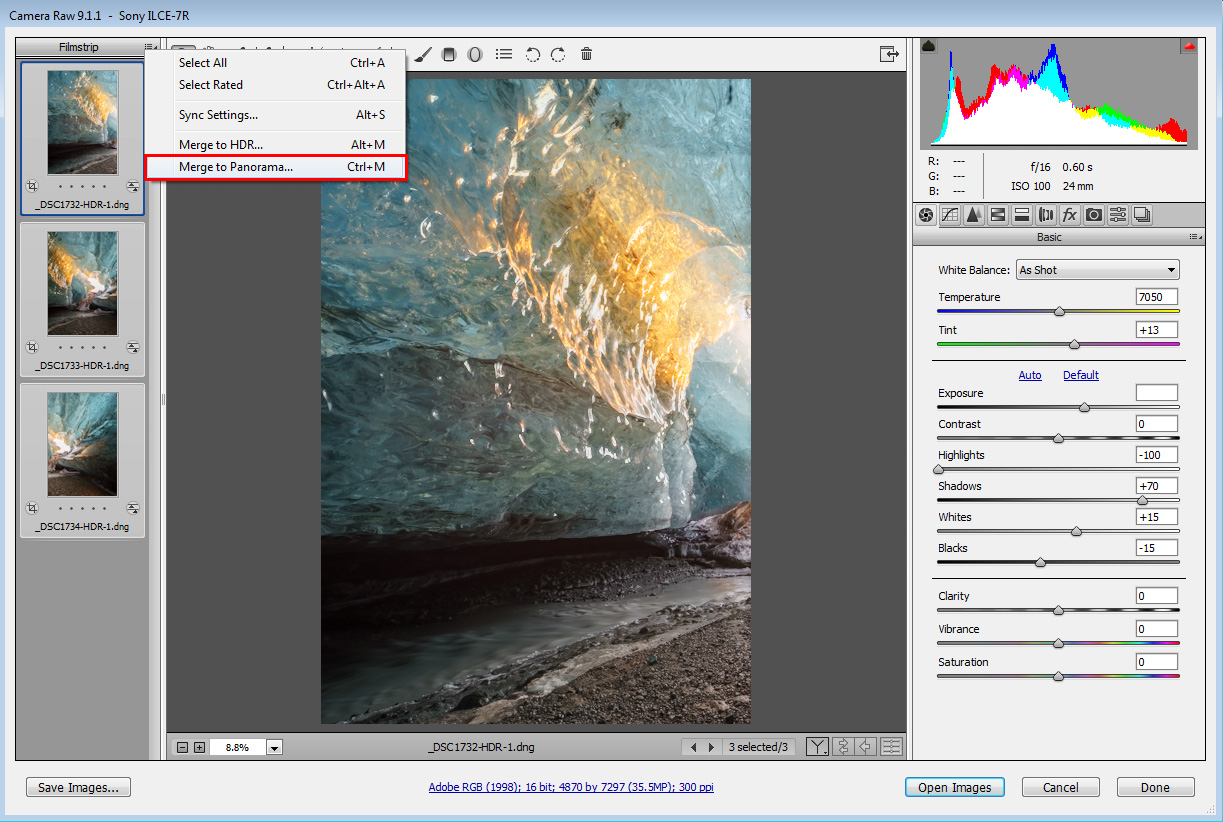
Each of the 3 pairs of files yielded a DNG file with extended dynamic range. This DNG can be further manipulated in ACR. Next I loaded the 3 DNG files, selected all of them and clicked 'Merge to Panorama' on the filmstrip menu. Note that the auto toning has changed the look of the files, but I'll deal with that later. Also note that these changes are saved inside the DNG file, as opposed to a separate .xmp files when working with RAW.
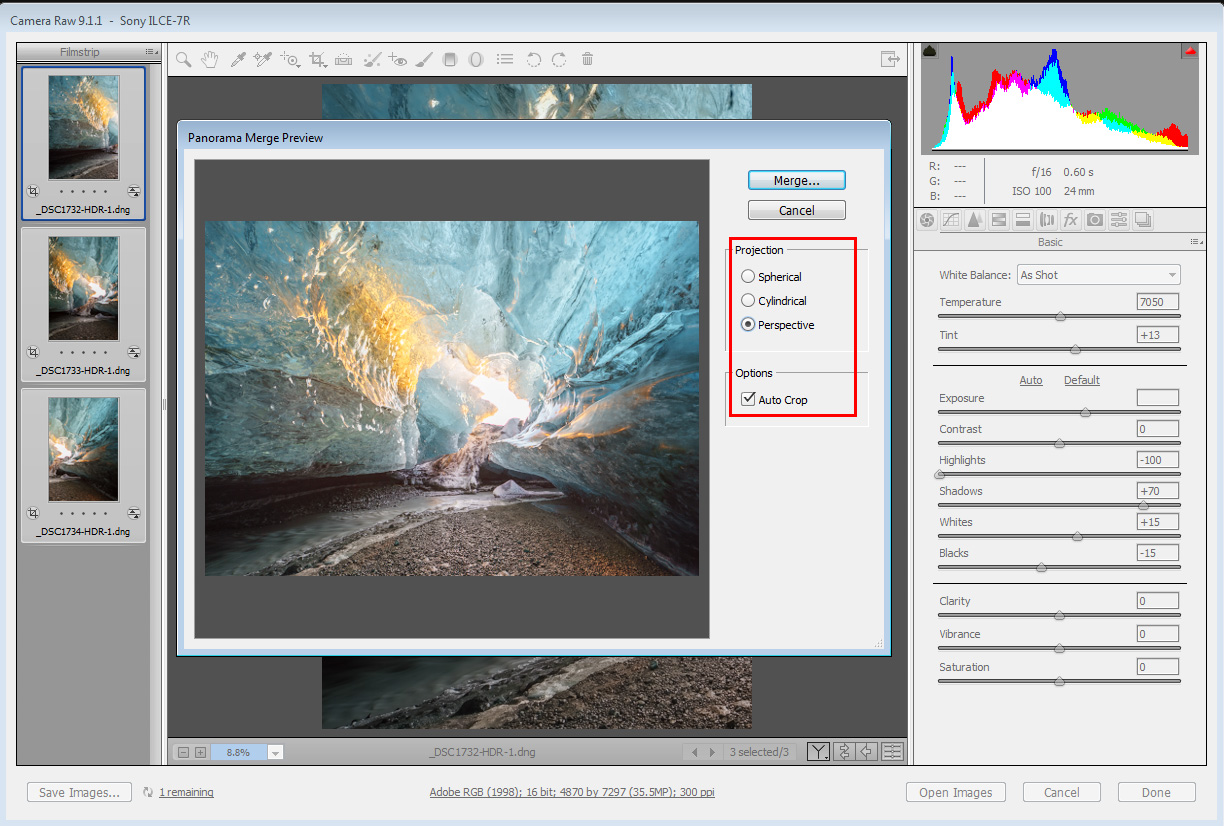
In the panorama creation menu, I chose perspective projection and clicked 'merge'.
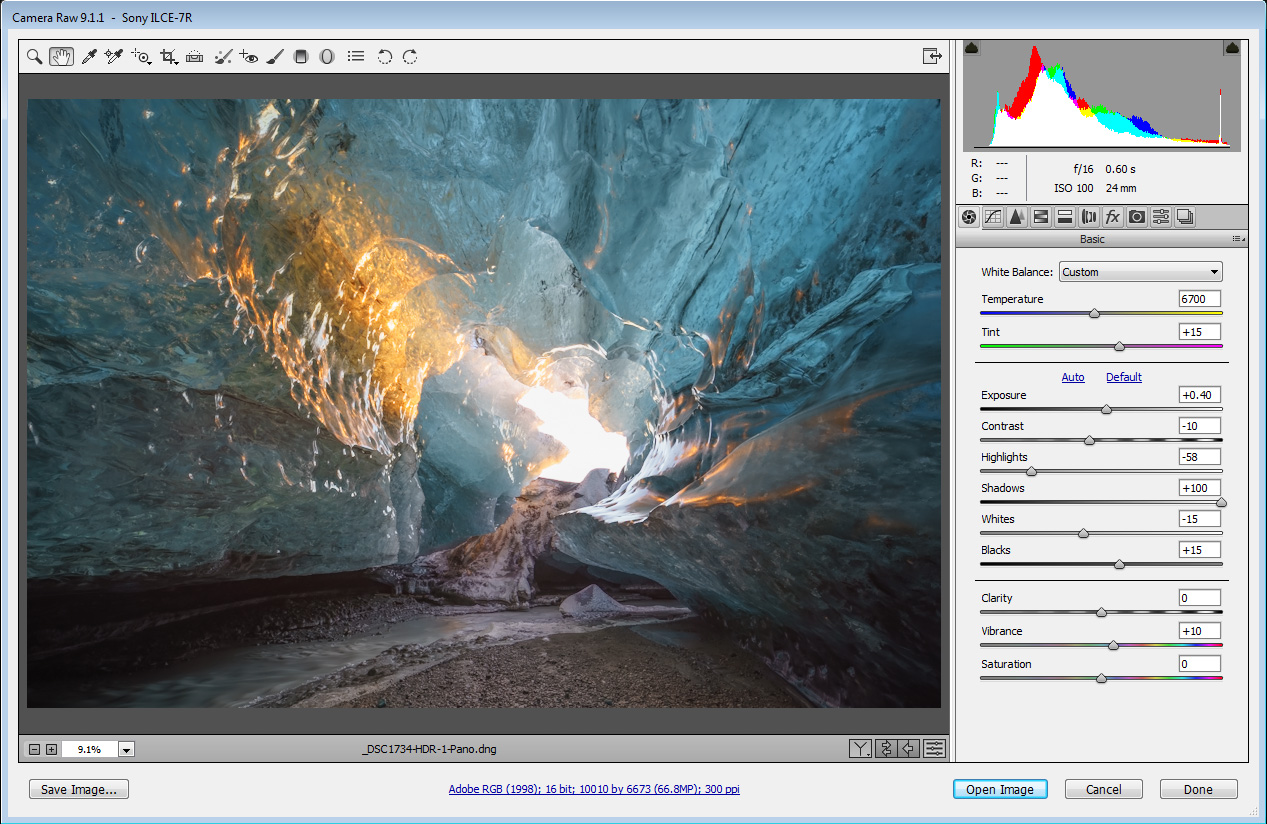
The resulting panorama is a 225 MB, 73 megapixel monster, with tons of dynamic range and amazing detail. The rest of the post processing was done in ACR as well. Let's see what I did to perfect the shot.
First of all, I cropped the image to get rid of the relatively empty space on the bottom. I also balanced the exposure and contrast using the ACR controls.

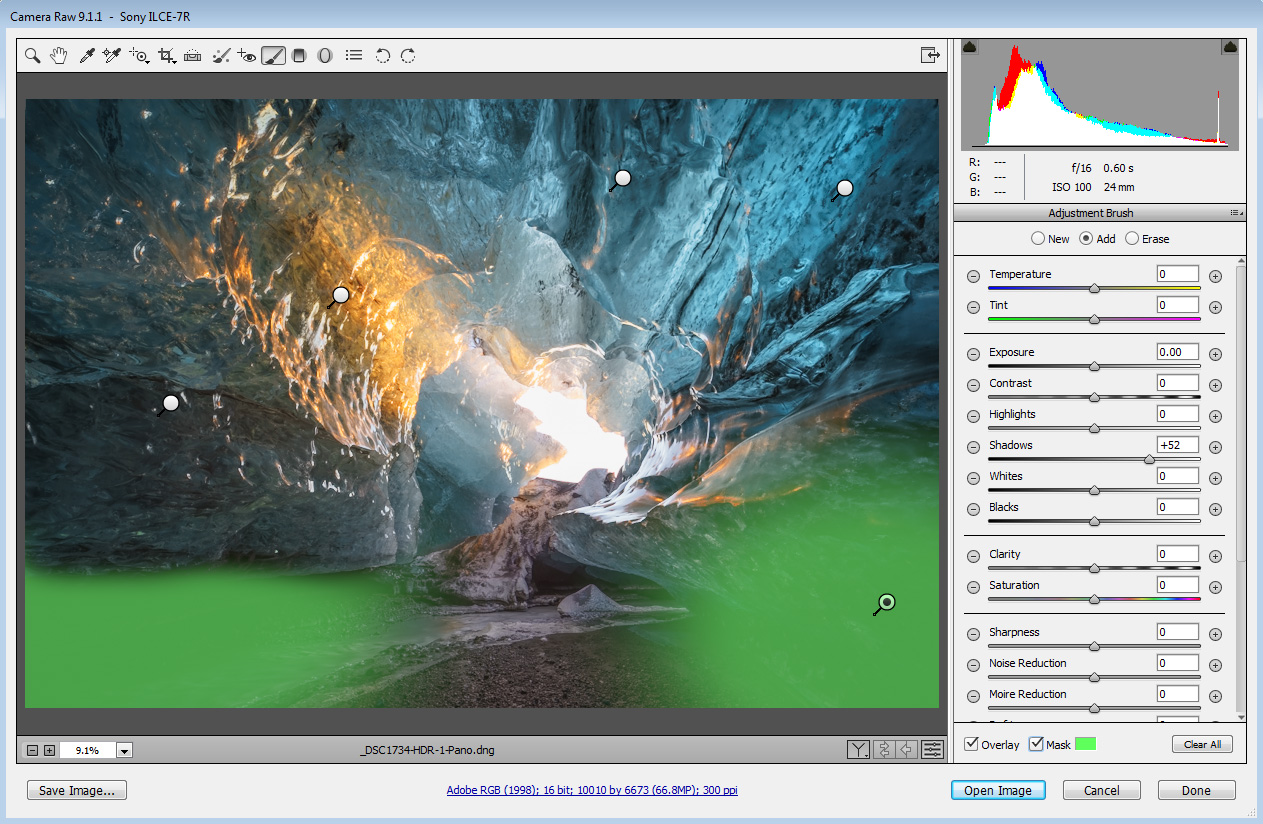
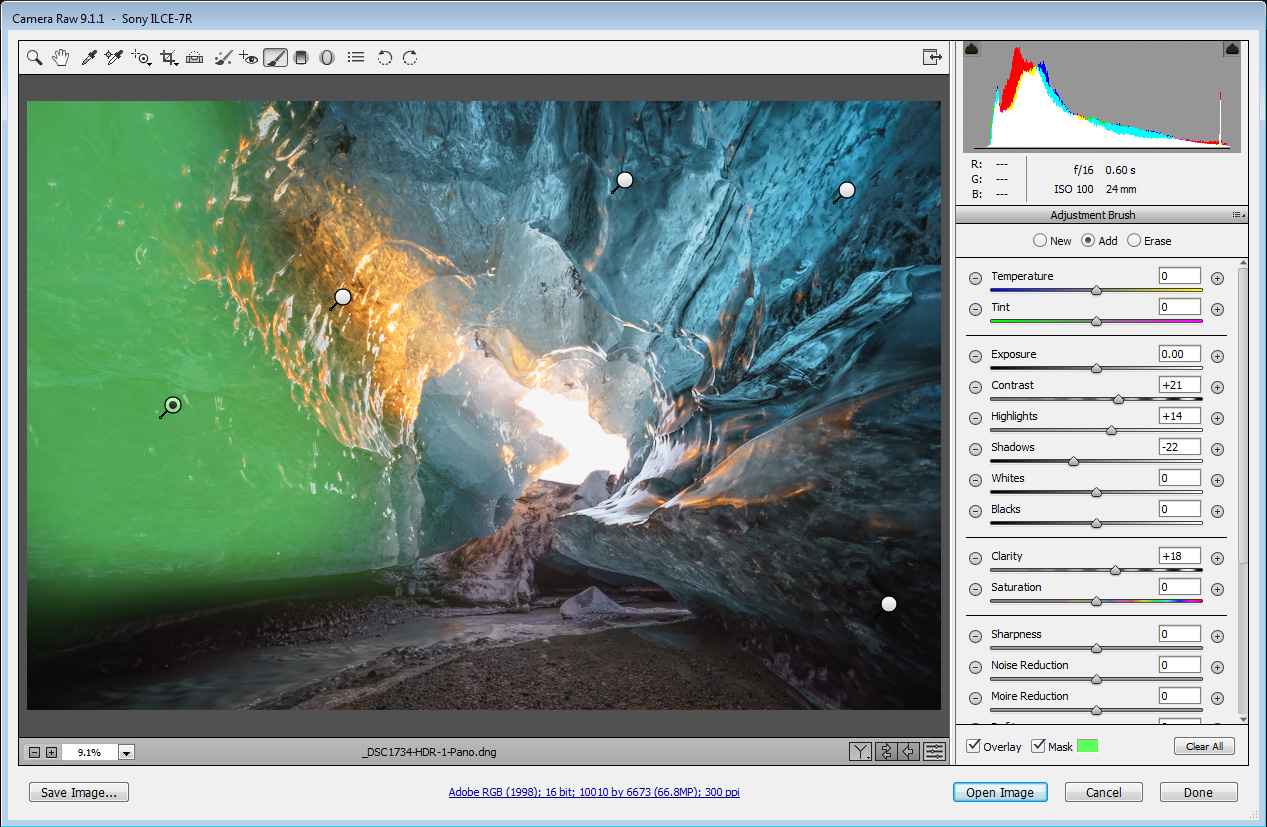
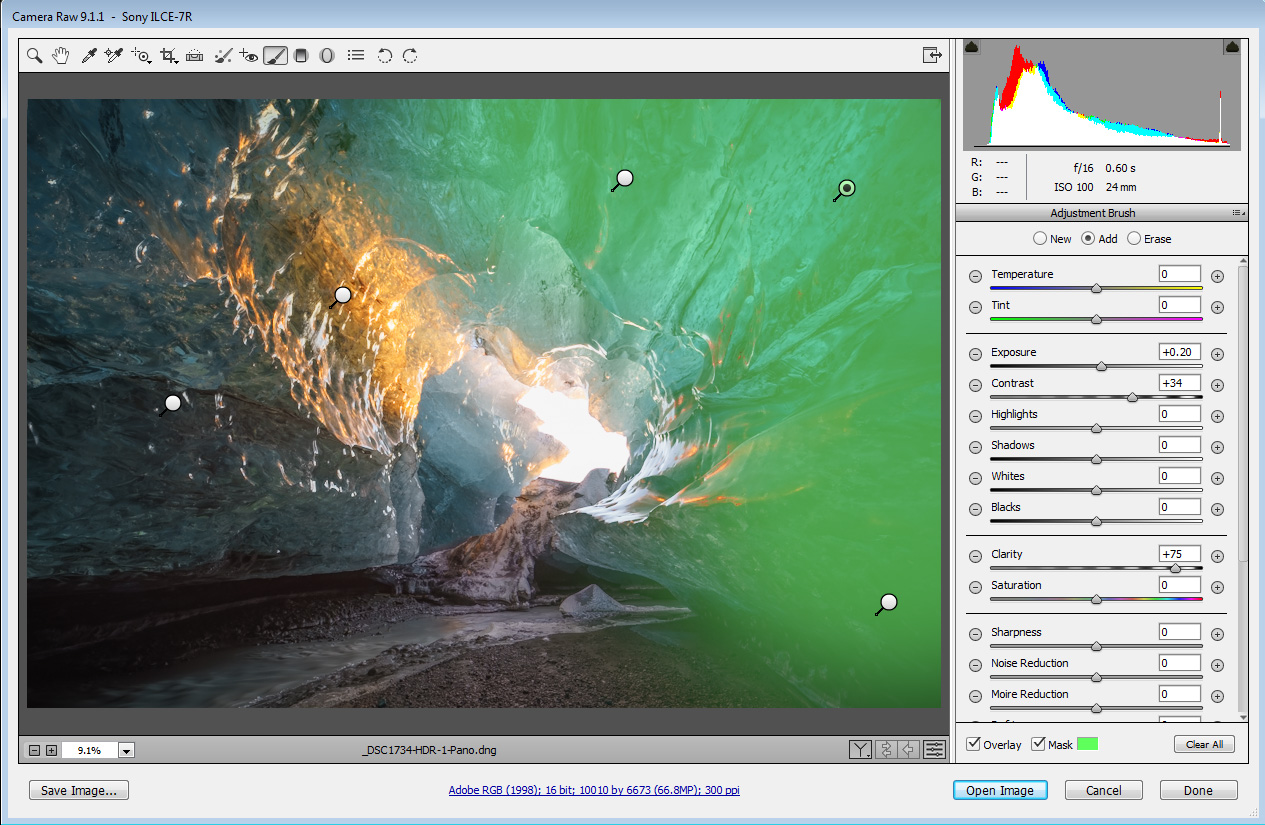
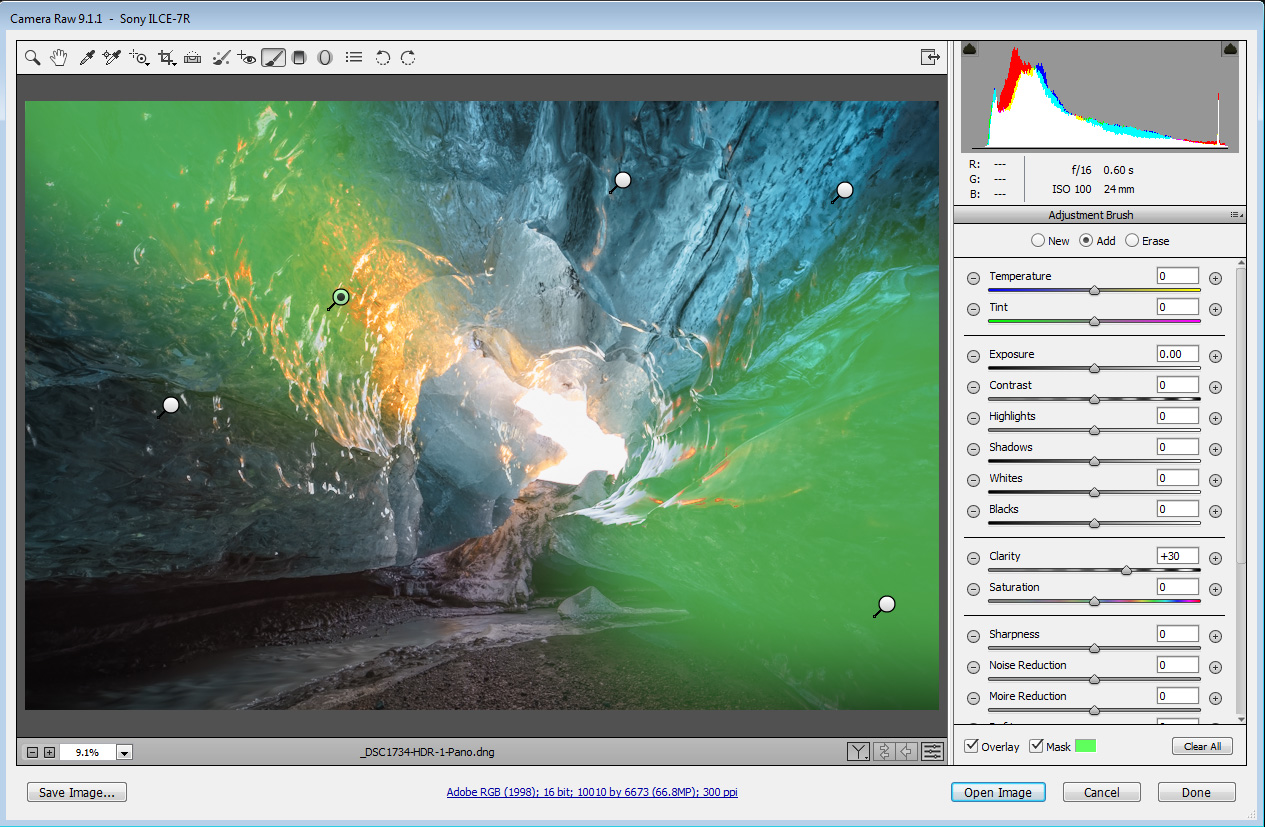
Although not shown here, I added a tiny bit of vignetting, and also turned the hue of the aqua colors toward the blue, to have the colors more similar to those I witnessed in reality. What I do want to show are some of the local adjustments I made. As you can see, most of them are simply clarity and contrast boosts, to further emphasize the natural textures and colors of the ceiling of the cave. The adjustment specifications and masks are visible in the screen shots below.
After all this work, I was left with a 67MP, well-exposed and balanced HDR-shift-o-rama. For internet viewing, I converted the color space to sRGB, performed size-reduction and some sharpening, and I was done. I hope you enjoy the result.